LIMITATION OF LIABILITY
|
|
|
- Achille Archambault
- il y a 8 ans
- Total affichages :
Transcription
1
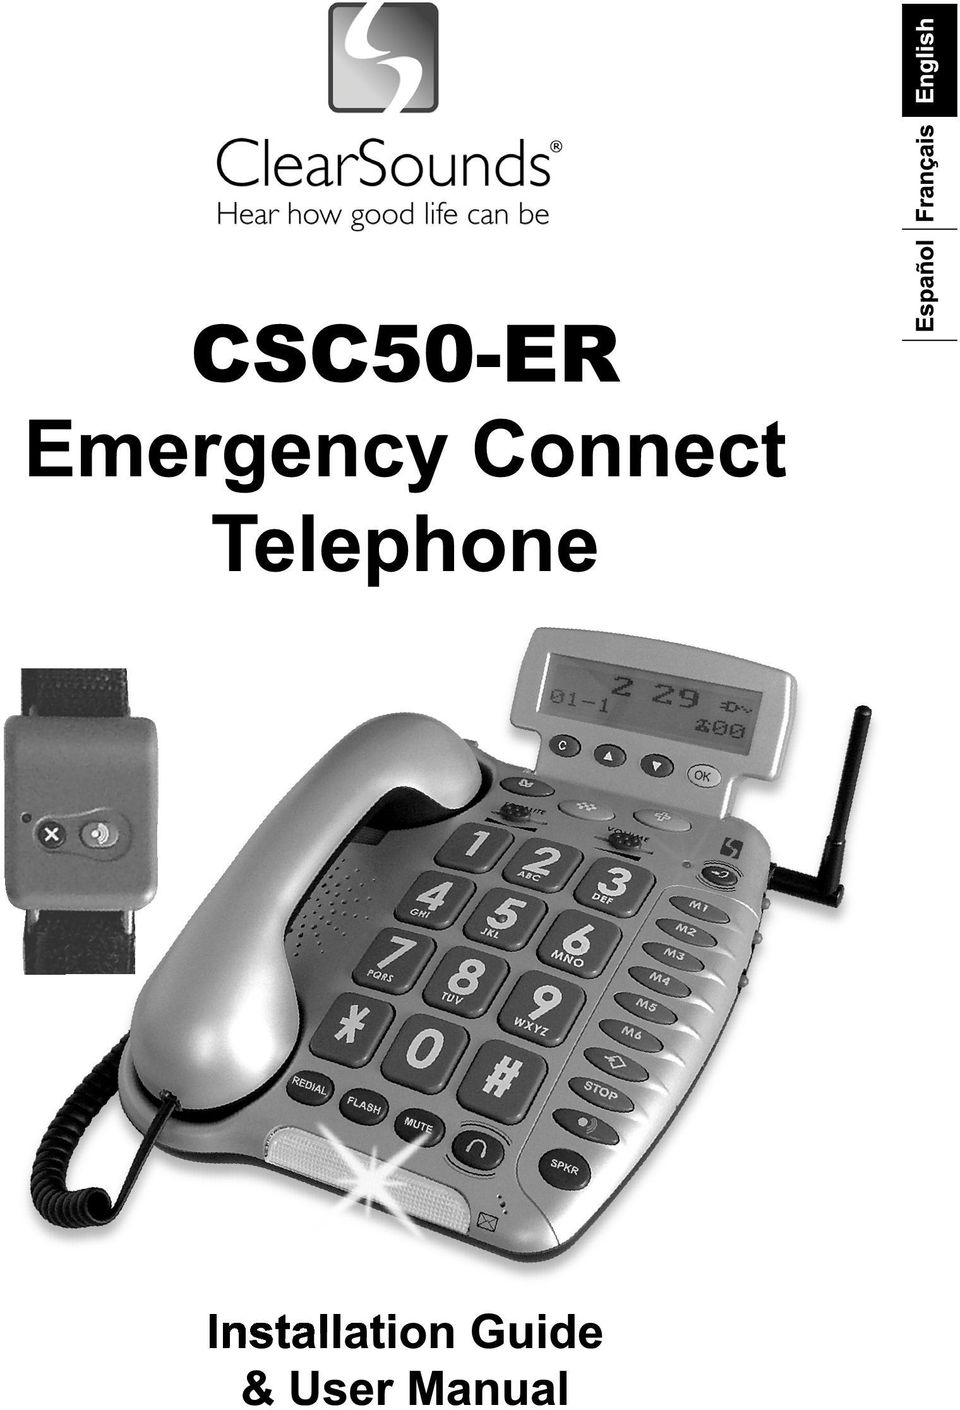
2 Congratulations on your purchase of the CSC50-ER Emergency Connect Telephone from ClearSounds Communications. Please read this User Manual carefully in order to get the very best results from your telephone. Keep the manual near the telephone for easy reference. Please visit our web site at to: Register your product It s easy! Click on the Warranty Registration Tab, complete the form and click submit. It s that simple! Download additional manuals and troubleshooting tips LIMITATION OF LIABILITY By using this product, the purchaser agrees to the terms and conditions below and to read and follow all instructions and warnings on the product and contained within the enclosed manual. It shall be the sole obligation of the purchaser to assure that CSC50-ER Phone is installed and programmed properly, and that the unit is used and maintained properly. This includes, but is not limited to, periodic use to assure that the phone, including batteries, is in proper working order, that the phone is located within sufficient range of the remote band to provide reliable operation, and education of the user to assure that he/she is familiar with, and capable of operating the phone and remote band. The ClearSounds maximum liability hereunder is limited to the purchase price of the product. In no event shall ClearSounds be held liable for any consequential, indirect, incidental or special damages of any nature arising from the sale or use of the product, including failure of equipment to perform, whether based in contract, tort, strict liability or otherwise. Further, ClearSounds has no obligation to assure that calls are placed, received or responded to, nor is ClearSounds responsible for the acts, or consequences of the acts, of those responding. Conditions for Use IMPORTANT SAFETY INSTRUCTIONS Read and understand the Installation Guide & User Manual. When using your telephone equipment, basic safety precautions should always be followed to reduce the risk of fire, electric shock and injury to person, including the following. 2

3 WARNING: The CSC50-ER Emergency Connect Telephone should be tested regularly to ensure proper delivery of your pre-recorded emergency message when activated by the Emergency Button or the Remote Band. This is your responsibility as the user of the product. WARNING: Using the CSC50-ER does not guarantee that you will make contact or receive help. The CSC50-ER is only an aid to assist you in calling for help. WARNING: Certain structures within the household may block the transmitter signal. It is up to the user to test the transmitter (Remote Band) within the first 30 days of use to determine if any dead areas exist, and where they are located. WARNING: Do not place the CSC50-ER on any metal surface. It could reduce reception range. WARNING: The CSC50-ER is capable of amplifying sounds to a loud volume. It is important to instruct all potential users of its proper operation. It is advised to adjust the volume control to the minimum level (Low) when not in use and alert other users that hearing damage can potentially result from misuse. WARNING: To avoid the possibility of electrical shock, do not use this product near water (For example, near a bathtub, wash basin, kitchen sink or laundry tub, in a wet basement or near a swimming pool) while in the bathtub or shower or when you are wet. If the phone becomes submerged in water, do not attempt to retrieve it until after you have unplugged the line cord from the modular wall jack. Do not plug the phone back in until it has dried completely. WARNING: Avoid using the telephone during electrical storms. There may be a remote risk of electric shock from lightning. If the electrical storm is present in your immediate area, possibility of electrical shock exists. WARNING: Do not use the phone if you suspect a gas leak in the area. The phone s electrical contacts could create a spark, which could ignite any heavy concentration of leaking gas. WARNING: Do not use liquid cleaners or aerosol cleaners on the telephone. Use a damp cloth for cleaning. WARNING: The Remote Band is not waterproof or water resistant and may not be submerged in water. IMPORTANT: Test Your CSC50-ER! You should check the operation of your CSC50-ER Phone at least once per month to assure that it is operating properly. PLEASE SAVE THESE INSTRUCTIONS 3
 within the first 30 days of use to determine if any dead areas exist, and where they are located.")
4 Table of Contents 4 Product Overview Page 2 Limitation of Liability Page 2 Conditions For Use Page 2 Table of Contents Page 4 Features & Functions Top View Page 6 Left side, Right side & Back side Views Page 7 Handset & Bottom View Page 8 LCD Screen Page 9 Screen Display Page 9 Installation Steps Components Page 10 Installing the optional batteries Page 10 Phone mounting desk & wall use Pages Setting the dialing mode Page 12 Programming ringer volume & style Pages Programming memory dial buttons Pages CSC50-ER Emergency Connect Phone Operation Programming 6 Emergency Connect SOS dialing numbers Page 16 Record an Emergency Connect SOS message Pages Play the Emergency Connect SOS message Page 17 Use the Emergency Connect function Page 17 Test the Emergency Connect phone Page 18 Cancel the Emergency Connect SOS call Page 18 Remote Audio Monitoring Activate the Remote Audio Monitoring Pages Setting Access PIN Code Page 19 Using the Remote Audio Monitoring Page 19 Auto On Hook Page 20 CSC50-ER Phone Operation Making & receiving a call Using the handset Page 20 Using the speakerphone Pages Using audio & telephone accessory jacks Pages Using the amplification function Page 23

5 Using the volume reset override Page 24 Using the outgoing speech volume Page 25 Using the last number redial Page 25 Using the flash button Page 25 Using the mute button Page 25 CSC50-ER Caller ID Operation Viewing your Caller ID display Page 26 Viewing incoming calls Page 27 New calls / message waiting indicator Page 28 Remove call record(s) from Caller ID A specific call record Page 28 All call records Pages Turn on the Call Waiting Caller ID feature Page 29 CSC50-ER Miscellaneous Feature Setting Set language Page 30 Set area code / LDS code Page 30 LCD screen contrast Page 31 Date / Hour format Pages Adjust number size Page 32 Phone book Add new number/name Pages Review /modify number/name Page 33 Delete number Pages Save number from Caller ID Page 34 Dial from the phone book Page 34 Recall/Delete one of the last 30 numbers dialed Pages Auto On Hook Page 35 Troubleshooting Guide Pages Maintenance and Care Page 37 Change the Emergency Connect Band Remote Battery Page 37 Specifications Page 38 FCC Regulatory Compliance Pages Warranty and Service Page 40 5

6 Features & Functions Figure # X Front C (delete) button 2. (up) button 3. (down) button 4. OK (accept) button 5. Priority memory button 6. Priority memory button 7. - Priority memory button 8. Antenna 9. AMPLI Amplification & tone activation button 10. Volume control 11. Tone control 12. M1 M6 One-Touch memory dial buttons PROG Program (save) button 14. STOP Cancels emergency connect dial button 15. Active emergency connect dial button 16. SPKR Speakerphone button 17. New calls / message waiting indicator 18. Headset button 19. Flashing incoming call indicator (strobe light) 20. MUTE button 21. FLASH button 22. REDIAL button 23. In use indicator 24. Speaker 25. Large keypad 26. Hook switch 27. Caller ID Screen 28. Remote Band 29. Active or Answer button 30. X Cancel or End Button 31. LED Stop/battery light indicator
 20. MUTE button 21. FLASH button 22. REDIAL button 23. In use indicator 24. Speaker 25.")
7 Features & Functions Figure #3 2 Left side Right side Back Speakerphone volume adjustment 2. Antenna 3. Outgoing speech volume select switch (LO/NORMAL/HI) 4. Ringer Volume select switch (HI/LO/OFF) 5. Ringer / shaker / strobe select mode 6. Phone line jack 7. AC power adapter jack 8. Volume reset override switch (ON/OFF) 9. Optional bed shaker jack 10. Optional Audio/Neckloop jack (3.5mm jack) 11. Optional Telephone jack (2.5mm hands-free) 7
 9. Optional bed shaker jack 10. Optional Audio/Neckloop jack (3.5mm jack) 11.")
8 Figure #4 Bottom Handset Handset Boost button 2. Memory card to record speed dial numbers 3. Phone keyholes (mounts) 4. Battery compartment 8
 4.")
9 Figure # Screen example (on hook position) 1. Hours 2. Minutes 3. Power network icon 4. Number of calls 5. Validation button 6. UP / DOWN arrow buttons 7. Cancel / Clear button 8. Month 9. Day OK button is used to confirm action or a choice on the screen. UP / DOWN arrow buttons are used to highlight or scroll through the menu. C button is used to cancel or confirm an action/entry or clear a stored Caller ID call. Your CSC50-ER Phone has a screen with different icons, which help you to use the telephone The telephone is powered by battery (+battery indicator). The telephone is powered by AC adapter. Memory storing is required. Screen contrast level. Mute is activated. Speakerphone is activated. Precede the CID call record number. To show new records. 9
. The telephone is powered by AC adapter.")
10 Installation Steps Installation of your ClearSounds CSC50-ER Emergency Connect Phone is easy. There are some basic steps you need to take when you set-up your CSC50-ER Emergency Connect Phone for the first time. 1. Check parts list. 2. Install (4) AAA Alkaline batteries (not included). Batteries are necessary in case of network power failure to save stored numbers in memory and are required for the Phone Book use. 3. Choose desktop or wall mount. 4. Set the dialing mode. 5. Set ringer and auxiliary alert. 6. Program your memory dial buttons. COMPONENTS Check to be sure you have all items that come with your telephone. You should have a REMOTE BAND, TELEPHONE BASE UNIT, TELEPHONE HANDSET, 6 ft LONG TELE- PHONE LINE CORD, 8 inch SHORT TELEPHONE LINE CORD, HANDSET COIL CORD, WALL PLATE ADAPTER, SCREWDRIVER, AC ADAPTER, AND OWNERS MANUAL INSTALLING THE OPTIONAL BATTERIES The batteries are necessary in case of network power failure to save stored numbers in memory and are required for the Phone Book use. 1. Open the battery compartment door located on the bottom of your phone by unscrewing the battery compartment door and removing it from the bottom of your phone (screwdriver provided). 2. Insert correctly 4 AAA alkaline batteries (purchased separately) in the battery compartment (See diagram #6). Be sure to observe battery polarity as imprinted on the base of the compartment. 3. Replace the battery compartment door and screw back in place. 4. The batteries will last approximately 1 year before needing replacement. DIAGRAM #6- Installing the batteries NOTE: Always unplug the line cord before installing new batteries. 10

11 PHONE MOUNTING INSTALLATIONS Choose a location for the CSC50-ER Emergency Connect Telephone that is as central as possible in the house, while providing access to a modular jack and an AC outlet. The telephone may be placed on a shelf or table, or may be fixed to a wall using the mounting bracket. Plug the AC Adapter into the AC power back on the back of your phone, then into an electrical outlet or surge protector, if you are using one. NOTE: The adapter is required for the telephone to work correctly. If the adapter is accidentally unplugged (or in case of power failure) and if the batteries are dead or not installed, minimal restricted phone features only will work on the phone (make a call or answer incoming call). IMPORTANT: Please remove the clear plastic Caller ID tab. This film tab is only for display and to protect your Caller ID display during shipping. Desk / Table Use 1. Connect one end of the 6ft telephone cord to the line jack on the back of your CSC50-ER Phone and connect the other end to a modular phone jack (RJ11C). 2. Connect the handset coil cord (curly cord) to the handset and to the telephone (See diagram #7). 3. Lift the handset and listen for a dial tone. If you hear a dial tone, your phone is ready to use. If there is no dial tone, check all your cords to make sure they are plugged in securely. DIAGRAM #7 Desk Installation Wall Mount Use 1. Slide the handset hanger tab out and reverse its position (rotate it 180 degrees). Slide it back into place so that the hook points up (See diagram #8). This will keep the handset from falling out of the cradle when it is mounted on the wall. 2. Plug the 8in short phone cord into the telephone jack on the CSC50-ER, run phone cord underneath wall plate adapter and through the opening. 3. Insert the Wall Plate adapter. Hold the wall plate adapter so that the raised mounting pins line up with the phone s keyholes on the CSC50-ER. Once the holes are lined up, push the wall plate adapter in towards the CSC50-ER and then slide the plate upwards until it is securely seated on the phone. (See diagram #9) 4. With the Wall Plate adapter installed, plug the 8in short phone cord into the jack on the wall. 11

12 5. Holding the phone slightly above the mounting screws on the wall jack, push the phone against the mounting screws so they are hooked into upper and lower keyhole slots on the back of the phone. Slowly slide the phone down until it snaps into place (See diagram #10). 6. Connect the handset coil cord (curly cord) to the handset and to the telephone. 7. Lift the handset and listen for a dial tone. If you hear a dial tone, your phone is ready to use. If there is no dial tone, check all your cords to make sure they are plugged in securely. DIAGRAM #8 Reversing The Hook DIAGRAM #9 Mounting The Wall Bracket DIAGRAM #10 Wall Installation SETTING THE DIALING MODE The Tone/Pulse is factory pre-set to Tone (T). Please check with your local telephone company if uncertain of the type of service. You can review or change the settings as follows: In the hook position (handset in cradle), 1. Press the MUTE button to access the special features. 2. Using the or arrow buttons (below the Caller ID Display), highlight <<SET PHONE>>. 3. Press the OK (green) button. 4. Using the or arrow buttons, scroll to select <<TONE MODE OR PUSLE MODE>>. 5. Press OK button. 6. Press the C button 3 times to exit. 12
.")
13 PROGRAMMING THE RINGER & AUXILIARY ALERT Ringer Volume: You can adjust the ringer volume of your CSC50-ER as high as 95+ db. The ringer volume adjustment is located on the right side of the telephone. The settings are OFF, LO, HI, (See diagram #11). Your phone comes with the ringer switched to HI. In additional to volume, you can adjust the tone or melody of the ring. : Off, : Low, : Hi DIAGRAM #11 Ringer Volume Switch Ring Style: Your CSC50-ER Phone allows you to choose from four different ring tones. You can choose a new one by changing the settings as follows: In the hook position 1. Press the MUTE button to access the special features (See diagram #12). 2. Using the or arrow buttons (below the Caller ID Display), highlight <<SET PHONE>>. 3. Press the OK (green) button. 4. Using the or arrow buttons, scroll to select <<SET RING>>. 5. Press OK button. 6. There are four (4) ring tones available. To hear each ring, use the or arrow button to highlight any one of the four and then press the OK button. Do this with each one to find the best fit for you. 7. To save the ring tone, highlight the ring tone you want, and then press the C button three (3) times until you are back to the time and date display. Or after your selection, do nothing for 20 seconds and the ring type will automatically be saved for the next incoming call. DIAGRAM #12 Set The Ringer Strobe & Optional Bed Shaker Ring Signaling: Your ClearSounds CSC50-ER Emergency Connect Telephone incorporates several options to alert you that the phone is ringing. The loud, adjustable Ringer as well as the bright Strobe and optional Bed Shaker or any combination of these allow you to customize the phone to fit your needs. 13
. 2.")
14 Your CSC50-ER Phone is equipped with a bright STROBE light, which flashes a very bright strobe when the phone rings (See diagram #13). It s almost impossible to miss telephone calls when you select the Strobe Ringer. DIAGRAM #13 Strobe Ringer (Flashing incoming call indicator) If you purchased the optional Bed Shaker, simply plug it into the shaker jack (See diagram #14) and place it between your mattress and box spring. Caution: For safety and correct functionality considerations, your CSC50-ER Phone can only be guaranteed when used with our ClearSounds Bed Shaker, model CS-SHK. DIAGRAM #14 Optional Bed Shaker Jack A 3-position switch located on the right side of the phone allows for the settings below (See diagram #15). NOTE: The loud ringer will be triggered unless you have turned it OFF. Bed Shaker & Strobe Bed Shaker Only Strobe Only DIAGRAM #15 Auxiliary Alert Switch PROGRAMMING MEMORY DIAL BUTTONS These memory dial buttons are empty. Should you choose to use this feature you will need to select the telephone numbers for each button. It is recommended you store these numbers during installation. Your CSC50-ER Phone allows you to program three Priority numbers and six frequently dialed numbers into memory for future use (30 digits maximum for each button). We suggest you program the emergency numbers for your local Police, Fire Station, Doctor or Hospital. NOTE: Do not program 911 into any memory buttons! 14

15 To program your one-touch memory dial buttons please follow instructions below: 1. Lift the handset. 2. Press the PROG (program) button (See diagram #16). 3. Using the keypad, dial the number you would like to save, including 1 and the area code (if applicable). (See diagram #17). 4. Press one of the Priority or Memory Dial buttons (M1 M6) located on top of the phone (See diagram #18). Each button can be programmed (or reprogrammed using the same procedure) for a phone number. 5. The Caller ID Screen will display <<SAVE OK>> (See diagram #19). 6. To register your stored phone numbers, use the phonebook insert card located under the base. NOTE: Numbers will be lost if the phone is not receiving any power, either through the phone line, batteries, AC adapter during a storm, power outage or if you disconnect the phone. Entering a new number in the same location will automatically erase the previous number. DIAGRAM #16 Program Button DIAGRAM #17 Telephone Keypad DIAGRAM #18 Memory / Priority Buttons DIAGRAM #19 LCD Display If at any time you have questions about your telephone please contact our ClearSounds Customer Service Department at:
. 6. To register your stored phone numbers, use the phonebook insert card located under the base.")
16 CSC50-ER Emergency Connect Phone Operation The ClearSounds CSC50-ER Emergency Connect Phone allows you to ask for help conveniently when there is an emergency. To activate the function, you need to preset the emergency connect SOS number and record an emergency connect SOS message, which will be heard by the person you contact. It is suggested to turn ON both the Remote Audio Monitoring & Auto On Hook features of the CSC50-ER. Programming emergency connect SOS number The CSC50-ER Phone provides six (6) emergency connect SOS number memory locations for setting (18 digits maximum for each memory). Only program the phone to call someone with whom you have discussed your CSC50-ER Emergency Connect Phone system and who would expect such a call (such as a friend, relative or neighbor). They will need to determine if there is a real problem and call for assistance to be sent if necessary. You should NOT program the CSC50-ER to dial the police or other emergency services directly. In the hook position (handset in cradle), 1. Press the MUTE button to access the Special Feature Menu. 2. Using the or arrow buttons, highlight <<SET SOS>>. 3. Press the OK button to confirm. 4. Using the or arrow buttons, scroll to select <<SOS NUMBER>>. 5. Press the OK button. 6. Using the arrow buttons select << SOS NUMBER 1>> or one of the others. 7. Press the OK button to confirm. 8. Enter the emergency connect SOS number, (you can use the C key to delete previous digit). 9. Press the OK button to confirm. 10. To program another emergency connect SOS number when you are in the menu simply select <<SOS NUMBER 2>>, or one of the others and do the same as above. 11. When all numbers are programmed, press the C button three (3) times to exit. Repeat steps 1-9 to change a phone number. NOTE: If you only want to program one phone number, you should store this number in all six of the memory locations. Record an emergency connect SOS message The person will hear the emergency connect SOS message if the call is answered. You can record a 10 second message maximum. 16
 emergency connect SOS number memory locations for setting (18 digits maximum for each memory).")
17 In the hook position, 1. Press the MUTE button. 2. Using the or arrow buttons, highlight <<SET SOS>>. 3. Press the OK button to confirm. 4. Using the or arrow buttons, scroll to select <<SOS SOUND>>. 5. Press the OK button. 6. Using the arrows button select << RECORD SOUND>>. 7. Press the OK button. 8. Record your emergency connect SOS message by speaking clearly into the speakerphone at a distance less than 1 ft. You can record up to 10 seconds of speech. You may wish to use this message or create one of your own to meet your specific needs: This is Mr. Jones. I have a problem, please press any phone key to talk and listen in. 9. Press the OK button to stop the recording. 10. Press the C button three (3) times to exit. Play the emergency connect SOS message In the hook position, 1. Press the MUTE button. 2. Use the or arrow buttons, highlight <<SET SOS>>. 3. Press the OK button to confirm. 4. Using the or arrow buttons, scroll to select <<SOS SOUND>>. 5. Press the OK button. 6. Using the arrow buttons select << PLAY SOUND>>. 7. Press the OK button to play your emergency connect SOS message. 8. Press the C button three (3) times to exit. Using the emergency connect phone After setting the emergency connect SOS number(s) and message, you can use this function whenever required. Press the red (Emergency button) on the remote band or telephone base. Once an emergency call is dialed, either from the phone or the remote band, the ClearSounds CSC50-ER immediately begins dialing your pre-programmed emergency connect SOS numbers. The phone will dial the first emergency connect SOS number. If there is no response in 30 seconds or if the line is busy, the phone will dial the second number. If there is still no response in 30 seconds or if the line is still busy, the phone will dial the next number in turn until all the numbers you set are dialed twice. If someone on the other end lifts the handset, the phone will play the emergency connect SOS message you recorded to ask for help. You can press the X button on the remote band or STOP button on the phone base to deactivate the emergency connect SOS function. When a person answers the phone, they will hear the emergency connect SOS message playing. The person is required to press one of the keypad keys (0-9, * or #) to confirm that the emergency connect SOS message has been received and to deactivate the CSC50- ER from dialing the next number. Next the CSC50-ER Phone will automatically turn ON the speakerphone allowing the person to speak to the emergency user. Otherwise, the 17

18 CSC50-ER Phone will dial the next emergency connect SOS number automatically. NOTE: The friend, relative or neighbor whom you have chosen are required to have touchtone phone service and a phone that will generate touch-tone code. Test the CSC50-ER emergency connect phone 1. Make sure the phone numbers and your message have been entered. 2. Call your friends, family or neighbors to let them know you are going to test the CSC50-ER. Be sure that they understand that this is not a real emergency. 3. After you hang up the phone, press the Remote Band s Emergency Connect Button. 4. The CSC50-ER will dial the first phone number. Shortly after it dials the number, the CSC50-ER starts to play its message. 5. If the person it calls doesn t answer within about 30 seconds or answers but doesn t press a number key, the CSC50-ER calls the next number. If the called person presses a number key on the phone, the recorded message stops and he/she can listen in as well as speak directly to you through the speakerphone. 6. To turn off or hang up, press X or STOP button on your band remote or on the phone base. Test your CSC50-ER emergency connect remote band every month At least once per month you should test your remote band s emergency connect button by following the directions above. If your remote band does not work reliably from locations where it has worked before, you should immediately replace the battery (see page #37) and check to be sure the phone s antenna is in its proper placement. To Cancel The CSC50-ER Emergency Connect Call In case of a false alarm or mistaken activation, press the STOP or X button on the CSC50-ER phone base or on the remote band. Advanced CSC50-ER Emergency Connect Phone Operation REMOTE AUDIO MONITORING If a family member or friend to whom you ve given your Monitor Access Code becomes worried about you or wants to call back after they have called 911 for help, this feature allows them to call you. They can turn on the speakerphone of your CSC50-ER remotely and listen in or talk to you. If everything is all right, you just answer the phone in a normal manner. If you need assistance, they can stay on the line until help arrives. 18

19 IMPORTANT: This feature will not work with answering machines or voice mail services. All answering machine or systems connected to the same phone number as your CSC50- ER must be unplugged. Activate the Remote Audio Monitoring Feature In the hook position, 1. Press the MUTE button. 2. Using the or arrow buttons, highlight <<SET SOS>>. 3. Press the OK button to confirm. 4. Using the or arrow buttons, scroll to select <<AUTO TURN>>. 5. Press the OK button. 6. Using the arrow buttons select << ON>> ( OFF to deactivate). 7. Press the OK button. 8. Press the C button twice (2) times to exit. Setting/Modifying Remote Audio Monitoring Access PIN Code This feature sets the speakerphone to identify the selected number for Remote Audio Monitoring. The Access PIN code is factory preset to the sequence If you wish to modify it, follow these steps: In the hook position, 1. Press the MUTE button. 2. Using the or arrow buttons, highlight <<SET SOS>>. 3. Press the OK button to confirm. 4. Using the or arrow buttons scroll to select <<PIN CODE>>. 5. Press the OK button. 6. Use the C button to delete preset digits. 7. Enter your new code (max 4 digits) and press the OK button. 8. Press the C button twice (2) times to exit. Using the Remote Audio Monitoring Feature The following instructions are for someone to call you, the CSC50-ER Emergency Connect user, to call back after responding to your initial emergency call or in case they did not hear from you as expected. Please give a copy of these important instructions to the appropriate persons for quick reference. 1. Provide your selected callers with a Caller PIN code. 2. Dial as you would a regular phone call. You will hear a beep after 10 dialing tones. 3. You will have 10 seconds to enter the Remote Audio Monitor Access PIN Code on your keypad (the access code is 1234 unless it has been changed). This turns on the speakerphone of the CSC50-ER phone and allows you to listen in and have a two-way conversation. 4. Every two (2) minutes, you will hear another beep and will need to press any of the 0-9 keys to continue; otherwise the CSC50-ER will hang up. 19
 times to exit. Setting/Modifying Remote Audio Monitoring Access PIN Code This feature sets the speakerphone to identify the selected number for Remote Audio Monitoring.")
20 AUTO ON HOOK When the Auto On Hook feature is ON, Your ClearSounds CSC50-ER will automatically disconnect the line after 5-8 minutes if the phone is left off the hook. This will restore your line to be able to receive another call even if you leave the handset off the base. In the hook position, 1. Press the MUTE button to access the Programming Menu. 2. Using the or arrow buttons, highlight <<SET PHONE>> then press the OK button to confirm. 3. Using the or arrow buttons, scroll to select <<AUTO ON HOOK>> and press the OK button. 4. Using the arrow buttons, choose <<ON>> or <<OFF>>. 5. Press the OK button. 6. Press the C button twice to exit. 20 CSC50-ER Phone Operation MAKING AND RECEIVING A CALL Making A Call Using The Handset 1. To make a call, lift the handset, listen for a dial tone and adjust your Volume & Tone Settings. (See page 23 for details on the amplification functions) 2. To dial a number you can: a. Dial a number from the keypad b. Press one of the Priority or Memory dial buttons (See pages for instructions on programming Priority/Memory Dial Buttons) c. Dial from your Phone Book or Caller ID (See page 34 for instructions on setting up your Phone Book.) 3. On completion of the call, carefully replace the handset in the cradle. Receiving/Answering A Call Using The Handset 1. While the phone is ringing, simply lift the handset and speak. 2. Adjust your Volume and Tone Settings if needed (See page 23 for assistance) 3. On completion of the call, carefully replace the handset in the cradle. USING THE SPEAKERPHONE Your CSC50-ER Emergency Connect Telephone is also a full Speakerphone that offers volume adjustment up to +15dB. This allows you to hear and speak hands-free. Making A Call Using The Speakerphone 1. Press the SPKR (speakerphone) button for dial tone. 2. Adjust the volume to fit your needs. Move the Volume Adjustment Switch located to the left side of the telephone beside the speaker (See diagram #20). 3. To dial a number you can:

21 a. Dial a number from the keypad b. Press one of the Priority or Memory dial buttons (See pages for instructions on programming Priority/Memory Dial Buttons.) c. Dial from your Phone Book or Caller ID (See page 34 for instructions on setting up your Phone Book.) 4. On completion of the call, press the SPKR button again. DIAGRAM #20 Speakerphone Volume Control Receiving/Answering A Call Using The Speakerphone 1. Press the SPKR (speakerphone) button while the phone is ringing to answer. 2. Adjust the volume to fit your need (Same as above). 3. On completion of the call, press the SPKR button again. Switch between Handset and Speakerphone While on a handset call, press the SPKR button and replace the handset in the cradle. While on a speakerphone call, lift the handset. USING AUDIO AND TELEPHONE HEADSET ACCESSORY JACKS Your CSC50-ER Emergency Connect Phone is equipped with both an Audio and Telephone Headset Jack, providing total flexibility and multi-functionality (See diagram #21). Both the Audio & Headset jacks are amplified, allowing you to adjust both the tone and volume. (See pages for instructions on the amplification features.) These jacks accommodate a variety of accessories including Neckloops, Headphones, Earbuds, Silhouettes, Cellular Accessories and Cochlear Patchcords*. *Caution: Before plugging any cord into your Cochlear processor, you should consult with your implant manufacturer. Audio/Neckloop Jack Using the 3.5mm stereo/mono jack allows you to listen through your Neckloop or Headset while speaking into the handset or speakerphone. Telephone Headset Jack Using the 2.5mm stereo jack that can accommodate many hands-free headsets allows for total hands-free operation as you listen and speak through your hands-free headset. 21
22 Audio Jack (only) Telephone headset Jack DIAGRAM #21 Audio & Telephone Headset Jack Location Making A Call: 1. Plug your Neckloop, Headphones, Headset or other jack accessory into the Audio/ Neckloop Jack or Headset Jack. 2. Press the (headset) button for dial tone (See diagram #22). 3. Dial the number and wait for someone to answer. a. If you are using the 3.5mm Audio/Neckloop Jack, and want to speak into the handset, lift the handset and speak into it. Adjust your volume. On completion of the call, carefully replace the handset in the cradle. b. If you are using the 3.5mm Audio/Neckloop Jack, and want to speak into the speakerphone, press the SPKR speakerphone button for hands-free operation, and talk into the speakerphone (the conversation will be heard through both your audio equipment and over the speakerphone). Adjust your volume. On completion of the call, press the SPKR speakerphone button. c. If you are using the 2.5mm Headset Jack for hands-free communication, leave the handset in the cradle, and talk into the headset microphone. Adjust your volume. On completion of the call press the headset button. DIAGRAM #22 Audio / Headset Jack Button Receiving/Answering A Call: 1. Plug your accessory into the Audio/Neckloop Jack or Headset Jack. 2. If using the audio jack, press the SPKR or lift handset. 3. If using the headset jack, press the (headset) button while the phone is ringing to answer the call. 4. Depending whether you are using the 3.5mm Audio/Neckloop Jack or 2.5mm Telephone Headset Jack follow the directions above (A, B or C) 22
23 Using the Amplification Function The CSC50-ER Phone has an AMPLI button that controls the loudness and tone of the handset. Without pressing the AMPLI button, you are able to amplify the handset up to 30 db of amplification. Once the AMPLI button is pressed, an extra level of amplification is added providing 30 to 50 db of gain and tone control. Voice Amplification and Tone Your CSC50-ER Emergency Connect Telephone is equipped with a specialized amplification function designed to fit your needs. You can adjust the volume and tone (sound frequency range) of the incoming voice by simply adjusting Volume and Tone Controls. To use the specialized amplification boost and tone control features, follow these directions. 1. Once you have dialed the phone or answered a call, press the AMPLI (amplify) button (See diagram #23). This turns the incoming voice amplifier ON. When the amplifier is ON, you will see the red light on the left side of the AMPLI button light up. i.e. AMPLI 2. Adjust the volume and tone to fit your needs by adjusting the VOLUME (See diagram #24) and TONE (See diagram #25) controls until you find the right levels for you. The Volume Control increase sound volume. Slide the Volume Control to the right to increase the volume and slide it to the left to decrease the volume. The Tone Control allows you to fit your specific hearing needs. Slide the Tone Control to the left to boost the lower frequency range. Slide the Tone Control to right to boost the high frequency range. This allows individuals with BOTH high frequency and low frequency hearing loss to use the CSC50-ER Phone. DIAGRAM #23 Amplify Button DIAGRAM #24 Volume Control DIAGRAM #25 Tone Control 3. For additional, situational amplification, press and hold the HANDSET BOOST button located just below the earpiece on the inside of the handset (See diagram #26). By pressing and holding this additional handset boost button, you get an extra 10 db gain of amplification. IMPORTANT NOTE: The Handset Boost button is designed to be used when listening only. When you are ready to speak, release the button. Press it again when the extra amplification is necessary. Failure to release the 23
24 button when speaking will result in the other party not hearing you. Use this additional handset boost button (See diagram #26) for the following reasons: a. The caller has a very soft speech b. There is a lot of background noise c. You are in a noisy environment d. The connection on the phone line is weak DIAGRAM #26 Handset Boost Button CAUTION: This telephone can produce very high (loud) sound levels. Repeated incremental exposure to amplification levels greater than 18 db may be harmful to people without hearing loss. Always adjust the volume control to the minimum setting after using the phone and alert other users that hearing damage can potentially result from misuse. Using the volume reset override In standard mode, the phone will reset to normal sound levels when you hang up. This allows people who do not require the level of amplification offered on the phone to use it. If you would like to override the reset, simply turn the AUTO AMPLIFY switch on the back of the phone to ON using the tip of a pencil or paper clip (See diagram #27). IMPORTANT: When the AUTO AMPLIFY switch is in the ON position, you do not need to press the AMPLI (amplify) button. Your amplification setting will remain as set. On any call, you can temporarily turn OFF and turn back ON the AUTO AMPLIFY feature by pressing the AMPLI button. Using your CSC50-ER emergency connect phone with hearing aids Your CSC50-ER Phone can be used with hearing aids equipped with a telecoil (T-coil). Adjust your hearing aid T-switch to the T position. Make sure to hold the handset close to your hearing aid. 24 DIAGRAM #27 Volume Reset Override Switch
25 Using the Outgoing Speech Volume You can adjust the sending volume (outgoing volume up to 12 db of gain) by using the Speech Volume Control located on the right side of your CSC50-ER phone. If your voice is faint or weak, adjust the volume to HI. You can also decrease the volume as well. There are three levels available LO, NORMAL & HI (See diagram #28). DIAGRAM #28 - Outgoing Speech Volume Switch Tip: If you are using the boost feature along with the handset boost, we suggest you set the SPCH VOL switch to HI. Any time you utilize the maximum amplification for listening, it is normal for your outgoing speech volume to decrease. Therefore, it may be necessary to turn the Speech Volume to HI. Using The Last Number Redial The REDIAL button is used to quickly redial the last number you dialed. 1. Lift the handset, listen for the dial tone 2. Press REDIAL button. The phone will redial up to 31 digits automatically. NOTE: If you would like to dial from one of the last 30 numbers dialed (See page #34 for instructions). Using The Flash Button The FLASH button is used to disconnect a call and re-establish dial tone or to switch over to another caller if you use custom calling services such as Call Waiting or Three Way Calling. Please contact your local telephone company for information on these services. 1. During a call press the FLASH button to access flash feature. Using The Mute Button The MUTE button allows the user to conduct a private conversation that you do not want the person on the other end to hear. 1. Press and hold the MUTE button. You will still be able to hear the caller but they cannot hear you during the mute operation. 2. To resume normal conversation, release the MUTE button. CSC50-ER CALLER ID OPERATION NOTE: In order to utilize the Caller ID features, you must subscribe to Caller ID service through your local phone company. There are fees for Caller ID services, and it may not be 25
26 available in all areas. This product can provide information only if both you and the caller are in areas offering Caller ID service, and if both telephone companies use compatible equipment. Viewing Your Display Screen: Your CSC50-ER Emergency Connect Telephone has a large LCD screen that provides useful information. When the phone is not in use, the screen displays the following information: Total & New Calls The screen displays the total number of new calls to be reviewed. The total number of calls received is also displayed. This shows you how many total calls are in your Caller ID memory and how many of those are new (See diagram #29). No Calls If you have viewed all of your calls in the Caller ID and have deleted all of them, the screen will display NO CALL (See diagram #30). Battery Low Indicator The battery power level icon is display on the screen when the AC adapter is not plugged in or during a power outage. This will let you see the status of battery power. As the batteries drain, the lines on the icon will disappear (See diagram #31). When your AC adapter is plugged in or power is restored, you will see a plug icon rather than a battery icon (See diagram #32). DIAGRAM #29 Total & New Calls DIAGRAM #30 No Call DIAGRAM #31 Battery Power Indicator DIAGRAM #32 AC Power Indicator Message Waiting If you have Voice Mail Service from your local phone company, your CSC50-ER phone will display MESSAGE WAITING if a recorded message has been left (See diagram #33). The Message Indicator light (See page #28) will flash until the message is retrieved. Call Counter DIAGRAM #33 Message Waiting 26
27 Viewing Incoming Calls If you subscribe to Caller ID service with your local phone service provider, this phone stores all incoming calls with valid Caller ID information in the call history. Your LCD screen will display the time and date, the caller s phone number and name (if they are sent with the call) as well as a count number (See diagram #34). New calls are assigned a number from 1 to 99. The most recent call will have the highest number. The call history numbers appear in the upper right hand corner next to the time and date. New (un-reviewed) call information shows NEW in the display. With each new call it will automatically turn on the New Calls / Message Waiting Indicator, which is a small red light located on the lower right-side of the phone s visual ringer (next to the envelope icon). NOTE: You must follow the instructions in Set Area Code / LDS (Long Distance Service) Code for your phone to properly recognize and dial calls out of the Caller ID stored calls (see page #30). You must program your area code so your phone can properly recognize and dial calls. NOTE: Those numbers can also be saved to your Phone Book (See pages for instructions on setting up your phone book). NOTE: Your CSC50-ER stores up to 99 call records before the memory becomes full. When the next call comes in, the oldest record is automatically deleted. Call Counter DIAGRAM #34 Caller ID Display If you answer a call before information appears on the screen, it will not be stored in the call history. Between the first and second rings the screen displays. Your caller s name (15 letters are sent by your phone company). The caller s area code and telephone number (area code is not display if it is programmed as the Home Area Code). The time and date of the call. The call s position in call history. NOTE: Call information is displayed for about 30 seconds. Review Call History To review earlier calls In the hook position, 1. Using the or arrow buttons to scroll through the caller list. 2. To advance through call history from an earlier call, press the DOWN arrow button. When you have reach the end of the call history, the screen displays <<END OF LIST>>. 27
28 Turn OFF the New Calls / Message Waiting Indicator Light This red light (See diagram #35) will remain lit unless you do one of the following in the hook position: 1. If you do not have Caller ID or Message Waiting Service, your CSC50-ER will alert you that you have missed a call by causing the red indicator light to flash. To turn OFF, simply tap the down arrow button once or until the light turns off. 2. If you only have Caller ID Service, your CSC50-ER will continue to flash unless you review all new calls. To turn OFF, simply continue to tap the down arrow button to scroll through the Caller ID until the light turns off. 3. If you have Message Waiting Service through your local telephone company, your CSC50-ER will alert you that you have a message waiting after you have reviewed your Caller ID or missed calls. To turn OFF, you will need to retrieve your message(s) before the red light will go off. NOTE: The red flashing light will return with your next missed call, next call with Caller ID information or if you receive a message through Message Waiting Service. DIAGRAM #35 - New Call/ Message Waiting Indicator Remove Call Record From The Caller ID List Remove A Specific Call Record In the hook position, 1. Using the or arrow buttons to move into the list and select the required number to delete. 2. Press the C button. 3. The screen display <<DEL?>>. 4. Press the C button to confirm. 5. Press the OK button to exit. Remove All Call Records In the hook position, 3. Using the or arrow buttons to move into the list and select the required number to delete. 4. Press & hold the C button until the screen displays <<ALL DEL?>>. 28
29 5. Press the C button to confirm. 6. Press the OK button to exit. NOTE: Once a call is removed from call history, it cannot be retrieved. Call Waiting Your CSC50-ER Phone also has a Caller ID with Call Waiting feature that works with your service from the local phone service provider. Caller ID with Call Waiting lets you see who s calling before you answer the phone even when you re on another call. If you are on a call and a 2nd call comes in, you will hear the audible beep in the handset and the LCD will show Caller 2 and their information. If you choose to answer the call, press the FLASH button or the Phone Hook button to transfer to the 2nd caller. If you choose not to answer the 2nd call, the caller s information will be stored in the Caller ID history and can be viewed later. Turn ON The Call Waiting Caller ID Feature In the hook position, 1. Press the MUTE button to access the Programming Menu. 2. Using the or buttons, highlight <<SET PHONE>>. 3. Press the OK button to confirm. 4. Using the or arrow buttons, scroll to select <<CALL WAITING>>. 5. Press the OK button. 6. Using the arrow buttons to select <<ON>> or <<OFF>> to activate or deactivate the function. 7. Press the OK button to confirm. 8. Press the C button twice to exit. NOTE: When call waiting is OFF, Caller ID information for the 2nd caller will not be displayed. You may need to change your phone service to use this feature. Contact your phone service provider if: You have both Caller ID and Call Waiting, but as separate services (you may need combined service) You have only Caller ID service or only Call Waiting service You don t subscribe to any Caller ID or Call Waiting services Display Screen Messages PRIVATE NAME The other party is blocking name information. PRIVATE CALLER The other party is blocking name and number information. 29
30 UNKNOWN NAME Your phone company is unable to receive information about this caller s name. UNKNOWN CALLER Your phone company is unable to receive information about this caller s name and number. OUT OF AREA If a caller is in an area where the local phone company does not offer Caller ID services or an area that is yet providing name & number information. CSC50-ER MISCELLANEOUS FEATURE SETTINGS Set The Language Your CSC50-ER Phone supports multiple languages. It is pre-set to American English (English1). If you need to change the language, you can choose from 16 different languages. As listed in the programming menu, these languages include: Norway, English1, China, Korean, Greece, Austral, Turkish, English3, Spanish, Nederland, French, Germany, Poland, Sweden, Danish, and Finland. To change the language used for your Caller ID display: In the hook position, 1. Press the MUTE button to access the Programming Menu. 2. Using the or arrow buttons, highlight/select <<SET PHONE>>. 3. Press the OK button to confirm. 4. Using the or arrow buttons to select <<SET LANGUAGE>>. 5. Press the OK button. 6. Using the arrow buttons to select the language you would like to set <<FRENCH>> (for example) 7. Press the OK button. 8. Press the C button twice to exit. NOTE: Do not change the language if you can not read it as all of the menu options will change and it will be very difficult to change to English. If you change to a language you can t read follow this process 1. Press MUTE 2. Using the arrow down button - tap twice and press OK. 3. Tap the arrow down button 3 more times and press OK. 4. You should see all the languages listed and select English1 then press OK. 5. Press the C button twice. Set Area Code / LDS (Long Distance Service) Code Your ClearSounds CSC50-ER allows you to dial from your Caller ID memory and your phonebook. When you use your phone for the first time or if you have moved to a different area code, you need to enter your area code into the phone. This assures that when dialing a call out of memory or your phonebook, the number is formatted properly. To set your are code & LDS Code: In the hook position, 1. Press the MUTE button to access the Programming Menu. 2. Using the or arrow buttons, highlight <<SET PHONE>>. 3. Press the OK button to confirm. 30
31 4. Using the or arrow buttons, scroll to select <<SET AREA & LDS>>. 5. Press the OK button. 6. Using the arrow buttons, enter your area code. After each number press the OK button. The phone accommodates up to six (6) digits (allows for International codes). Once you have entered your area code, even if you are not using all six (6) digits, press the OK button until you reach the <<SET LDS CODE>> screen. The LDS Code is your long distance code. In the U.S. your long distance code is 1. The phone is pre-set for the U.S. NOTE: Do not change the LDS code unless you are leaving the U.S. 1. Following step 6 of set area code, using the or arrow button, enter your Long Distance Code (LDS). 2. Press the OK button to confirm. 3. Press the C button once to exit. LCD / Screen Contrast Adjustment You can adjust the contrast on the LCD screen to darken or lighten the screen. Your screen has a backlight that automatically switches off after 15 seconds of inactivity. In the hook position, 1. Press the MUTE button to access the Programming Menu. 2. Using the or arrow buttons, highlight <<SET PHONE>>. 3. Press the OK button to confirm. 4. Using the or arrow buttons to select <<LCD CONTRAST>>. 5. Press the OK button. 6. Using the arrow buttons to adjust the contrast level that most comfortable for you. 7. Press the OK button (it will automatically return to time & date screen). TIP: You can tilt the display as well to fit your needs. Choosing The Date / Hour Format If you have Caller ID service, the date and hour will be automatically set when you receive your first call. If you currently do not have Caller ID service through you phone company, please follow directions below. You can change the format of the time and date to your preference. Date format You can choose between (2) two formats: Day Month or Month Day In the hook position, 1. Press the MUTE button to access the Programming Menu. 2. Using the or arrow buttons, highlight <<SET PHONE>>. 31
32 3. Press the OK button to confirm. 4. Using the or arrow buttons, scroll to select <<DATE FORMAT>>. 5. Press the OK button. 6. Using the arrow buttons, select <<DAY-MONTH>> or <<MONTH-DAY>>. 7. Press the OK button. 8. Press the C button twice to exit. Hour format You can choose between (2) two formats: 12 hours or 24 hours In the hook position, 1. Press the MUTE button to access the Programming Menu. 2. Using the or arrow buttons, highlight <<SET TIME>>. 3. Press the OK button to confirm. 4. Using the or arrow buttons to select the desired digit. 5. Press the OK button to confirm and pass to the next digit. 6. Press the C button twice to exit. DIM: X------x This feature allows you to change the number of digits that can be displayed on the screen. If the DIM:X function is activated, the maximum number of digits that can be shown is 18. If it is deactivated, the maximum number of digits is 8. It is set to display 18 digits. We suggest you leave the DIM:X activated as the caller s complete number will not appear on the screen if it is deactivated. In the hook position, 1. Press the MUTE button to access the Programming Menu. 2. Using the or arrow buttons, highlight <<SET PHONE>>. 3. Press the OK button to confirm. 4. Using the or arrow buttons, scroll to select <<DIM: X---- x >>. 5. Press the OK button. 6. Using the arrow buttons to select <<ON>> or <<OFF>> to activate or deactivate the function. 7. Press the OK button to confirm. 8. Press the C button twice to exit. Setting Up Your Phone Book Your phone book stores up to 99 names and numbers. To Add A New Number/Name: In the hook position, 1. Press the MUTE button to access the Programming Menu. 2. Using the or arrow buttons, highlight <<PHONE BOOK>>. 32
Instructions Mozilla Thunderbird Page 1
 Instructions Mozilla Thunderbird Page 1 Instructions Mozilla Thunderbird Ce manuel est écrit pour les utilisateurs qui font déjà configurer un compte de courrier électronique dans Mozilla Thunderbird et
Garage Door Monitor Model 829LM
 Garage Door Monitor Model 829LM To prevent possible SERIOUS INJURY or DEATH from a closing garage door: NEVER permit children to operate or play with door control push buttons or remote control transmitters.
Guide d'installation rapide TFM-560X YO.13
 Guide d'installation rapide TFM-560X YO.13 Table of Contents Français 1 1. Avant de commencer 1 2. Procéder à l'installation 2 Troubleshooting 6 Version 06.08.2011 16. Select Install the software automatically
How to Login to Career Page
 How to Login to Career Page BASF Canada July 2013 To view this instruction manual in French, please scroll down to page 16 1 Job Postings How to Login/Create your Profile/Sign Up for Job Posting Notifications
Thank you for choosing the Mobile Broadband USB Stick. With your USB Stick, you can access a wireless network at high speed.
 Thank you for choosing the Mobile Broadband USB Stick. With your USB Stick, you can access a wireless network at high speed. Note: This manual describes the appearance of the USB Stick, as well as the
Amplified Cordless Expandable Telephone System Installation Guide & User Manual
 A50 Amplified Cordless Expandable Telephone System Installation Guide & User Manual Congratulations You have just purchased the Most Remarkable Amplified Cordless Expandable Telephone System In The World!
Thank you for choosing the Mobile Broadband USB Stick. With your USB Stick, you can access a wireless network at high speed.
 Thank you for choosing the Mobile Broadband USB Stick. With your USB Stick, you can access a wireless network at high speed. Note: This manual describes the appearance of the USB Stick, as well as the
Instructions pour mettre à jour un HFFv2 v1.x.yy v2.0.00
 Instructions pour mettre à jour un HFFv2 v1.x.yy v2.0.00 HFFv2 1. OBJET L accroissement de la taille de code sur la version 2.0.00 a nécessité une évolution du mapping de la flash. La conséquence de ce
SA-32 / SA-62 INSTRUCTION MANUAL - MANUEL D INSTRUCTIONS
 SA-32 / SA-62 INSTRUCTION MANUAL - MANUEL D INSTRUCTIONS 4 5 6 7 4 5 6 7 1. Telephone Paging Volume Control 1. Contrôle de volume Paging Téléphone 2. Microphone Volume Control 2. Contrôle volume du microphone
GIGABIT PCI DESKTOP ADAPTER DGE-530T. Quick Installation Guide+ Guide d installation+
 GIGABIT PCI DESKTOP ADAPTER Quick Installation Guide+ Guide d installation+ Check Your Package Contents Quick Installation Guide Gigabit Ethernet PCI Adapter CD with Manual and Drivers DO NOT insert the
«BOREAL 20» MODE D EMPLOI / USER MANUAL REF 983816 S.A HENRI DEPAEPE
 «BOREAL 20» MODE D EMPLOI / USER MANUAL REF 983816 S.A HENRI DEPAEPE 98 AV., DE STALINGRAD -BP 05-92702 COLOMBES CEDEX FRANCE. L appareil «BOREAL 20» de la société DEPAEPE est conforme à la norme de sécurité
Application Form/ Formulaire de demande
 Application Form/ Formulaire de demande Ecosystem Approaches to Health: Summer Workshop and Field school Approches écosystémiques de la santé: Atelier intensif et stage d été Please submit your application
Notice Technique / Technical Manual
 Contrôle d accès Access control Encodeur USB Mifare ENCOD-USB-AI Notice Technique / Technical Manual SOMMAIRE p.2/10 Sommaire Remerciements... 3 Informations et recommandations... 4 Caractéristiques techniques...
TABLE DES MATIERES A OBJET PROCEDURE DE CONNEXION
 1 12 rue Denis Papin 37300 JOUE LES TOURS Tel: 02.47.68.34.00 Fax: 02.47.68.35.48 www.herve consultants.net contacts@herve consultants.net TABLE DES MATIERES A Objet...1 B Les équipements et pré-requis...2
WEB page builder and server for SCADA applications usable from a WEB navigator
 Générateur de pages WEB et serveur pour supervision accessible à partir d un navigateur WEB WEB page builder and server for SCADA applications usable from a WEB navigator opyright 2007 IRAI Manual Manuel
AND / ET USER GUIDE UK HARDWIRED CONTROL PANEL UK GUIDE UTILISATEUR CENTRALE D ALARME FILAIRE F 496572 1
 AND / ET UK USER GUIDE HARDWIRED CONTROL PANEL UK F GUIDE UTILISATEUR CENTRALE D ALARME FILAIRE 496572 1 English UK Operator Controls and Displays On both control panel and remote keypad the LEDs display
Paxton. ins-20605. Net2 desktop reader USB
 Paxton ins-20605 Net2 desktop reader USB 1 3 2 4 1 2 Desktop Reader The desktop reader is designed to sit next to the PC. It is used for adding tokens to a Net2 system and also for identifying lost cards.
Logitech Tablet Keyboard for Windows 8, Windows RT and Android 3.0+ Setup Guide Guide d installation
 Logitech Tablet Keyboard for Windows 8, Windows RT and Android 3.0+ Setup Guide Guide d installation English.......................................... 3 Français.........................................
Contents Windows 8.1... 2
 Workaround: Installation of IRIS Devices on Windows 8 Contents Windows 8.1... 2 English Français Windows 8... 13 English Français Windows 8.1 1. English Before installing an I.R.I.S. Device, we need to
Contrôle d'accès Access control. Notice technique / Technical Manual
 p.1/18 Contrôle d'accès Access control INFX V2-AI Notice technique / Technical Manual p.2/18 Sommaire / Contents Remerciements... 3 Informations et recommandations... 4 Caractéristiques techniques... 5
Package Contents. System Requirements. Before You Begin
 Package Contents DWA-125 Wireless 150 USB Adapter CD-ROM (contains software, drivers, and manual) Cradle If any of the above items are missing, please contact your reseller. System Requirements A computer
Quick Setup Guide Guide de configuration rapide. Tablet Device SGPT12 Series Tablette électronique Série SGPT12
 Quick Setup Guide Guide de configuration rapide Tablet Device SGPT12 Series Tablette électronique Série SGPT12 Welcome / Bienvenue Congratulations on your purchase of this Xperia Tablet S. This Quick Setup
3-046-449-22 (1) CALLER ID Telephone. Operating Instructions. Mode d emploi IT-ID20. 2000 Sony Corporation
 CALLER ID Telephone. Operating Instructions. Mode d emploi IT-ID20. 2000 Sony Corporation") 3-046-449-22 (1) CALLER ID Telephone Operating Instructions Mode d emploi US FR IT-ID20 2000 Sony Corporation WARNING To prevent fire or shock hazard, do not expose the unit to rain or moisture. To avoid
3-046-449-22 (1) CALLER ID Telephone Operating Instructions Mode d emploi US FR IT-ID20 2000 Sony Corporation WARNING To prevent fire or shock hazard, do not expose the unit to rain or moisture. To avoid
accidents and repairs:
 accidents and repairs: putting the pieces together accidents et réparations : réunir le tout nobody can repair your Toyota like Toyota Unfortunately, accidents do happen. And the best way to restore your
WiFi Security Camera Quick Start Guide. Guide de départ rapide Caméra de surveillance Wi-Fi (P5)
") #45 #46 WiFi Security Camera Quick Start Guide Guide de départ rapide Caméra de surveillance Wi-Fi (P5) #47 Start Here 1 Is this you? TECH SUPPORT CTRL ALT DEL 2 If yes, turn to page three 1 3 If not,
#45 #46 WiFi Security Camera Quick Start Guide Guide de départ rapide Caméra de surveillance Wi-Fi (P5) #47 Start Here 1 Is this you? TECH SUPPORT CTRL ALT DEL 2 If yes, turn to page three 1 3 If not,
Nouveautés printemps 2013
 » English Se désinscrire de la liste Nouveautés printemps 2013 19 mars 2013 Dans ce Flash Info, vous trouverez une description des nouveautés et mises à jour des produits La Capitale pour le printemps
Lavatory Faucet. Instruction Manual. Questions? 1-866-661-9606 customerservice@artikaworld.com
 Lavatory Faucet Instruction Manual rev. 19-01-2015 Installation Manual You will need Adjustable Wrench Adjustable Pliers Plumber s Tape Hardware list (included) Allen Key Socket wrench tool Important Follow
Gestion des prestations Volontaire
 Gestion des prestations Volontaire Qu estce que l Income Management (Gestion des prestations)? La gestion des prestations est un moyen de vous aider à gérer votre argent pour couvrir vos nécessités et
APPENDIX 6 BONUS RING FORMAT
 #4 EN FRANÇAIS CI-DESSOUS Preamble and Justification This motion is being presented to the membership as an alternative format for clubs to use to encourage increased entries, both in areas where the exhibitor
PRESENTATION REMOTE TÉLÉCOMMANDE DE PRÉSENTATION. User Guide Manuel de l utilisateur
 PRESENTATION REMOTE TÉLÉCOMMANDE DE PRÉSENTATION User Guide Manuel de l utilisateur Targus Presentation Remote Introduction Thank you for your purchase of the Targus Presentation Remote. This cordless
Folio Case User s Guide
 Fujitsu America, Inc. Folio Case User s Guide I N S T R U C T I O N S This Folio Case is a stylish, lightweight case for protecting your Tablet PC. Elastic Strap Pen Holder Card Holders/ Easel Stops Figure
Logitech Speaker System Z553 Setup Guide Guide d installation
 Logitech Speaker System Z553 Setup Guide Guide d installation Logitech Speaker System Z553 English................. 3 Français................ 10 www.logitech.com/support...19 2 Package contents Logitech
POLICY: FREE MILK PROGRAM CODE: CS-4
 POLICY: FREE MILK PROGRAM CODE: CS-4 Origin: Authority: Reference(s): Community Services Department Cafeteria Services and Nutrition Education Division Resolution #86-02-26-15B.1 POLICY STATEMENT All elementary
CL320. User guide P2 Notice D'utilisation P38 MULTIFUNCTION TELEPHONE 2LMC29YY
 CL320 MULTIFUNCTION TELEPHONE 2LMC29YY 1 User guide P2 Notice D'utilisation P38 CONTENTS CONTENTS 1 INTRODUCTION 3 Unpacking the Telephone 4 DESCRIPTION 5 General Description 5 LCD Screen Description 7
calls.paris-neuroscience.fr Tutoriel pour Candidatures en ligne *** Online Applications Tutorial
 calls.paris-neuroscience.fr Tutoriel pour Candidatures en ligne Online Applications Tutorial 1/4 Pour postuler aux Appels d Offres de l ENP, vous devez aller sur la plateforme : calls.parisneuroscience.fr.
PARIS ROISSY CHARLES DE GAULLE
 GPS 2 34 1 E 49 0 46 N GPS* 2 56 56 E 49 0 12 N Votre contact / Your contact: et / and: Accueil : Cabines téléphoniques publiques Reception: Public telephone kiosks Navette Shuttle AÉROPORT DE TT CAR TRANSIT
USB 598. Quick Start Guide (Windows) Guide de démarrage rapide (Windows) USB Modem. Modem USB. www.sierrawireless.com
 Guide de démarrage rapide (Windows) USB Modem. Modem USB. www.sierrawireless.com") USB 598 With Avec USB Modem Quick Start Guide (Windows) Modem USB Guide de démarrage rapide (Windows) www.sierrawireless.com This guide provides installation instructions for users of: Windows Vista Windows
USB 598 With Avec USB Modem Quick Start Guide (Windows) Modem USB Guide de démarrage rapide (Windows) www.sierrawireless.com This guide provides installation instructions for users of: Windows Vista Windows
English. Français 11. 1. 13. 14.
 916i cr 1 2 3 4 5 6 7 8 9 10 11 12 13 14 15 16 17 18 19 20 English New voice message - (flashing), answer machine on (on), answer machine off (off) and visual ring indicator. Two-way recording/memo Hanging
LOGICIEL D'ADMINISTRATION POUR E4000 & G4000 MANAGEMENT SOFTWARE FOR E4000 & G4000
 LOGICIEL D'ADMINISTRATION POUR E4000 & G4000 MANAGEMENT SOFTWARE FOR E4000 & G4000 TABLE DES MATIÈRES TITRE PAGE Présentation - - - - - - - - - - - - - - - - - - - - - - - - - - - - - - - - - - - -4 Le
Règlement sur le télémarketing et les centres d'appel. Call Centres Telemarketing Sales Regulation
 THE CONSUMER PROTECTION ACT (C.C.S.M. c. C200) Call Centres Telemarketing Sales Regulation LOI SUR LA PROTECTION DU CONSOMMATEUR (c. C200 de la C.P.L.M.) Règlement sur le télémarketing et les centres d'appel
Lesson Plan Physical Descriptions. belle vieille grande petite grosse laide mignonne jolie. beau vieux grand petit gros laid mignon
 Lesson Plan Physical Descriptions Objective: Students will comprehend and describe the physical appearance of others. Vocabulary: Elle est Il est Elle/Il est Elle/Il a les cheveux belle vieille grande
DOCUMENTATION - FRANCAIS... 2
 DOCUMENTATION MODULE SHOPDECORATION MODULE PRESTASHOP CREE PAR PRESTACREA INDEX : DOCUMENTATION - FRANCAIS... 2 INSTALLATION... 2 Installation automatique... 2 Installation manuelle... 2 Résolution des
You're reading an excerpt. Click here to read official SONY IT-ID20 user guide http://yourpdfguides.com/dref/692873
 You can read the recommendations in the, the technical guide or the installation guide for SONY IT-ID20. You'll find the answers to all your questions on the SONY IT-ID20 in the user manual (information,
If you understand the roles nouns (and their accompanying baggage) play in a sentence...
 play in a sentence...") If you understand the roles nouns (and their accompanying baggage) play in a sentence...... you can use pronouns with ease (words like lui, leur, le/la/les, eux and elles)...... understand complicated
If you understand the roles nouns (and their accompanying baggage) play in a sentence...... you can use pronouns with ease (words like lui, leur, le/la/les, eux and elles)...... understand complicated
CLB FR/ANG 7/05/04 14:52 Page 1. Clavier de commande radio CLB800HF NOTICE D'UTILISATION EKZ 0107 00B
 CLB FR/ANG 7/05/04 14:52 Page 1 NOTICE D'UTILISATION EKZ 0107 00B Clavier de commande radio CLB800HF 4ghi 7pqrs 2abc 5jkl 8tuv 0 0 Menu 3def 6mno 9wxyz CLB FR/ANG 7/05/04 14:52 Page 2 Nous vous remercions
3-867-313-21 (1) Cordless Telephone. Operating Instructions. Mode d emploi SPP-ID971. 1999 by Sony Corporation
 Cordless Telephone. Operating Instructions. Mode d emploi SPP-ID971. 1999 by Sony Corporation") 3-867-313-21 (1) Cordless Telephone Operating Instructions Mode d emploi US FR SPP-ID971 1999 by Sony Corporation WARNING To prevent fire or shock hazard, do not expose the unit to rain or moisture. To
3-867-313-21 (1) Cordless Telephone Operating Instructions Mode d emploi US FR SPP-ID971 1999 by Sony Corporation WARNING To prevent fire or shock hazard, do not expose the unit to rain or moisture. To
Editing and managing Systems engineering processes at Snecma
 Editing and managing Systems engineering processes at Snecma Atego workshop 2014-04-03 Ce document et les informations qu il contient sont la propriété de Ils ne doivent pas être copiés ni communiqués
that the child(ren) was/were in need of protection under Part III of the Child and Family Services Act, and the court made an order on
 was/were in need of protection under Part III of the Child and Family Services Act, and the court made an order on") ONTARIO Court File Number at (Name of court) Court office address Applicant(s) (In most cases, the applicant will be a children s aid society.) Full legal name & address for service street & number, municipality,
ONTARIO Court File Number at (Name of court) Court office address Applicant(s) (In most cases, the applicant will be a children s aid society.) Full legal name & address for service street & number, municipality,
PAR RINOX INC BY RINOX INC PROGRAMME D INSTALLATEUR INSTALLER PROGRAM
 PAR RINOX INC BY RINOX INC PROGRAMME D INSTALLATEUR INSTALLER PROGRAM DEVENEZ UN RINOXPERT DÈS AUJOURD HUI! BECOME A RINOXPERT NOW OPTIMISER VOS VENTES INCREASE YOUR SALES VISIBILITÉ & AVANTAGES VISIBILITY
APPENDIX 2. Provisions to be included in the contract between the Provider and the. Holder
 Page 1 APPENDIX 2 Provisions to be included in the contract between the Provider and the Obligations and rights of the Applicant / Holder Holder 1. The Applicant or Licensee acknowledges that it has read
AMENDMENT TO BILL 32 AMENDEMENT AU PROJET DE LOI 32
 THAT the proposed clause 6(1), as set out in Clause 6(1) of the Bill, be replaced with the following: Trustee to respond promptly 6(1) A trustee shall respond to a request as promptly as required in the
Owner's Manual RSB-1410
 Owner's Manual RSB-1410 LED SCROLLING MESSAGE SIGN Page en Français 7 Please read and retain these instructions. To register your product, please go to www.royalsovereign.com Because our products are subject
Once the installation is complete, you can delete the temporary Zip files..
 Sommaire Installation... 2 After the download... 2 From a CD... 2 Access codes... 2 DirectX Compatibility... 2 Using the program... 2 Structure... 4 Lier une structure à une autre... 4 Personnaliser une
Le Cloud Computing est-il l ennemi de la Sécurité?
 Le Cloud Computing est-il l ennemi de la Sécurité? Eric DOMAGE Program manager IDC WE Security products & Solutions Copyright IDC. Reproduction is forbidden unless authorized. All rights reserved. Quelques
Dans une agence de location immobilière...
 > Dans une agence de location immobilière... In a property rental agency... dans, pour et depuis vocabulaire: «une location» et «une situation» Si vous voulez séjourner à Lyon, vous pouvez louer un appartement.
ASSEMBLY INSTRUCTIONS DIRECTIVES POUR L'ASSEMBLAGE ombre pendant lamp lampe suspendue à tons dégradés, chocolat
 ASSEMBLY INSTRUCTIONS DIRECTIVES POUR L'ASSEMBLAGE ombre pendant lamp lampe suspendue à tons dégradés, chocolat SKU 2728089 INSTRUCTIONAL MANUAL MANUEL D'INSTRUCTIONS 270/2707 COMPONENT LIST LISTE DES
Le passé composé. C'est le passé! Tout ça c'est du passé! That's the past! All that's in the past!
 > Le passé composé le passé composé C'est le passé! Tout ça c'est du passé! That's the past! All that's in the past! «Je suis vieux maintenant, et ma femme est vieille aussi. Nous n'avons pas eu d'enfants.
Adeunis-RF Softwares. Stand-Alone configuration Manager V2. User guide version V1 FRANCAIS ENGLISH
 Adeunis-RF Softwares Stand-Alone configuration Manager V2 User guide version V1 FRANCAIS ENGLISH Adeunis RF 283 rue Louis Néel Parc Technologique Pré Roux 38920 Crolles - France Tel : +33 0)4 76 92 07
Using a Walker. 2. Move your injured or weak leg toward the walker first. If you have had surgery on both legs, use either leg to begin walking.
 Using a Walker Walking with a Walker 1. Lift the walker and place it at a comfortable distance in front of you with all four of its legs on the floor. This distance is often equal to an arm s length. 2.
WINTER BOAT STORAGE SYSTEM SYSTÈME DE REMISAGE HIVERNAL POUR BATEAU
 MANUAL / MANUEL VIDEO WINTER BOAT STORAGE SYSTEM SYSTÈME DE REMISAGE HIVERNAL POUR BATEAU ASSEMBLY INSTRUCTIONS GUIDE D ASSEMBLAGE NAVIGLOO 14-18½ ft/pi FISHING BOAT! RUNABOUT! PONTOON BOAT! SAILBOAT (SAILBOAT
CS70 WARRANTY MAINTENANCE TECHNICAL SUPPORT
 WARRANTY Limited Warranty This warranty covers defects in materials and workmanship of products manufactured, sold or certified by Plantronics which were purchased and used in the United States. This warranty
DOCUMENTATION - FRANCAIS... 2
 DOCUMENTATION MODULE CATEGORIESTOPMENU MODULE CREE PAR PRESTACREA INDEX : DOCUMENTATION - FRANCAIS... 2 INSTALLATION... 2 CONFIGURATION... 2 LICENCE ET COPYRIGHT... 3 SUPPORT TECHNIQUE ET MISES A JOUR...
UML : Unified Modeling Language
 UML : Unified Modeling Language Recommended: UML distilled A brief guide to the standard Object Modeling Language Addison Wesley based on Frank Maurer lecture, Univ. of Calgary in french : uml.free.fr/index.html
ASSEMBLY INSTRUCTIONS DIRECTIVES POUR L'ASSEMBLAGE luster chandelier lamp chandelier à trois branches en verre lustré
 ASSEMBLY INSTRUCTIONS DIRECTIVES POUR L'ASSEMBLAGE luster chandelier lamp chandelier à trois branches en verre lustré SKU 2711592 INSTRUCTIONAL MANUAL MANUEL D'INSTRUCTIONS 270/2707 COMPONENT LIST LISTE
SAP SNC Portal. User Guide for Suppliers. M1, M2b Modules - Edition 3. Direction des Achats/Ph.Longuet Date: 4/11/11
 SAP SNC Portal User Guide for Suppliers M1, M2b Modules - Edition 3 Direction des Achats/Ph.Longuet Date: 4/11/11 SAP SNC How to get started with Sagemcom SNC 1 - SNC Portal, what are features? SNC is
Serie 620/630/63 FT - Combinés d essai Series 620/630/63 FT - LINEMAN S TEST SETS
 MON OFF NOTICE D UTILISATION - OPERATING INSTRUCTIONS Serie 620/630/63 FT - Combinés d essai Series 620/630/63 FT - LINEMAN S TEST SETS TALK I I MAR E.DIS SERIE 6 ADSL COMPATIBLE SIGNALSHIELD TM 1 2 MR
Instruction Manual. HS-636-4GBBK MP3 Player
 Instruction Manual HS-636-4GBBK MP3 Player Thank you for your purchase of this Hip Street MP3 player and we hope you enjoy using it. Please visit our website at www.hipstreetonline.com. The display screen
Warning: Failure to follow these warnings could result in property damage, or personal injury.
 Western Steel & Tube 1 Storage Locker Extended Storage Locker Storage Cabinet Assembly And Use Instructions Warning: Failure to follow these warnings could result in property damage, or personal injury.
Critères à l attention des fabricants et des fournisseurs de biens ou de services : dispositifs mécaniques pour bingo
 Alcohol and Gaming Commission des alcools Commission of Ontario et des jeux de l'ontario Gaming Registration & Lotteries Inscription pour les jeux et loteries 90 Sheppard Avenue East 90, avenue Sheppard
Guide d installation Deco Drain inc. DD200
 Guide d installation Deco Drain inc. DD200 Pour plus informations et pour télécharger les guides d installation en couleur, visitez notre site web. www.decodrain.com Soutien technique : Composez le : 514-946-8901
FCM 2015 ANNUAL CONFERENCE AND TRADE SHOW Terms and Conditions for Delegates and Companions Shaw Convention Centre, Edmonton, AB June 5 8, 2015
 FCM 2015 ANNUAL CONFERENCE AND TRADE SHOW Terms and Conditions for Delegates and Companions Shaw Convention Centre, Edmonton, AB June 5 8, 2015 Early-bird registration Early-bird registration ends April
Cheque Holding Policy Disclosure (Banks) Regulations. Règlement sur la communication de la politique de retenue de chèques (banques) CONSOLIDATION
 Regulations. Règlement sur la communication de la politique de retenue de chèques (banques) CONSOLIDATION") CANADA CONSOLIDATION CODIFICATION Cheque Holding Policy Disclosure (Banks) Regulations Règlement sur la communication de la politique de retenue de chèques (banques) SOR/2002-39 DORS/2002-39 Current to
CANADA CONSOLIDATION CODIFICATION Cheque Holding Policy Disclosure (Banks) Regulations Règlement sur la communication de la politique de retenue de chèques (banques) SOR/2002-39 DORS/2002-39 Current to
RULE 5 - SERVICE OF DOCUMENTS RÈGLE 5 SIGNIFICATION DE DOCUMENTS. Rule 5 / Règle 5
 RULE 5 - SERVICE OF DOCUMENTS General Rules for Manner of Service Notices of Application and Other Documents 5.01 (1) A notice of application or other document may be served personally, or by an alternative
ETABLISSEMENT D ENSEIGNEMENT OU ORGANISME DE FORMATION / UNIVERSITY OR COLLEGE:
 8. Tripartite internship agreement La présente convention a pour objet de définir les conditions dans lesquelles le stagiaire ci-après nommé sera accueilli dans l entreprise. This contract defines the
3615 SELFIE. http://graffitiresearchlab.fr HOW-TO / GUIDE D'UTILISATION
 3615 SELFIE http://graffitiresearchlab.fr HOW-TO / GUIDE D'UTILISATION Hardware : Minitel Computer DIN FM545 45 connector (http://www.gotronic.fr/art-fiche-din-fm545-4747.htm) Cable Arduino compatible
Display keypad. Notice d emploi User manual. Part. U3908A - 11/09-01 PC
 Display keypad Notice d emploi User manual 675 07 Part. U3908A - 11/09-01 PC FR UK Français 3 English 25 Index FR 1. Introduction 5 L activateur à clavier et moniteur 6 Le clavier 7 Les touches de navigation
SAP SNC Portal. User Guide for Suppliers. M1, M2b Modules - Edition 1. Direction des Achats/Ph.Longuet Date: 5/08/10
 SAP SNC Portal User Guide for Suppliers M1, M2b Modules - Edition 1 Direction des Achats/Ph.Longuet Date: 5/08/10 SAP SNC How to get started with Sagemcom SNC 1 - SNC Portal, what are features? SNC is
Logitech Wireless Performance Combo MX800 Setup Guide Guide d installation
 Logitech Wireless Performance Combo MX800 Setup Guide Guide d installation Logitech Wireless Performance Combo MX800 Setup Guide Guide d installation Important information Safety, compliance, and warranty
DOCUMENTATION - FRANCAIS... 2
 DOCUMENTATION MODULE PRETTYSLIDER MODULE PRESTASHOP CREE PAR PRESTACREA INDEX : DOCUMENTATION - FRANCAIS... 2 INSTALLATION... 2 Installation automatique... 2 Installation manuelle... 2 Résolution des problèmes...
Utiliser une WebCam. Micro-ordinateurs, informations, idées, trucs et astuces
 Micro-ordinateurs, informations, idées, trucs et astuces Utiliser une WebCam Auteur : François CHAUSSON Date : 8 février 2008 Référence : utiliser une WebCam.doc Préambule Voici quelques informations utiles
Principe de TrueCrypt. Créer un volume pour TrueCrypt
 Sommaire : Principe de TrueCrypt...1 Créer un volume pour TrueCrypt...1 Premier montage...6 Réglages...8 Save Currently Mounted Volumes as Favorite...8 Settings > Preferences...9 TrueCrypt Traveller pour
SERVEUR DÉDIÉ DOCUMENTATION
 SERVEUR DÉDIÉ DOCUMENTATION Release 5.0.6.0 19 Juillet 2013 Copyright 2013 GIANTS Software GmbH, All Rights Reserved. 1/9 CHANGE LOG Correction de bug divers (5.0.6.0) Ajout d une option de relance automatique
Compléter le formulaire «Demande de participation» et l envoyer aux bureaux de SGC* à l adresse suivante :
 FOIRE AUX QUESTIONS COMMENT ADHÉRER? Compléter le formulaire «Demande de participation» et l envoyer aux bureaux de SGC* à l adresse suivante : 275, boul des Braves Bureau 310 Terrebonne (Qc) J6W 3H6 La
MELTING POTES, LA SECTION INTERNATIONALE DU BELLASSO (Association étudiante de lʼensaparis-belleville) PRESENTE :
 PRESENTE :") MELTING POTES, LA SECTION INTERNATIONALE DU BELLASSO (Association étudiante de lʼensaparis-belleville) PRESENTE : Housing system est un service gratuit, qui vous propose de vous mettre en relation avec
MELTING POTES, LA SECTION INTERNATIONALE DU BELLASSO (Association étudiante de lʼensaparis-belleville) PRESENTE : Housing system est un service gratuit, qui vous propose de vous mettre en relation avec
The new consumables catalogue from Medisoft is now updated. Please discover this full overview of all our consumables available to you.
 General information 120426_CCD_EN_FR Dear Partner, The new consumables catalogue from Medisoft is now updated. Please discover this full overview of all our consumables available to you. To assist navigation
Deadline(s): Assignment: in week 8 of block C Exam: in week 7 (oral exam) and in the exam week (written exam) of block D
: Assignment: in week 8 of block C Exam: in week 7 (oral exam) and in the exam week (written exam) of block D") ICM STUDENT MANUAL French 2 JIC-FRE2.2V-12 Module Change Management and Media Research Study Year 2 1. Course overview Books: Français.com, niveau intermédiaire, livre d élève+ dvd- rom, 2ième édition,
ICM STUDENT MANUAL French 2 JIC-FRE2.2V-12 Module Change Management and Media Research Study Year 2 1. Course overview Books: Français.com, niveau intermédiaire, livre d élève+ dvd- rom, 2ième édition,
Restaurant Application Quick Reference Guide
 Restaurant Application Quick Reference Guide Ingenico Telium Canada English Color key Required Merchant Input on Point of Sale Required Customer Input on Internal or External PIN-pad Optional Merchant
Sécurité relative aux sièges auto et aux rehausseurs
 Sécurité relative aux sièges auto et aux rehausseurs Safety with Car Seats and Booster Seats Car crashes are the main cause of accidental death and serious injury of children. Correctly using a car or
Stainless Steel Solar Wall Light
 V 2.9 Stainless Steel Solar Wall Light User Manual Please read and understand all instructions before use.retain this manual for future reference. V 2.9 Stainless Steel Solar Wall Light SPECIFICATIONS
GAME CONTENTS CONTENU DU JEU OBJECT OF THE GAME BUT DU JEU
 GAME CONTENTS 3 wooden animals: an elephant, a Polar bear and an African lion 1 Playing Board with two tree stumps, one red and one blue 1 Command Board double sided for two game levels (Green for normal
Quick Installation Guide TEW-P21G
 Quick Installation Guide TEW-P21G Table of of Contents Contents... 1. Avant de commencer... 2. Comment effectuer les connexions... 3. Utilisation du serveur d'impression... 1 1 2 3 Troubleshooting... 7
Institut français des sciences et technologies des transports, de l aménagement
 Institut français des sciences et technologies des transports, de l aménagement et des réseaux Session 3 Big Data and IT in Transport: Applications, Implications, Limitations Jacques Ehrlich/IFSTTAR h/ifsttar
Quick Start Guide This guide is intended to get you started with Rational ClearCase or Rational ClearCase MultiSite.
 Rational ClearCase or ClearCase MultiSite Version 7.0.1 Quick Start Guide This guide is intended to get you started with Rational ClearCase or Rational ClearCase MultiSite. Product Overview IBM Rational
CONVENTION DE STAGE TYPE STANDART TRAINING CONTRACT
 CONVENTION DE STAGE TYPE STANDART TRAINING CONTRACT La présente convention a pour objet de définir les conditions dans lesquelles le stagiaire ci-après nommé sera accueilli dans l entreprise. This contract
RAPID 3.34 - Prenez le contrôle sur vos données
 RAPID 3.34 - Prenez le contrôle sur vos données Parmi les fonctions les plus demandées par nos utilisateurs, la navigation au clavier et la possibilité de disposer de champs supplémentaires arrivent aux
PORTADA PROGRAMMER MANUAL
 PORTADA PROGRAMMER MANUAL Pag 1 FERMAX 100C MEMOKEY KIT INSTRUCTIONS. Edition: October 2003. This technical document of an informative nature is issued by FERMAX ELECTRONICA S.A.E. The company reserves
R.V. Table Mounting Instructions
 PTSS165 ACCESSORY MOUNTING INSTRUCTIONS Use these instructions in conjunction with your main manual to properly assemble your gas grill. Refer to the main manual for safety, operating, cleaning and maintenance
SAP SNC (Supply Network Collaboration) Web Package. (Français / English) language. Edition 2013 Mars
 Web Package. (Français / English) language. Edition 2013 Mars") SAP SNC (Supply Network Collaboration) Web Package (Français / English) language Edition 2013 Mars Direction des Achats Philippe.longuet@sagemcom.com Date: 28/03/13 Sagemcom portal Content of presentation
SAP SNC (Supply Network Collaboration) Web Package (Français / English) language Edition 2013 Mars Direction des Achats Philippe.longuet@sagemcom.com Date: 28/03/13 Sagemcom portal Content of presentation
MD450 Series. User's Guide > Guide de l'utilisateur >
 MD450 Series Digital 2.4GHz Expandable Cordless Telephone System Système téléphonique sans fil évolutif numérique 2,4 GHz User's Guide > Guide de l'utilisateur > Congratulations on your purchase of a Motorola
DOCUMENTATION MODULE BLOCKCATEGORIESCUSTOM Module crée par Prestacrea - Version : 2.0
 DOCUMENTATION MODULE BLOCKCATEGORIESCUSTOM Module crée par Prestacrea - Version : 2.0 INDEX : DOCUMENTATION - FRANCAIS... 2 1. INSTALLATION... 2 2. CONFIGURATION... 2 3. LICENCE ET COPYRIGHT... 3 4. MISES