Energy Star FOR YOUR SAFETY. FCC Class B Radio Frequency Interference Statement WARNING: (FOR FCC CERTIFIED MODELS)
|
|
|
- Colette Lesage
- il y a 8 ans
- Total affichages :
Transcription
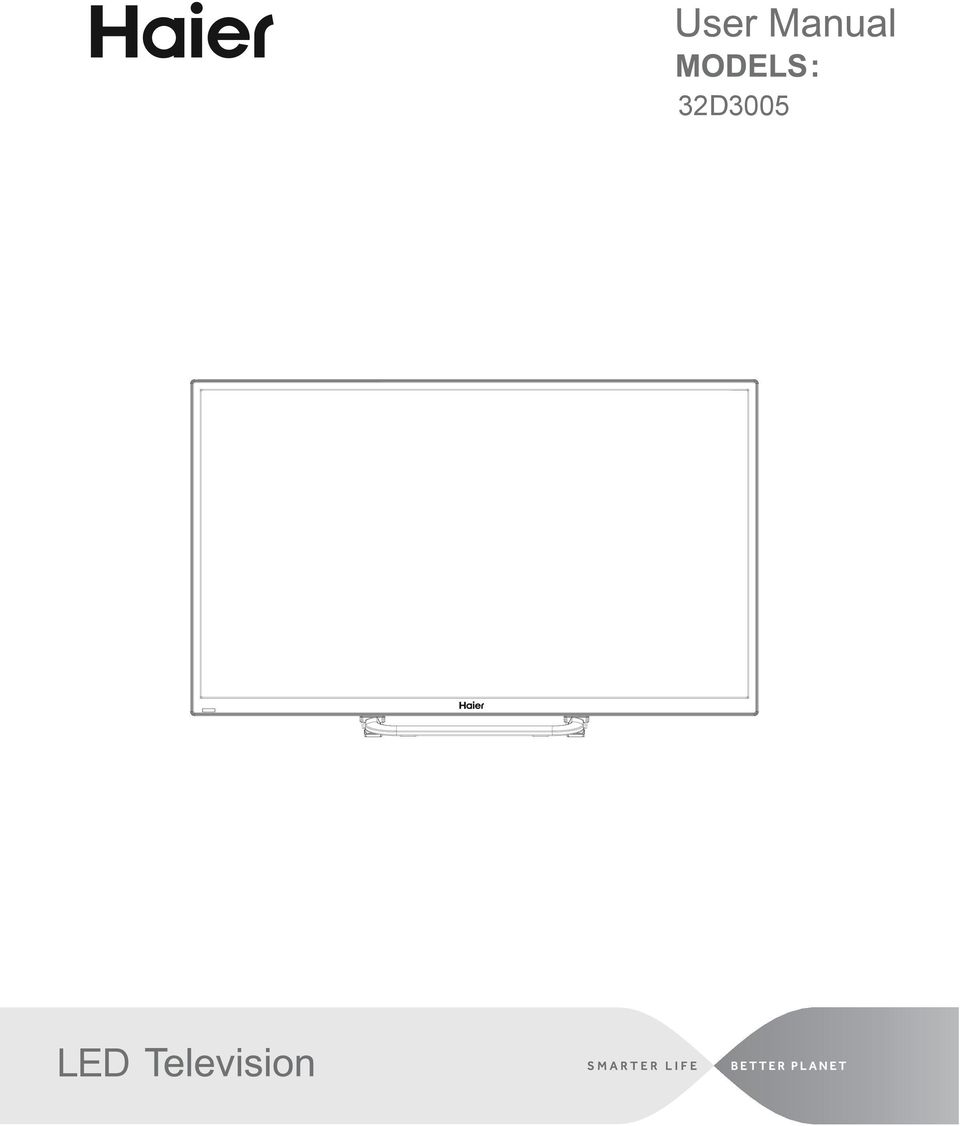
1 LED 32D3005
2 Energy Star This product qualifies for ENERGY STAR in the factory default setting and this is the setting in which power savings will be achieved. Changing the factory default picture setting or enabling other features will increase power consumption that could exceed the limits necessary to qualify for ENERGY STAR rating. SYMBOL SA 1965 SYMBOL DEFINITION DANGEROUS VOLTAGE: The lightning flash with arrowhead symbol, within an equilateral triangle, is intended to alert the user to the presence of uninsulated dangerous voltage within the product s enclosure that may be of sufficient magnitude to constitute a risk of electrical shock to persons. English SA 1966 INSTRUCTIONS: The exclamation point within an equilateral triangle is intended to alert the user to the presence of important operating and maintenance (servicing) instruction in the literature accompanying the appliance. Apparatus shall not be exposed to dripping or splashing and no objects filled with liquids, such as vases, shall be placed on the apparatus. Batteries installed warning Caution - Danger of explosion if battery is incorrectly replaced. Replace only with the same or equivalent type. The batteries (battery pack or batteries installed) shall not be exposed to excessive heat such as sunshine, fire or the like. FOR YOUR SAFETY Before operating the TV, please read this manual thoroughly. This manual should be retained for future reference. FCC Class B Radio Frequency Interference Statement WARNING: (FOR FCC CERTIFIED MODELS) NOTE: This equipment has been tested and found to comply with the limits for a Class B digital device, pursuant to Part 15 of the FCC Rules. These limits are designed to provide reasonable protection against harmful interference in a residential installation. This equipment generates, uses and can radiate radio frequency energy, and if not installed and used in accordance with the instructions, may cause harmful interference to radio communications. However, there is no guarantee that interference will not occur in a particular installation. If this equipment does cause harmful interference to radio or television reception, which can be determined by turning the equipment off and on, the user is encouraged to try to correct the interference by one or more of the following measures: 1. Reorient or relocate the receiving antenna. 2. Increase the separation between the equipment and receiver. 3. Connect the equipment into an outlet on a circuit different from that to which the receiver is connected. 4. Consult the dealer or an experienced radio/tv technician for help. NOTICE 1. The changes or modifications not expressly approved by the party responsible for compliance could void the user's authority to operate the equipment. 2. Shielded interface cables and AC power cord, if any, must be used in order to comply with the emission limits. 3. The manufacturer is not responsible for any radio or TV interference caused by unauthorized modification to this equipment. It is the responsibilities of the user to correct such interference. WARNING: To prevent fire or shock hazard, do not expose the TV to rain or moisture. Dangerously high voltages are present inside the TV. Do not open the cabinet. Refer servicing to qualified personnel only. 1

3 PRECAUTIONS AND REMINDERS Place unit on even surfaces. Unplug immediately if other foreign materials are put inside TV box or if the TV fell down. Do not cover or block any vents and openings. Inadequate ventilation may shorten the life of the display unit and cause overheating. Unplug immediately if malfunction like no video/audio occurs, or smoke and bad odor come from TV. Prohibit/Avoid opening TV cabinet. Avoid direct sunlight, dusty, humid and smoky areas. Don't throw any object inside the TV box like metals or other flammable materials. Remember to unplug the AC cord from the AC outlet before cleaning. Do not use liquid cleaners or aerosol cleaners to clean the display. Call service personnel to clean the internal part of the TV once a year. Don't place the TV in confined spaces or in a box when using it. Make sure to unplug the unit when not in use for a long period of time (days). Do not place the display near water, such as bathtub, washbasin, kitchen sink, laundry tub, swimming pool or in a damp basement. 6 in. NOTE Notice for Remote Control Avoid Dropping Avoid Liquids 2 Avoid Aerosol Cleaners

4 IMPORTANT SAFETY INSTRUCTIONS Read before operating equipment. To reduce the risk of electric shock or component damage, switch off the power before connecting other components to your TV. Read these instructions. Keep these instructions. Heed all warnings. Follow all instructions. Do not use this apparatus near water. Clean only with a dry cloth. Do not block any ventilation openings. Install in accordance with the manufacturer s instructions. Do not install near any heat sources such as radiators, heat registers, stoves, or other apparatus (including amplifiers) that produce heat. Do not defeat the safety purpose of the polarized or grounding-type plug. A polarized plug has two blades and a third grounding prong. The wide blade or the third prong are provided for your safety. If the provided plug does not fit into your outlet, consult an electrician for replacement of the obsolete outlet. Protect the power cord from being walked on or pinched, particularly at plugs, convenience receptacles, and the point where they exit from the apparatus. Only use attachments/accessories specified by the manufacturer. Use only with the cart, stand, tripod, bracket, or table specified by the manufacturer, or sold with the apparatus. When a cart is used, use caution when moving the cart/apparatus combination to avoid injury from tip-over. Unplug this apparatus during lightning storms or when unused for long periods of time. Refer all servicing to qualified service personnel. Servicing is required when the apparatus has been damaged in any way, such as when the power-supply cord or plug is damaged, liquid has been spilled or objects have fallen into the apparatus, the apparatus has been exposed to rain or moisture, does not operate normally or has been dropped. Unplug the power cord before cleaning your TV. When moving your TV from an area of low temperature to an area of high temperature, condensation may form in the housing. Wait before turning on your TV to avoid causing fire, electric shock, or component damage. A distance of at least three feet should be maintained between your TV and any heat source, such as a radiator, heater, oven, amplifier etc. Do not install your TV close to smoke. Operating your TV close to smoke or moisture may cause fire or electric shock. Slots and openings in the back and bottom of the cabinet are provided for ventilation. To ensure reliable operation of your TV and to protect it from overheating, be sure these openings are not blocked or covered. Do not place your TV in a bookcase or cabinet unless proper ventilation is provided. Never push any object into the slots and openings on your TV cabinet. Do not place any objects on the top of your TV. Doing so could short circuit parts causing a fire or electric shock. Never spill liquids on your TV. Your TV should be operated only from the type of power source indicated on the label. If you are not sure of the type of power supplied to your home, consult your dealer or local power company. Do not apply pressure or throw objects at your TV. This may compromise the integrity of the display. The manufacturer s warranty does not cover user abuse or improper installations. The power cord must be replaced when using different voltage than the voltage specified. For more information, contact your dealer. When connected to a power outlet, power is always flowing into your TV. To totally disconnect power, unplug the power cord. Do not overload power strips and extension cords. Overloading can result in fire or electric shock. The wall socket should be installed near your TV and easily accessible. Only power of the marked voltage can be used for your TV. Any other voltage than the specified voltage may cause fire or electric shock. Do not touch the power cord during lightning. To avoid electric shock, avoid handling the power cord during electrical storms. Unplug your TV during a lightning storm or when it will not be used for long period of time. This will protect your TV from damage due to power surges. Do not attempt to repair or service your TV yourself. Opening or removing the back cover may expose you to high voltages, electric shock, and other hazards. If repair is required, contact your dealer and refer all servicing to qualified service personnel. English 3

5 WARNING: Keep your TV away from moisture. Do not expose your TV to rain or moisture. If water penetrates into your TV, unplug the power cord and contact your dealer. Continuous use in this case may result in fire or electric shock. Do not use your TV if any abnormality occurs. If any smoke or odor becomes apparent, unplug the power cord and contact your dealer immediately. Do not try to repair your TV yourself. Avoid using dropped or damaged appliances. If your TV is dropped and the housing is damaged, the internal components may function abnormally. Unplug the power cord immediately and contact your dealer for repair. Continued use of your TV may cause fire or electric shock. Do not install your TV in an area with heavy dust or high humidity. Operating your TV in environments with heavy dust or high humidity may cause fire or electric shock. Follow instructions for moving your TV. Ensure that the power cord and any other cables are unplugged before moving your TV. When unplugging your TV, hold the AC/DC power adapter, not the cord. Pulling on the power cord may damage the wires inside the cord and cause fire or electric shock. When your TV will not be used for an extended period of time, unplug the power cord. To reduce risk of electric shock, do not touch the connector with wet hands. Insert batteries in accordance with instructions. Incorrect polarities may cause the batteries to leak which can damage the remote control or injure the operator. Do not expose batteries to excessive heat such as sunshine, fire or the like. If any of the following occurs, contact the dealer: - The power cord fails or frays. - Liquid sprays or any object drops into your TV. - Your TV is exposed to rain or other moisture. - Your TV is dropped or damaged in any way. - The performance of your TV changes substantially. This apparatus shall not be exposed to dripping or splashing and no objects filled with liquids, such as vases, shall be placed on the apparatus. The mains plug or appliance coupler is used as the disconnect device, the disconnect device shall remain readily operable. CAUTION - These servicing instructions are for use by qualified service personnel only. To reduce the risk of electric shock, do not perform any servicing other than that contained in the operating instructions unless you are qualified to do so. Outdoor Antenna Grounding If an outside antenna is connected to the receiver, be sure the antenna system is grounded so as to provide some protection against voltage surges and built up static charges. Section 810 of the National Electric Code, ANSI/NFPA No , provides information with respect to proper grounding of the mats and supporting structure grounding of the lead-in wire to an antenna discharge unit, size of grounding connectors, location of antenna discharge unit, connection to grounding electrodes and requirements for the grounding electrode. See Figure below. EXAMPLE OF ANTENNA GROUNDING AS PER NATIONAL ELECTRICAL CODE ANTENNA GROUND CLAMP ELECTRIC SERVICE EQUIPMENT ANTENNA DISCHARGE UNIT GROUND CLAMPS GROUNDING CONDUCTORS POWER SERVICE GROUNDING ELECTRODE SYSTEM Note to the CATV system installer: This reminder is provided to call the CATV system installer s attention to Article of the NEC that provides guidelines for proper grounding and, in particular, specifies that the cable ground shall be connected to the 6 English grounding system of the building, as close to the point of cable entry as practical. Please, make sure to connect the power plug to the wall outlet socket after connecting the TV to the adapter! 4

6 English SAVE THESE INSTRUCTIONS Thank you for purchasing this Haier product. This easy-to-use manual will guide you in getting the best use of your product. Remember to record the model and serial number. They are on the label on back of the unit. Model number Serial number Date of purchase Staple your receipt to your manual. You will need it to obtain warranty service 5

7 TABLE OF CONTENTS FOR YOUR SAFETY PRECAUTIONS AND REMINDERS IMPORTANT SAFETY INSTRUCTIONS PREPARATION ATTACHING THE STAND PREPARING YOUR LCD TV FOR WALL MOUNTING TURNING ON THE TV PERIPHERAL CONNECTION AND CONTROLS PERIPHERAL CONNECTION SIDE CONTROL MAKING CONNECTIONS CONNECTING TO AN ANTENNA/CABLE WALL JACK CONNECTING EXTERNAL AUDIO/VIDEO DEVICE CONNECTING PC CONNECTING HEADPHONES CONNECTING DIGITAL AUDIO DEVICE OPERATING INSTRUCTIONS USING THE REMOTE CONTROL INITIAL SETUP INPUT SOURCE NAVIGATING THE ON-SCREEN MENU PICTURE AUDIO CHANNEL SETUP LOCK MEDIA TIPS LEGAL NOTICES PRODUCT SPECIFICATION TROUBLESHOOTING WARRANTY

8 PREPARATION area which may compromise the integrity of the display. The manufacturer s warranty does not cover user abuse or improper installations. TURNING ON THE TV 1. Install the stand and place the TV on a solid surface. ATTACHING THE STAND IMPORTANT: The stand of the TV must be assembled prior to usage. 1. (blanket, foam, cloth, etc.) to prevent any damage to the TV. 2. Fix the stand to the bracket with the four M4x8mm silver screws. 3. Fix the bracket with stand to the bottom of the TV with the four M4x12mm black screws. Min 1m NOTE Ensure that the TV is placed in a position to allow free back cover. sources, To prevent any unsafe situations, no naked such as lighted candles, should be placed on or in the vicinity. Avoid heat, direct sunlight and exposure to rain or water. The equipment shall not be exposed to dripping or splashing. M4x12mm (4pcs black color) M4x8mm (4pcs silver color) PREPARING YOUR LCD TV FOR WALL MOUNTING We suggest that you keep your TV at least 2.36 inches (60 mm) from the wall to prevent cable interference. Before mounting your TV on the wall, you need to remove the stand. For your safety, please use only with a UL listed wall mount bracket with minimum weight of the TV without stand. (Please see page 18 for the weight of the TV.) To attach a wall mount bracket to your TV: 1. Remove the screws holding your TV to the stand. 2. Remove the stand from your TV. 3. Secure the wall mount bracket to the back of your TV using four screws (see page 18 for the size of the screws). Follow the instructions of the user manual that came with the wall mount bracket to install. 2. Connect the antenna cable or cable TV cable to the ANT IN aerial socket on the back of the TV set. See "CONNECTING TO AN ANTENNA/CABLE WALL JACK" on page Remote control: Remove the cover of the battery compartment. Insert the 2 supplied batteries (Type AAA 1.5V). H H TR -A TR -A M 18 M Power: Plug the cord into a working power outlet. NOTE The wall mount bracket and the screws are not included. 5. Turn the TV on: Press on the remote control or POWER button on the side control panel of the TV. 7 English IMPORTANT: Do not apply pressure to the screen display

9 PERIPHERAL CONNECTION AND CONTROLS PERIPHERAL CONNECTION SIDE CONTROL INPUT HDMI3 MENU MHL HDMI2 POWER # Item Description # Item Description 1 HEADPHONE 2 COAXIAL L R VIDEO YPbPr PC AUDIO VGA RF Connect headphones to this jack. When headphones are inserted, the TV speakers will be muted. Connect a coaxial audio cable from a sound bar, stereo system, receiver, etc. Connect the audio cables for a component or composite device. Connect the video cable for a composite device. Connect the video cables for a component device. Connect the audio cable from a computer. Connect the video cable from a computer. Connect an antenna or cable TV cable to this jack. 1 INPUT 2 MENU Press to select the input source. Press the VOL+ button to change to the selected input source. Press to open or close the on-screen menu. 3 VOL+ Press to increase the volume level. 4 VOL- Press to decrease the volume level. 5 CH+ 6 CH- 7 POWER Press to go to the next channel in the channel list. Press to go to the previous channel in the channel list. (standby mode). When the TV is completely disconnect power, unplug the power cord HDMI1 HDMI2(MHL) HDMI3 USB Connect HDMI devices to these jacks. An HDMI cable carries both video and sound. You do not need to make an audio connection for an HDMI device. Note: The HDMI2 port is MHL enabled. Insert a USB storage device to the USB port to view JPEG photos, and listen to MP3 music. (See page 16 for more information.) 8

10 MAKING CONNECTIONS CONNECTING TO AN ANTENNA/CABLE WALL JACK CONNECTING PC PC AUDIO (L/R) CONNECTING HEADPHONES CONNECTING EXTERNAL AUDIO/VIDEO DEVICE Using HDMI cable (best) MHL HDMI2 HDMI3 NOTE NOTE An HDMI cable carries both video and audio. You do not need to use any audio cables. making connections. You can connect MHL devices, such as the Roku Streaming Stick and compatible mobile phones and tablets to the HDMI2(MHL) port. A USB to HDMI cable is required to To play from the external device: connect a mobile phone or tablet to the TV. Please check 1. Turn on the TV and the connected device. the documentation of your device. 2. Press INPUT to open the input source list, then press to highlight the input to which the device was connected and press OK to switch. Select TV to watch TV from the RF input. Select HDMI1, HDMI2(MHL), or HDMI3 to play from a device connected to the HDMI1, HDMI2(MHL), or HDMI3 input. Select Composite to play from the device connected to the COMPOSITE input. Select Component to play from the device connected to the COMPONENT input. Select VGA to play from the PC connected to the PC AUDIO inputs. Using component cables (better) COMPONENT OUT L R Y PB PR Using composite cable (good) COMPOSITE OUT L R VIDEO NOTE Cables are often color-coded to match color-coded jacks. 9 English RGB

11 OPERATING INSTRUCTIONS USING THE REMOTE CONTROL Item Descriptions Power INPUT USB CC HOME 0~9 / number RECALL VOL+/VOL- MUTE MENU CH+/CH - BACK DISPLAY EXIT SAP SLEEP WIDE AUDIO PICTURE OK CH.LIST FAVORITE PLAY REV FWD disconnect power, unplug the power cord. Press to open the input source list. Press to switch to USB input (USB multimedia mode). Press this key to select the CC,ON or OFF mode and CC on Mute. Switch to the HDMI2(MHL) input, If the Roku Streaming Stick is connected, press this button to return to the Roku home screen. Press to enter a TV channel number (Press "." to choose the sub-channel). Press to switch to last viewed channel. Press VOL+ or VOL- to adjust volume level. Press to open or close the on-screen menu. Press CH+ or CH- to change TV channels. Return to the previous menu. If the Roku Streaming Stick is connected, press this button to go back to the previous screen. Press to display the information window. Press to exit the menu or on screen display (OSD). Press to switch sounds: SAP, Stereo, Mono for ATV, or switch audio language for DTV. Press to set the sleep timer. Press to adjust the picture aspect ratio. Press to switch the audio mode. Press to switch the picture mode. Enter the selected option or perform the selected operation. Press to display the Channel List. Press to display the Favorite List. Use the arrow buttons to move around in menus. Press to start playing the MEDIA, or to pause playing.(used for models with MEDIA function only). Press to fast reverse MP3 playback in Music mode. Press to fast forward MP3 playback in Music mode. Enter electronic program guide. If the Roku Streaming Stick is connected, press this button to view more options. 10
. Press to switch to last viewed channel. Press VOL+ or VOL- to adjust volume level. Press to open or close the on-screen menu.")

12 INITIAL SETUP will guide you through setting up basic settings including the menu language, time zone, and TV signal source. 1. Press to turn on the TV. The setup wizard screen opens. Press OK to start the wizard. 2. Press to select Home Mode or Store Mode, then press to continue. Note: Home mode is energy saving mode, store mode is vivid mode. Initial Setup Home mode Store Mode Air Set the signal type to antenna. When set to Air, the TV can receive analog and digital (ATSC) broadcasting signals. Cable Set the signal type to cable. When set to Cable, the TV can receive analog and QAM broadcasting signals. 6. The auto channel scan usually takes a few minutes to complete but can take up to 20 minutes. You can cancel the channel scan by pressing EXIT. Initial Setup Channel Scan The channel scan may take a while to complete. Analog: 0 Digital: 0 RF CH: 30 Total Found: 0 20% Cancel Exit Back Select Next Exit 3. Press to select your language, then press to continue. Initial Setup Please select your preferred language English Language NOTE During initial setup, press to return to the previous screen and press EXIT to exit the initial setup. INPUT SOURCE Press INPUT to open the input source list, then press to highlight an input and press OK to switch. Français Español Back Select Next Exit 4. Press to select your time zone, then press to continue. Initial Setup Time Zone Mountain Newfoundland Atlantic Pacific Alaska Eastern Central Hawaii Samoa Back Select Next Exit 5. Press to select your tuner type, then press to start channel scan. Initial Setup Air Cable Tuner NAVIGATING THE ON-SCREEN MENU 1. Press MENU to open the on-screen menu. 2. Press to select the main menu (Picture/ Audio/Channel/Setup/Lock), then press OK or to enter the sub-menu. 3. Press to highlight a sub-menu item, then press to adjust the setting or select the desired option. 4. Press EXIT to close the on-screen menu. NOTE Press MENU to return to the previous menu. If the main menu is displayed, pressing MENU will close the onscreen menu. Back Select Next Exit 11

13 PICTURE AUDIO Picture Audio Channel Setup Lock Picture Mode Brightness Contrast Color Tint Sharpness Color Temperature Energy Saving Cool Picture Audio Channel Setup Lock Sound Mode Standard Balance 0 Bass 50 Treble 50 Surround Sound off Digital Audio Output Mode Raw Audio Language English Auto Volume Level Off Select Exit Select Exit Picture Mode Select the picture mode. You can select: Standard A standard picture. The contrast, brightness, and sharpness are moderately increased. Vivid A bright and vivid picture. The contrast, brightness, and sharpness are increased. Mild A soft picture. The brightness, contrast and sharpness level are lowered. User Customized picture. Picture settings such as brightness, contrast, and color are manually adjusted. Energy Saving The backlight brightness is decreased to save energy. NOTE Manually adjusting picture settings will automatically change the Picture Mode to User. Brightness Adjust the brightness of the dark areas of the picture. Press to darken the picture. Press to brighten the picture. Contrast Adjust the brightness of the light areas of the picture. Press to decrease the contrast. Press to increase the contrast. Color Adjust the color intensity of the picture. Tint Adjust the color balance of the picture. Press to increase the red tones. Press to increase the green tones. Sharpness Adjust the color details of picture. Press to soften the picture. Press to sharpen the picture. Color Temperature Select the color temperature. You can select: Normal Give the white color a neutral tint. Warm Give the white color a reddish tint. Cool Give the white color a bluish tint. PC Settings Adjust the computer image in VGA input (VGA input only). You can adjust: H-Pos Adjust picture s horizontal position. V-Pos Adjust picture s vertical position. Clock Adjust the sample frequency. Phase Adjust the focus of stable images. Auto Automatically adjust the image settings. Sound Mode Select the sound mode. You can select: Standard Balanced treble and bass. This setting is good for watching standard TV broadcasts. Music Increase the treble and bass and preserve the original sound. This setting is good for listening to a musical program. Theater Moderately decrease and enhance treble and bass for a rich sound experience. News Balance treble and bass. This setting is good for watching a news program. User Let you manually adjust sound settings. NOTE Manually adjusting audio settings will automatically change the Sound Mode to User. Balance Adjust the balance between the left and right audio channels. Bass Adjust the low frequency sound. Press to decrease bass. Press to increase the bass. Treble Adjust the high frequency sound. Press to decrease treble. Press to increase the treble. Surround Sound Activate or deactivate the surround sound function. Digital Audio Output Mode Select digital audio output type. You can select: Raw Pass through the original digital audio sound. PCM Output audio in 2-channel stereo. Audio Language Select an alternate audio language, if available. You can select English/Spanish/French. (Digital channels only) Auto Volume Level Adjust the volume to keep the volume level consistent when switching channels or when switching from a TV show to a commercial. You 12

14 CHANNEL SETUP Picture Audio Channel Setup Lock Air/Cable Auto Scan Favorite Channel Skip Channel Number Channel Label Air Picture Audio Channel Setup Lock Menu Language Aspect Ratio MTS Blue Screen Audio Only Time Noise Reduction English Normal Mono On Off Medium English Select Exit Select Exit Air/Cable Select the signal type. Air Set the signal type to antenna. When set to Air, the TV can receive analog and digital (ATSC) broadcasting signals. Cable Set the signal type to cable. When set to Cable, the TV can receive analog and QAM broadcasting signals. Auto Scan Press OK to start the auto channel scan. Favorite Manually add and skip channels in your favorite channel list. Channel Skip Manually add and skip channels in your channel list. Channel Number Select the channel that you want to assign a customized label. Channel Label Label a channel to make it easier to identify. Picture Audio Channel Setup Lock Select 1. Press OK to label the selected channel. 2. Press 3. Press to select the desired character for a 4. Press OK after all the desired characters are entered. Exit Menu Language Select on-screen display menu language. You can select English/Français/Español. Aspect Ratio Select the display mode. You can select: Full 100% image may appear distorted. (VGA input only) Point to Point Display the VGA signal s original aspect ratio. Black bars might be added for display. (VGA input only) Normal Display the original 4:3 aspect ratio with vertical black bars on the left and right of the image. Wide Use this option to view content recorded in a 16:9 (wide-screen) aspect ratio. Zoom and bottom of the image may be cropped. Cinema Stretch the image at the edges, but keeps a clear image in the center. MTS Select the preferred sound track. You can select: Mono Select this option if there is noise or static from a weak broadcast signal. Stereo Select this option for programs broadcast in stereo sound. SAP Select this option to enable audio in an alternative language, if available. Blue Screen When this option is set to On, the screen will be blue instead of black when there is no input signal. Audio Only audio. NOTE Audio only works only when the input source is TV and the TV is receiving a broadcast signal. To exit audio only mode, press any button. Time Adjust the time settings. Time Zone Select your time zone. Sleep Timer Set the amount of time before the TV Daylight Saving Time Select On (if your viewing area observes Daylight Saving Time) or (if your viewing area does not observe Daylight Saving Time). Clock Set the date and time. 13

15 Noise Reduction Select the noise reduction mode to reduce picture noise (snow). You can select Medium/High. Closed Caption Adjust the closed captioning settings. CC Mode Select closed captioning mode. You can select: CC On Turn on closed captioning. CC on Mute Turn on closed captioning when the sound is muted. Analog CC Select analog closed captioning mode. Digital CC Select digital closed captioning mode. Option Customize digital closed captioning settings. Mode Select Custom to customize below settings or select Default to use default settings. Font Style Select font style. You can select Default/Font 0~Font 7. Font Size Select font size. You can select Default/ Normal/Large/Small. Font Edge Style Select font edge style. You can select Default/None/Raised/Depressed/Uniform/ Left Shadow/Right Shadow. Font Edge Color Select font edge color. You can select Default/Black/White/Red/Green/Blue/Yellow/ Magenta/Cyan. FG Color Select font color. You can select Default/ White/Black/Red/Green/Blue/Yellow/Magenta/ Cyan. BG Color Select background color. You can select Default/Black/White/Red/Green/Blue/Yellow Magenta/Cyan. FG Opacity Select font opacity. You can select Default/Solid/Flashing/Translucent/Transparent. BG Opacity Select background opacity. You can select Default/Solid/Flashing/Translucent/ Transparent. LOCK Picture Audio Channel Setup Lock Enter Password Select 1. Press OK or to enter password. 2. Use the number buttons on the remote control to enter your 4-digit password. The default password is After the correct password is entered, the Lock submenu screen opens. Picture Audio Channel Setup Lock Change Password System Lock US Rating Canada Rating RRT Setting Reset RRT Select Change Password Press OK to set a new 4-digit password. Enter Old Password Enter your old 4-digit password. Enter New Password Enter your new 4-digit password. OK Off Exit Exit Password Enter your new 4-digit password System Lock Turn the US and Canada rating limits on Over Scan Extend part of the display past the visible area of the screen. The resulting picture will zoom in on the image center. Restore Default Reset all settings to the factory defaults. E-manual The electronic user manual. 14

16 US Rating Set the U.S. rating limits. TV U.S. TV ratings. The TV ratings compose of two aspects: age-based and content-based. Picture Audio Channel Setup Lock Picture Audio Channel Setup Lock TV rating levels ALL FV V S L D TV Rating Press OK to Lock or Unlock TV-Y TV-Y7 TV-G TV-PG TV-14 TV-MA U.S TV ratings (content-based) ALL All ratings FV Fantasy violence V Violence S Sexual situations L Strong language D Suggestive dialog Select Press OK to Lock or Unlock Select Exit Exit U.S TV ratings (age-based) TV-Y All children. TV-Y7 Suitable for children 7 and older. TV-G General audiences. TV-PG Parental guidance suggested. TV-14 Parental guidance strongly suggested. TV-MA Mature audiences only. MPAA comes from MPAA rules. MPAA rating levels U.S movie (MPAA) ratings G General audiences. PG Parental guidance suggested. PG-13 Suitable for children 13 and older. Parental guidance suggested for R children under 17. NC-17 Not suitable for children under 17. X Adults only. Canada Rating Set the Canada rating limits. Canada English The ratings are for programs using the English rating system. Canada English rating levels Canadian English ratings C Suitable for all children. C8+ Suitable for children 8 and older. G General audiences. PG Parental guidance suggested. 14+ Suitable for children 14 and older. 18+ Adults only. Canada French The ratings are for programs using the French rating system. Canada French rating levels Canadian French ratings G General audiences. 8 ans+ Suitable for children 8 and older. 13 ans+ Suitable for children 13 and older. 16 ans+ Suitable for children 16 and older. 18 ans+ Adults only. NOTE When a rating is locked, that rating and all other higher ratings are locked. When a rating is unlocked, that rating and all lower ratings are unlocked. RRT Setting Adjust RRT settings. Reset RRT Reset RRT settings to the factory default. English 15
 TV-Y All children. TV-Y7 Suitable for children 7 and older. TV-G General audiences. TV-PG Parental guidance suggested. TV-14 Parental guidance strongly suggested.")
17 MEDIA The USB Media Player allows you to connect a USB device to your TV and play music or photos. 1. Connect your USB device to the USB port on the rear of the TV. 2. Press INPUT and select USB, or press USB on the remote control to switch to USB input. USB 2.0 Select or press on the remote control to stop slide show playback. Select to change repeat mode. You can select Repeat One/Repeat ALL/None. Select to play the music in the current folder. To stop the music playback, highlight and press OK again. Select to display the play list. Press EXIT to close the list. Select resolution, size, date and time. Press OK to close the information screen. Select to rotate the photo 90 clockwise. Select to rotate the photo 90 counterclockwise. Select to zoom in on the photo. Select to zoom out on the photo. Select to view a zoomed photo. Press on the remote control to move and view the photo in detail. Press EXIT to exit. Music Photo Music Title: Artist: Album: Year: Bit Rate: Sampling: Size: 005 N/A N/A K 44K 5027KBytes Select 3. Press to highlight Photo or Music, then press OK. Press to highlight C, then press OK to 4. Press to select the that you want to play, then press OK. 5. To navigate the playback, press to highlight an option on the operation banner, then press OK to execute. Photo 1. Press to highlight an option, then press OK to execute. Select / or press on the remote control to pause or resume slide show playback. Select to display the previous photo. Select to display the next photo. OK OK Photo Repeat ALL IMG_7777.JPG Pause Music Repeat ALL 005.mp3 00:00:20 00:03:40 Pause 1. Press to highlight an option, then press OK to execute. Select / or press on the remote control to pause or resume music playback. Select or press on the remote control to fast reverse music playback. Select or press on the remote control to fast forward music playback. Select to play Select to play Select or press on the remote control to stop music playback. Select to change repeat mode. You can select Repeat One/Repeat ALL/None. Select to display the song list. Press EXIT to close the song list. NOTE In photo and music mode, press EXIT to close the operation banner, and press OK to open it again. In music mode, before pressing to adjust the volume level, press EXIT to close the operation 16

18 TIPS Care of the screen Do not rub or strike the screen with anything hard as this may scratch, mar, or damage the screen permanently. Unplug the power cord before cleaning the screen. Dust the TV by wiping the screen and the cabinet with a soft, clean cloth. If the screen requires additional cleaning, use a clean, damp cloth. Do not use liquid cleaners or aerosol cleaners. Mobile telephone warning To avoid disturbances in picture and sound, malfunctioning of your TV or even damage to the TV, keep your mobile telephone away from the TV. End of life directives We are paying a lot of attention to produce environmentally friendly products. Your new television contains materials, which can be recycled and reused. At the end of its life, specialized companies can dismantle the discarded receiver to collect the reusable materials and to minimize the amount of materials to be disposed of. Please ensure you dispose of your old receiver according to local regulations. Haier is committed to safely recycling electronic products and product materials. Please check for a local recycling location in the United States at: 1800RECYCLING.COM. LEGAL NOTICES Modifications The FCC requires the user to be notified that any changes or modifications made to this device that are not expressly approved by our company may void the user s authority to operate the equipment. Cables Connections to this device must be made with shielded cables with metallic RF/EMI connector hoods to maintain compliance with FCC Rules and Regulations. Canada ICES-003 statement This Class B digital apparatus complies with Canadian ICES-003. Standard Television Receiving Apparatus Appareil de réception télévision ordinaire, Canada BETS- 7/NTMR-7. Canadian notice This Class B digital apparatus meets all requirements of the Canadian Interference-Causing Equipment Regulations. Avis Canadian Cat apparel numerous de la classed B respected toutes les exigencies du règlement sur le materiel brouilleur du Canada. HDMI, the HDMI logo, and High-Definition Multimedia Interface are trademarks or registered trademarks of HDMI Licensing LCC in the United States and other countries. English 17

19 PRODUCT SPECIFICATION NOTE T T Model Viewable Television System Channel Coverage Rear Connectors 32D3005 DISPLAY 32 NTSC, ATSC NTSC: CH2-CH69 (Antenna)/CH1-CH135 (Cable) ATSC: CH2-CH69 (Antenna)/CH1-CH135 (Cable) CONNECTIONS HEADPHONE COAXIAL L R VIDEO YPbPr PC AUDIO VGA RF Side Connectors HDMI1/HDMI2(MHL)/HDMI3 USB WEIGHT & DIMENSION Dimensions with Stand (W x H x D) 28.72" x 18.16" x 7.05" Dimensions without Stand (W x H x D) 28.72" x 17.01" x 2.97" Weight with Stand Weight without Stand Wall Mount Pattern (H x V) Screw type Power Consumption Standby Mains Power 10.3 lbs 9.5 lbs WALL MOUNTING 200 x 200 mm M6 60W < 0.5W POWER V~50/60Hz Audio Power 8W+8W Ambient Temperature 41 F ~ 95 F PACKAGE CONTENTS Package Contents TV unit x 1 TV stand x 1 Remote control x 1 Screws x 8 User manual x 1 Registration card x 1 Battery x 2 18

20 TROUBLESHOOTING Please make these simple checks before calling service. These tips may save you time and money since charges for receiver installation and adjustments of customer controls are not covered under your warranty. Symptoms Ghost or double image No power No picture Good picture but no sound Good sound but poor color Poor picture Items to Check and Actions to Follow This may be caused by obstruction to the antenna due to high rise buildings or hills. Using a highly directional antenna may improve the picture. Check if the TV s AC power cord is plugged into the outlet. Unplug the TV, wait for 60 seconds. Then reinsert plug into the outlet and turn on the TV again. Check antenna connections at the rear of the TV to see if it is properly connected to the TV. Possible broadcast station trouble. Try another channel. Adjust the contrast and brightness settings. Check the Closed Captions control. Some TEXT modes could block the screen. Increase the volume level by pressing the VOL+ button on the remote control or on the TV side control panel. Press the MUTE Adjust the contrast, color and brightness settings. Poor picture quality may occur when an activated S-VHS camera or camcorder is connected to your TV and other peripherals at the English Snowy picture and noise Horizontal dotted line Check the antenna connection. This may be caused by electrical interference (e.g. hair dryer, nearby Television not responding to remote control Pixels (dots) that are always dark or always lit Check whether the batteries are working. Replace if necessary. Clean the remote control sensor lens on the TV. You can still use the buttons on the side of your TV. Your TV is precision-manufactured using an extremely high level of technology. However, sometimes pixels may not display correctly. These types of occurrences are inherent to this type of product and do not constitute a defective product. 19

Paxton. ins-20605. Net2 desktop reader USB
 Paxton ins-20605 Net2 desktop reader USB 1 3 2 4 1 2 Desktop Reader The desktop reader is designed to sit next to the PC. It is used for adding tokens to a Net2 system and also for identifying lost cards.
Notice Technique / Technical Manual
 Contrôle d accès Access control Encodeur USB Mifare ENCOD-USB-AI Notice Technique / Technical Manual SOMMAIRE p.2/10 Sommaire Remerciements... 3 Informations et recommandations... 4 Caractéristiques techniques...
GIGABIT PCI DESKTOP ADAPTER DGE-530T. Quick Installation Guide+ Guide d installation+
 GIGABIT PCI DESKTOP ADAPTER Quick Installation Guide+ Guide d installation+ Check Your Package Contents Quick Installation Guide Gigabit Ethernet PCI Adapter CD with Manual and Drivers DO NOT insert the
ASSEMBLY INSTRUCTIONS DIRECTIVES POUR L'ASSEMBLAGE ombre pendant lamp lampe suspendue à tons dégradés, chocolat
 ASSEMBLY INSTRUCTIONS DIRECTIVES POUR L'ASSEMBLAGE ombre pendant lamp lampe suspendue à tons dégradés, chocolat SKU 2728089 INSTRUCTIONAL MANUAL MANUEL D'INSTRUCTIONS 270/2707 COMPONENT LIST LISTE DES
PRESENTATION REMOTE TÉLÉCOMMANDE DE PRÉSENTATION. User Guide Manuel de l utilisateur
 PRESENTATION REMOTE TÉLÉCOMMANDE DE PRÉSENTATION User Guide Manuel de l utilisateur Targus Presentation Remote Introduction Thank you for your purchase of the Targus Presentation Remote. This cordless
ASSEMBLY INSTRUCTIONS DIRECTIVES POUR L'ASSEMBLAGE luster chandelier lamp chandelier à trois branches en verre lustré
 ASSEMBLY INSTRUCTIONS DIRECTIVES POUR L'ASSEMBLAGE luster chandelier lamp chandelier à trois branches en verre lustré SKU 2711592 INSTRUCTIONAL MANUAL MANUEL D'INSTRUCTIONS 270/2707 COMPONENT LIST LISTE
Thank you for choosing the Mobile Broadband USB Stick. With your USB Stick, you can access a wireless network at high speed.
 Thank you for choosing the Mobile Broadband USB Stick. With your USB Stick, you can access a wireless network at high speed. Note: This manual describes the appearance of the USB Stick, as well as the
Logitech Speaker System Z553 Setup Guide Guide d installation
 Logitech Speaker System Z553 Setup Guide Guide d installation Logitech Speaker System Z553 English................. 3 Français................ 10 www.logitech.com/support...19 2 Package contents Logitech
Garage Door Monitor Model 829LM
 Garage Door Monitor Model 829LM To prevent possible SERIOUS INJURY or DEATH from a closing garage door: NEVER permit children to operate or play with door control push buttons or remote control transmitters.
Guide d'installation rapide TFM-560X YO.13
 Guide d'installation rapide TFM-560X YO.13 Table of Contents Français 1 1. Avant de commencer 1 2. Procéder à l'installation 2 Troubleshooting 6 Version 06.08.2011 16. Select Install the software automatically
User guide Conference phone Konftel 100
 User guide Conference phone Konftel 100 English I Español I Conference phones for every situation Cet emballage contient: 1 x Guide de l utilisateur 1 x Téléphone pour conférences 1 x Transformateur secteur
Thank you for choosing the Mobile Broadband USB Stick. With your USB Stick, you can access a wireless network at high speed.
 Thank you for choosing the Mobile Broadband USB Stick. With your USB Stick, you can access a wireless network at high speed. Note: This manual describes the appearance of the USB Stick, as well as the
Logitech Tablet Keyboard for Windows 8, Windows RT and Android 3.0+ Setup Guide Guide d installation
 Logitech Tablet Keyboard for Windows 8, Windows RT and Android 3.0+ Setup Guide Guide d installation English.......................................... 3 Français.........................................
03/2013. Mod: WOKI-60IP/TR. Production code: DTWIC 6000
 03/2013 Mod: WOKI-60IP/TR Production code: DTWIC 6000 ENCASTRABLE INDUCTION DROP IN INDUCTION 11/2011 TECHNICAL FEATURES DOCUMENTATION S.A.V. Notice d utilisation : FX00326-A Guide d intervention : ---
Contrôle d'accès Access control. Notice technique / Technical Manual
 p.1/18 Contrôle d'accès Access control INFX V2-AI Notice technique / Technical Manual p.2/18 Sommaire / Contents Remerciements... 3 Informations et recommandations... 4 Caractéristiques techniques... 5
Lavatory Faucet. Instruction Manual. Questions? 1-866-661-9606 customerservice@artikaworld.com
 Lavatory Faucet Instruction Manual rev. 19-01-2015 Installation Manual You will need Adjustable Wrench Adjustable Pliers Plumber s Tape Hardware list (included) Allen Key Socket wrench tool Important Follow
Instructions Mozilla Thunderbird Page 1
 Instructions Mozilla Thunderbird Page 1 Instructions Mozilla Thunderbird Ce manuel est écrit pour les utilisateurs qui font déjà configurer un compte de courrier électronique dans Mozilla Thunderbird et
How to Login to Career Page
 How to Login to Career Page BASF Canada July 2013 To view this instruction manual in French, please scroll down to page 16 1 Job Postings How to Login/Create your Profile/Sign Up for Job Posting Notifications
Folio Case User s Guide
 Fujitsu America, Inc. Folio Case User s Guide I N S T R U C T I O N S This Folio Case is a stylish, lightweight case for protecting your Tablet PC. Elastic Strap Pen Holder Card Holders/ Easel Stops Figure
SA-32 / SA-62 INSTRUCTION MANUAL - MANUEL D INSTRUCTIONS
 SA-32 / SA-62 INSTRUCTION MANUAL - MANUEL D INSTRUCTIONS 4 5 6 7 4 5 6 7 1. Telephone Paging Volume Control 1. Contrôle de volume Paging Téléphone 2. Microphone Volume Control 2. Contrôle volume du microphone
Package Contents. System Requirements. Before You Begin
 Package Contents DWA-125 Wireless 150 USB Adapter CD-ROM (contains software, drivers, and manual) Cradle If any of the above items are missing, please contact your reseller. System Requirements A computer
Quick Setup Guide Guide de configuration rapide. Tablet Device SGPT12 Series Tablette électronique Série SGPT12
 Quick Setup Guide Guide de configuration rapide Tablet Device SGPT12 Series Tablette électronique Série SGPT12 Welcome / Bienvenue Congratulations on your purchase of this Xperia Tablet S. This Quick Setup
Warning: Failure to follow these warnings could result in property damage, or personal injury.
 Western Steel & Tube 1 Storage Locker Extended Storage Locker Storage Cabinet Assembly And Use Instructions Warning: Failure to follow these warnings could result in property damage, or personal injury.
Règlement sur le télémarketing et les centres d'appel. Call Centres Telemarketing Sales Regulation
 THE CONSUMER PROTECTION ACT (C.C.S.M. c. C200) Call Centres Telemarketing Sales Regulation LOI SUR LA PROTECTION DU CONSOMMATEUR (c. C200 de la C.P.L.M.) Règlement sur le télémarketing et les centres d'appel
Contents Windows 8.1... 2
 Workaround: Installation of IRIS Devices on Windows 8 Contents Windows 8.1... 2 English Français Windows 8... 13 English Français Windows 8.1 1. English Before installing an I.R.I.S. Device, we need to
Principe de TrueCrypt. Créer un volume pour TrueCrypt
 Sommaire : Principe de TrueCrypt...1 Créer un volume pour TrueCrypt...1 Premier montage...6 Réglages...8 Save Currently Mounted Volumes as Favorite...8 Settings > Preferences...9 TrueCrypt Traveller pour
Fabricant. 2 terminals
 Specifications Fabricant Nominal torque (Nm) 65 Minimal torque (Nm) 0,63 Coil resistance - 20 C (ohms) 20 Rated current DC (A) 1 Rotor inertia (kg.m 2 ) 2.10-3 Weight (kg) 7,20 Heat dissipation continuous
TABLE DES MATIERES A OBJET PROCEDURE DE CONNEXION
 1 12 rue Denis Papin 37300 JOUE LES TOURS Tel: 02.47.68.34.00 Fax: 02.47.68.35.48 www.herve consultants.net contacts@herve consultants.net TABLE DES MATIERES A Objet...1 B Les équipements et pré-requis...2
Instruction Manual. HS-636-4GBBK MP3 Player
 Instruction Manual HS-636-4GBBK MP3 Player Thank you for your purchase of this Hip Street MP3 player and we hope you enjoy using it. Please visit our website at www.hipstreetonline.com. The display screen
User Guide Guide de l utilisateur Guía del Usuario
 User Guide Guide de l utilisateur Guía del Usuario 37" LCD TV Téléviseur ACL de 37 po Televisor LCD de 37" NS-LCD37-09 Insignia NS-LCD37-09 37" LCD TV Contents Introduction...........................................................1
Utiliser une WebCam. Micro-ordinateurs, informations, idées, trucs et astuces
 Micro-ordinateurs, informations, idées, trucs et astuces Utiliser une WebCam Auteur : François CHAUSSON Date : 8 février 2008 Référence : utiliser une WebCam.doc Préambule Voici quelques informations utiles
SERVEUR DÉDIÉ DOCUMENTATION
 SERVEUR DÉDIÉ DOCUMENTATION Release 5.0.6.0 19 Juillet 2013 Copyright 2013 GIANTS Software GmbH, All Rights Reserved. 1/9 CHANGE LOG Correction de bug divers (5.0.6.0) Ajout d une option de relance automatique
Instructions pour mettre à jour un HFFv2 v1.x.yy v2.0.00
 Instructions pour mettre à jour un HFFv2 v1.x.yy v2.0.00 HFFv2 1. OBJET L accroissement de la taille de code sur la version 2.0.00 a nécessité une évolution du mapping de la flash. La conséquence de ce
WiFi Security Camera Quick Start Guide. Guide de départ rapide Caméra de surveillance Wi-Fi (P5)
") #45 #46 WiFi Security Camera Quick Start Guide Guide de départ rapide Caméra de surveillance Wi-Fi (P5) #47 Start Here 1 Is this you? TECH SUPPORT CTRL ALT DEL 2 If yes, turn to page three 1 3 If not,
#45 #46 WiFi Security Camera Quick Start Guide Guide de départ rapide Caméra de surveillance Wi-Fi (P5) #47 Start Here 1 Is this you? TECH SUPPORT CTRL ALT DEL 2 If yes, turn to page three 1 3 If not,
R.V. Table Mounting Instructions
 PTSS165 ACCESSORY MOUNTING INSTRUCTIONS Use these instructions in conjunction with your main manual to properly assemble your gas grill. Refer to the main manual for safety, operating, cleaning and maintenance
APPENDIX 6 BONUS RING FORMAT
 #4 EN FRANÇAIS CI-DESSOUS Preamble and Justification This motion is being presented to the membership as an alternative format for clubs to use to encourage increased entries, both in areas where the exhibitor
Nouveautés printemps 2013
 » English Se désinscrire de la liste Nouveautés printemps 2013 19 mars 2013 Dans ce Flash Info, vous trouverez une description des nouveautés et mises à jour des produits La Capitale pour le printemps
DOCUMENTATION - FRANCAIS... 2
 DOCUMENTATION MODULE SHOPDECORATION MODULE PRESTASHOP CREE PAR PRESTACREA INDEX : DOCUMENTATION - FRANCAIS... 2 INSTALLATION... 2 Installation automatique... 2 Installation manuelle... 2 Résolution des
AUTO ER ADAPT ER SPECIAL USE WARNING
 POWER SPECIALISTS FOR MOBILE COMPUTING AUTO ER ADAPT ER The Lind Automobile Power Adapter is designed to power your laptop computer and to charge its internal battery from an appropriate DC voltage power
Quick Installation Guide TEW-AO12O
 Quick Installation Guide TEW-AO12O Table of of Contents Contents Français... 1 1. Avant de commencer... 1 2. Installation du matériel... 2 3. Montage... 4 Troubleshooting... 6 Version 10.04.2007 1. Avant
WEB page builder and server for SCADA applications usable from a WEB navigator
 Générateur de pages WEB et serveur pour supervision accessible à partir d un navigateur WEB WEB page builder and server for SCADA applications usable from a WEB navigator opyright 2007 IRAI Manual Manuel
Quick Installation Guide TEW-P21G
 Quick Installation Guide TEW-P21G Table of of Contents Contents... 1. Avant de commencer... 2. Comment effectuer les connexions... 3. Utilisation du serveur d'impression... 1 1 2 3 Troubleshooting... 7
Stainless Steel Solar Wall Light
 V 2.9 Stainless Steel Solar Wall Light User Manual Please read and understand all instructions before use.retain this manual for future reference. V 2.9 Stainless Steel Solar Wall Light SPECIFICATIONS
DOCUMENTATION - FRANCAIS... 2
 DOCUMENTATION MODULE CATEGORIESTOPMENU MODULE CREE PAR PRESTACREA INDEX : DOCUMENTATION - FRANCAIS... 2 INSTALLATION... 2 CONFIGURATION... 2 LICENCE ET COPYRIGHT... 3 SUPPORT TECHNIQUE ET MISES A JOUR...
Harmony Smart Keyboard Add-on. Setup Guide Guide d installation
 Harmony Smart Keyboard Add-on Setup Guide Guide d installation Contents / Sommaire English................. 3 Français................. 9 support.myharmony.com/smart-keyboard-add-on 2 E Ch Pg Package contents
CA240/CA240B CA35 CA60 CA120(B) CA240(B) Mode d'emploi
 CA240(B) Mode d'emploi") CA240/CA240B CA35 CA60 CA120(B) CA240(B) Mode d'emploi Français CA35/CA60 CA120(B)/CA240(B) Mixer/Amplificateur FRANÇAIS V1.1 16/07/2013 MODE D'EMPLOI Français SOMMAIRE INTRODUCTION...1 CARACTÉRISTIQUES...1
CA240/CA240B CA35 CA60 CA120(B) CA240(B) Mode d'emploi Français CA35/CA60 CA120(B)/CA240(B) Mixer/Amplificateur FRANÇAIS V1.1 16/07/2013 MODE D'EMPLOI Français SOMMAIRE INTRODUCTION...1 CARACTÉRISTIQUES...1
LOGICIEL D'ADMINISTRATION POUR E4000 & G4000 MANAGEMENT SOFTWARE FOR E4000 & G4000
 LOGICIEL D'ADMINISTRATION POUR E4000 & G4000 MANAGEMENT SOFTWARE FOR E4000 & G4000 TABLE DES MATIÈRES TITRE PAGE Présentation - - - - - - - - - - - - - - - - - - - - - - - - - - - - - - - - - - - -4 Le
AND / ET USER GUIDE UK HARDWIRED CONTROL PANEL UK GUIDE UTILISATEUR CENTRALE D ALARME FILAIRE F 496572 1
 AND / ET UK USER GUIDE HARDWIRED CONTROL PANEL UK F GUIDE UTILISATEUR CENTRALE D ALARME FILAIRE 496572 1 English UK Operator Controls and Displays On both control panel and remote keypad the LEDs display
LG Electronics, Inc. Display Limited Warranty - USA
 LG Electronics, Inc. Display Limited Warranty - USA Your LG Display will be repaired or replaced in accordance with the terms of this warranty, at LGE s option, if it proves to be defective in material
Contrôle d accès Access control MOD-TCPIP-AI. Notice technique / Technical Manual
 Contrôle d accès Access control MOD-TCPIP-AI Notice technique / Technical Manual Notice technique Mod-TCPIP-AI 9 septembre 2008 v.1.0 p.2/16 Sommaire / Contents Sommaire / Contents...2 Remerciements...3
POLICY: FREE MILK PROGRAM CODE: CS-4
 POLICY: FREE MILK PROGRAM CODE: CS-4 Origin: Authority: Reference(s): Community Services Department Cafeteria Services and Nutrition Education Division Resolution #86-02-26-15B.1 POLICY STATEMENT All elementary
3615 SELFIE. http://graffitiresearchlab.fr HOW-TO / GUIDE D'UTILISATION
 3615 SELFIE http://graffitiresearchlab.fr HOW-TO / GUIDE D'UTILISATION Hardware : Minitel Computer DIN FM545 45 connector (http://www.gotronic.fr/art-fiche-din-fm545-4747.htm) Cable Arduino compatible
Gestion des prestations Volontaire
 Gestion des prestations Volontaire Qu estce que l Income Management (Gestion des prestations)? La gestion des prestations est un moyen de vous aider à gérer votre argent pour couvrir vos nécessités et
15 Digital Photo Frame model ADMPF315F. Instructional Manual mnl M10054
 15 Digital Photo Frame model ADMPF315F Instructional Manual mnl M10054 Table of Contents Introduction... Features... Package Contents... Product Highlights... Remote Control Close-up... Application...
Once the installation is complete, you can delete the temporary Zip files..
 Sommaire Installation... 2 After the download... 2 From a CD... 2 Access codes... 2 DirectX Compatibility... 2 Using the program... 2 Structure... 4 Lier une structure à une autre... 4 Personnaliser une
RULE 5 - SERVICE OF DOCUMENTS RÈGLE 5 SIGNIFICATION DE DOCUMENTS. Rule 5 / Règle 5
 RULE 5 - SERVICE OF DOCUMENTS General Rules for Manner of Service Notices of Application and Other Documents 5.01 (1) A notice of application or other document may be served personally, or by an alternative
Software and Hardware Datasheet / Fiche technique du logiciel et du matériel
 Software and Hardware Datasheet / Fiche technique du logiciel et du matériel 1 System requirements Windows Windows 98, ME, 2000, XP, Vista 32/64, Seven 1 Ghz CPU 512 MB RAM 150 MB free disk space 1 CD
a m p l i f i c a t e u r d e p u i s s a n c e s e p t c a n a u x guide d utilisation
 A30.7 a m p l i f i c a t e u r d e p u i s s a n c e s e p t c a n a u x guide d utilisation Bienvenue! Bienvenue avec l ampli Primare A30.7! Le A30.7 est un ampli modulaire sept canaux destiné à une
Logitech Wireless Performance Combo MX800 Setup Guide Guide d installation
 Logitech Wireless Performance Combo MX800 Setup Guide Guide d installation Logitech Wireless Performance Combo MX800 Setup Guide Guide d installation Important information Safety, compliance, and warranty
Le No.1 de l économie d énergie pour patinoires.
 Le No.1 de l économie d énergie pour patinoires. Partner of REALice system Economie d énergie et une meilleure qualité de glace La 2ème génération améliorée du système REALice bien connu, est livré en
WINTER BOAT STORAGE SYSTEM SYSTÈME DE REMISAGE HIVERNAL POUR BATEAU
 MANUAL / MANUEL VIDEO WINTER BOAT STORAGE SYSTEM SYSTÈME DE REMISAGE HIVERNAL POUR BATEAU ASSEMBLY INSTRUCTIONS GUIDE D ASSEMBLAGE NAVIGLOO 14-18½ ft/pi FISHING BOAT! RUNABOUT! PONTOON BOAT! SAILBOAT (SAILBOAT
MODE D EMPLOI USER MANUAL
 notice_cd 853:notice 9/01/08 15:08 Page 1 CAFETIÈRE À DOSETTES Coffee pad machine CD 853 GIACOMO MODE D EMPLOI USER MANUAL notice_cd 853:notice 9/01/08 15:08 Page 2 FRANÇAIS WHITE & BROWN vous félicite
TV / DVD à écran rabattable pour cuisine VSKTV102 Mk II
 TV / DVD à écran rabattable pour cuisine VSKTV102 Mk II Manuel de l Utilisateur Accessoires Les accessoires suivant devraient être dans la boîte : TV Bloc d alimentation Télécommande Schéma de montage
Monitor LRD. Table des matières
 Folio :1/6 Table des matières 1.Installation du logiciel... 3 2.Utilisation du logiciel... 3 2.1.Description de la fenêtre de commande... 3 2.1.1.Réglage des paramètres de communication... 4 2.1.2.Boutons
MiFi 2. Quick Start Guide
 MiFi 2 Quick Start Guide gettingstarted GETTING TO KNOW YOUR MiFi 2 INTELLIGENT MOBILE HOTSPOT With MiFi 2 by Novatel Wireless you can connect laptops, tablets, ereaders, gaming consoles and more up to
RAPID 3.34 - Prenez le contrôle sur vos données
 RAPID 3.34 - Prenez le contrôle sur vos données Parmi les fonctions les plus demandées par nos utilisateurs, la navigation au clavier et la possibilité de disposer de champs supplémentaires arrivent aux
PAR RINOX INC BY RINOX INC PROGRAMME D INSTALLATEUR INSTALLER PROGRAM
 PAR RINOX INC BY RINOX INC PROGRAMME D INSTALLATEUR INSTALLER PROGRAM DEVENEZ UN RINOXPERT DÈS AUJOURD HUI! BECOME A RINOXPERT NOW OPTIMISER VOS VENTES INCREASE YOUR SALES VISIBILITÉ & AVANTAGES VISIBILITY
Start Here Point de départ
 Start Here Point de départ Epson Stylus C88+ Please read these instructions before using the printer. Lisez ces instructions avant d utiliser l imprimante. Install Ink Cartridges Installez les cartouches
Le passé composé. C'est le passé! Tout ça c'est du passé! That's the past! All that's in the past!
 > Le passé composé le passé composé C'est le passé! Tout ça c'est du passé! That's the past! All that's in the past! «Je suis vieux maintenant, et ma femme est vieille aussi. Nous n'avons pas eu d'enfants.
Restaurant Application Quick Reference Guide
 Restaurant Application Quick Reference Guide Ingenico Telium Canada English Color key Required Merchant Input on Point of Sale Required Customer Input on Internal or External PIN-pad Optional Merchant
3M HEPA Vacuum 497AJK. User s Guide
 3M HEPA Vacuum 497AJK User s Guide Table of Contents Section Page Safety Instructions...3 Grounding Instructions...5 Specifications...7 To Operate...7 To Replace Filter...8 Parts List...9 Regulatory Statements...9
Support Orders and Support Provisions (Banks and Authorized Foreign Banks) Regulations
 Regulations") CANADA CONSOLIDATION CODIFICATION Support Orders and Support Provisions (Banks and Authorized Foreign Banks) Regulations Règlement sur les ordonnances alimentaires et les dispositions alimentaires (banques
CANADA CONSOLIDATION CODIFICATION Support Orders and Support Provisions (Banks and Authorized Foreign Banks) Regulations Règlement sur les ordonnances alimentaires et les dispositions alimentaires (banques
Access Point AP-010BT/AP-100BT Guide de démarrage rapide
 Access Point AP-010BT/AP-100BT Guide de démarrage rapide Acc-Pt-FR-QS Rév E 1/15 Connexion du point d accès 1. Faites glisser le joint torique dans le sillon dans le connecteur. Remarque : Si vous choisissez
Compléter le formulaire «Demande de participation» et l envoyer aux bureaux de SGC* à l adresse suivante :
 FOIRE AUX QUESTIONS COMMENT ADHÉRER? Compléter le formulaire «Demande de participation» et l envoyer aux bureaux de SGC* à l adresse suivante : 275, boul des Braves Bureau 310 Terrebonne (Qc) J6W 3H6 La
MiniBrute SE Connection logiciel de configuration 1.0.3
 MANUEL DE L'UTILISATEUR MiniBrute SE Connection logiciel de configuration 1.0.3 1 ére édition: Mai 2014 Les informations contenues dans ce mode d emploi sont sujettes à changements sans préavis et ne représentent
Quick Installation Guide TBW-106UB H/W: V1
 Quick Installation Guide TBW-106UB H/W: V1 Table of Contents... 1. Avant de commencer... 2. Procéder à l'installation... 3. Configuration de l'adaptateur Bluetooth... Troubleshooting... 1 1 2 5 7 Version
Quick Start Guide. Guía de inicio rápido TC-26LX85 TC-32LX85
 Operating Instructions 26 /32 Class 720p LCD HDTV (26.0/31.5 inches measured diagonally) Manual de instrucciones Televisión de alta definición de 720p y clase 26 / 32 de LCD (26,0/31,5 pulgadas medidas
USB 598. Quick Start Guide (Windows) Guide de démarrage rapide (Windows) USB Modem. Modem USB. www.sierrawireless.com
 Guide de démarrage rapide (Windows) USB Modem. Modem USB. www.sierrawireless.com") USB 598 With Avec USB Modem Quick Start Guide (Windows) Modem USB Guide de démarrage rapide (Windows) www.sierrawireless.com This guide provides installation instructions for users of: Windows Vista Windows
USB 598 With Avec USB Modem Quick Start Guide (Windows) Modem USB Guide de démarrage rapide (Windows) www.sierrawireless.com This guide provides installation instructions for users of: Windows Vista Windows
Sécurité relative aux sièges auto et aux rehausseurs
 Sécurité relative aux sièges auto et aux rehausseurs Safety with Car Seats and Booster Seats Car crashes are the main cause of accidental death and serious injury of children. Correctly using a car or
ETABLISSEMENT D ENSEIGNEMENT OU ORGANISME DE FORMATION / UNIVERSITY OR COLLEGE:
 8. Tripartite internship agreement La présente convention a pour objet de définir les conditions dans lesquelles le stagiaire ci-après nommé sera accueilli dans l entreprise. This contract defines the
ARP-090G / ARP-090K NOTICE D'EMPLOI INSTRUCTION MANUAL
 2 7 NOTICE D'EMPLOI INSTRUCTION MANUAL ARP-090G / ARP-090K Lire attentivement la notice avant d utiliser l appareil Before operating this product, please read user manual completely FRANCAIS EMPLACEMENT
FR KE-32TS2U KE-42TS2U
 4-091-567-12 (1) Flat Panel Color KE-32TS2U/KE-42TS2U US FR KE-32TS2U KE-42TS2U Printed in Japan US01COV-UC.p65 Actual total number: Operating Instructions Mode d emploi Manual de instrucciones 2002 Sony
PXL2780MW LED LCD Monitor
 PXL2780MW LED LCD Monitor USER'S GUIDE www.planar.com Content Operation Instructions...1 Unpacking Instructions...3 Safety Precautions...3 Package Overview...5 First Setup...6 Front View of the Product...7
Using a Walker. 2. Move your injured or weak leg toward the walker first. If you have had surgery on both legs, use either leg to begin walking.
 Using a Walker Walking with a Walker 1. Lift the walker and place it at a comfortable distance in front of you with all four of its legs on the floor. This distance is often equal to an arm s length. 2.
Spider IV 15 Manuel de pilotage
 Spider IV 15 Manuel de pilotage 40-00-0187 Remarques importantes pour votre sécurité PRUDENCE RISQUE D ÉLECTROCU- TION NE PAS OUVRIR AVERTISSEMENT: Pour minimiser les risques d incendie et d électrocution,
The new consumables catalogue from Medisoft is now updated. Please discover this full overview of all our consumables available to you.
 General information 120426_CCD_EN_FR Dear Partner, The new consumables catalogue from Medisoft is now updated. Please discover this full overview of all our consumables available to you. To assist navigation
APPENDIX 2. Provisions to be included in the contract between the Provider and the. Holder
 Page 1 APPENDIX 2 Provisions to be included in the contract between the Provider and the Obligations and rights of the Applicant / Holder Holder 1. The Applicant or Licensee acknowledges that it has read
English Q&A #1 Braille Services Requirement PPTC 144918. Q1. Would you like our proposal to be shipped or do you prefer an electronic submission?
 English Q&A #1 Braille Services Requirement PPTC 144918 Q1. Would you like our proposal to be shipped or do you prefer an electronic submission? A1. Passport Canada requests that bidders provide their
Quick Start Guide. Guía de inicio rápido TH-42PX80U TH-50PX80U
 Operating Instructions 42 /50 Class 720p Plasma HDTV (41.6/49.9 inches measured diagonally) Manual de instrucciones Television de alta definición de 720p y clase 42 /50 de Plasma (41,6/49,9 pulgadas medidas
Cheque Holding Policy Disclosure (Banks) Regulations. Règlement sur la communication de la politique de retenue de chèques (banques) CONSOLIDATION
 Regulations. Règlement sur la communication de la politique de retenue de chèques (banques) CONSOLIDATION") CANADA CONSOLIDATION CODIFICATION Cheque Holding Policy Disclosure (Banks) Regulations Règlement sur la communication de la politique de retenue de chèques (banques) SOR/2002-39 DORS/2002-39 Current to
CANADA CONSOLIDATION CODIFICATION Cheque Holding Policy Disclosure (Banks) Regulations Règlement sur la communication de la politique de retenue de chèques (banques) SOR/2002-39 DORS/2002-39 Current to
HP LCD HDTV User s Guide HP LC3260N 32-Inch (81-Centimeter) LCD High-Definition Television
 LCD High-Definition Television") sa6ldtv.book Page i Tuesday, February 21, 2006 12:35 PM HP LCD HDTV User s Guide HP LC3260N 32-Inch (81-Centimeter) LCD High-Definition Television sa6ldtv.book Page ii Tuesday, February 21, 2006 12:35
sa6ldtv.book Page i Tuesday, February 21, 2006 12:35 PM HP LCD HDTV User s Guide HP LC3260N 32-Inch (81-Centimeter) LCD High-Definition Television sa6ldtv.book Page ii Tuesday, February 21, 2006 12:35
worldwide limited warranty and technical support
 worldwide limited warranty and technical support English...1 Canadien-français...6 Warranty Documentation Team Saved date: 11/15/02 11:57 AM Part Number: 311681-121 File name: InsideFrontCover.doc HP NOTEBOOK
LC-46SV49U LC-32SV29U LC-26SV490U
 LC-46SV49U LC-32SV29U LC-26SV490U LIQUID CRYSTAL TELEVISION TÉLÉVISEUR ACL TELEVISOR CON PANTALLA DE CRISTAL LÍQUIDO OPERATION MANUAL MODE D'EMPLOI MANUAL DE OPERACIÓN ENGLISH ESPAÑOL FRANÇAIS LC-26SV490U
Critères à l attention des fabricants et des fournisseurs de biens ou de services : dispositifs mécaniques pour bingo
 Alcohol and Gaming Commission des alcools Commission of Ontario et des jeux de l'ontario Gaming Registration & Lotteries Inscription pour les jeux et loteries 90 Sheppard Avenue East 90, avenue Sheppard
B3225HD LED B4025FHD LED
 GB INSTRUCTION MANUAL FR MANUEL D UTILISATION NL HANDLEIDING ES MANUAL DE INSTRUCCIONES CZ NÁVOD K OBSLUZE SK NÁVOD NA POUŽITIE B3225HD LED B4025FHD LED Contents GB Warning...... 1 Assembling the stand......
CLIM/GTP/27/8 ANNEX III/ANNEXE III. Category 1 New indications/ 1 re catégorie Nouvelles indications
 ANNEX III/ANNEXE III PROPOSALS FOR CHANGES TO THE NINTH EDITION OF THE NICE CLASSIFICATION CONCERNING AMUSEMENT APPARATUS OR APPARATUS FOR GAMES/ PROPOSITIONS DE CHANGEMENTS À APPORTER À LA NEUVIÈME ÉDITION
Le Cloud Computing est-il l ennemi de la Sécurité?
 Le Cloud Computing est-il l ennemi de la Sécurité? Eric DOMAGE Program manager IDC WE Security products & Solutions Copyright IDC. Reproduction is forbidden unless authorized. All rights reserved. Quelques
that the child(ren) was/were in need of protection under Part III of the Child and Family Services Act, and the court made an order on
 was/were in need of protection under Part III of the Child and Family Services Act, and the court made an order on") ONTARIO Court File Number at (Name of court) Court office address Applicant(s) (In most cases, the applicant will be a children s aid society.) Full legal name & address for service street & number, municipality,
ONTARIO Court File Number at (Name of court) Court office address Applicant(s) (In most cases, the applicant will be a children s aid society.) Full legal name & address for service street & number, municipality,
Quick Installation Guide TW100-BRV304
 Quick Installation Guide TW100-BRV304 Table of of Contents Contents Français... 1. Avant de commencer... 2. Installation du matériel... 3. Configuration du routeur... 1 1 2 3 Troubleshooting... 5 Version
Lesson Plan Physical Descriptions. belle vieille grande petite grosse laide mignonne jolie. beau vieux grand petit gros laid mignon
 Lesson Plan Physical Descriptions Objective: Students will comprehend and describe the physical appearance of others. Vocabulary: Elle est Il est Elle/Il est Elle/Il a les cheveux belle vieille grande