Personal Audio System
|
|
|
- Blanche Géraldine Marois
- il y a 8 ans
- Total affichages :
Transcription
1 Personal Audio System RDP-XA900iPN Operating Instructions US Mode d emploi FR Manual de instrucciones ES

2
3

4

5 Owner s Record The serial number is located on the bottom of the unit. Record these numbers in the space provided below. Refer to them whenever you call upon your Sony dealer regarding this product. Model No. RDP-XA900iPN Serial No. Keep the lithium battery out of the reach of children. Should the battery be swallowed, immediately consult a doctor. Dispose of used battery promptly. Keep away from children. For customers in the USA Please register this product on line at Proper registration will enable us to send you periodic updates about new products, services, and other important announcements. Registering your product will also allow us to contact you in the unlikely event that the product needs adjustment or modification. Thank you. WARNING To reduce the risk of fire or electric shock, do not expose this apparatus to dripping or splashing, and do not place objects filled with liquids, such as vases, on the apparatus. To reduce the risk of fire, do not cover the apparatus with newspapers, tablecloths, curtains, etc. Do not place the naked flame sources such as lighted candles on the apparatus. Do not install the appliance in a confined space, such as a bookcase or built-in cabinet. As the main plug is used to disconnect the unit from the mains, connect the unit to an easily accessible AC outlet. Should you notice an abnormality in the unit, disconnect the main plug from the AC outlet immediately. Do not expose batteries or apparatus with batteryinstalled to excessive heat such as sunshine, fire or the like. CAUTION You are cautioned that any changes or modifications not expressly approved in this manual could void your authority to operate this equipment. Danger of explosion if battery is incorrectly replaced. Replace only with the same or equivalent type. Replace the battery with a Sony CR2025 lithium battery. Use of another battery may present a risk of fire or explosion. This symbol is intended to alert the user to the presence of uninsulated dangerous voltage within the product s enclosure that may be of sufficient magnitude to constitute a risk of electric shock to persons. This symbol is intended to alert the user to the presence of important operating and maintenance (servicing) instructions in the literature accompanying the appliance The Caution Marking is put on the Bottom Enclosure. Battery may explode if mistreated. Do not recharge, disassemble or dispose of in fire. The unit is not disconnected from the mains as long as it is connected to the AC outlet, even if the unit itself has been turned off. 1 US

6 For customers in the United States Customer Support Information If you have any questions about this product, you may call; Sony Customer Information Service Center or FOR UNITED STATES CUSTOMERS. NOT APPLICABLE IN CANADA, INCLUDING IN THE PROVINCE OF QUEBEC. POUR LES CONSOMMATEURS AUX ÉTATSUNIS. PAS APPLICABLE AU CANADA, Y COMPRIS LA PROVINCE DE QUÉBEC. Declaration of Conformity Trade Name: SONY Model No.: RDP-XA900iPN Responsible Party: Sony Electronics Inc. Address: Via Esprillo, San Diego, CA USA Telephone No.: This device complies with Part 15 of the FCC Rules. Operation is subject to the following two conditions: (1) This device may not cause harmful interference, and (2) this device must accept any interference received, including interference that may cause undesired operation. NOTE: This equipment has been tested and found to comply with the limits for a Class B digital device, pursuant to Part 15 of the FCC Rules. These limits are designed to provide reasonable protection against harmful interference in a residential installation. This equipment generates, uses and can radiate radio frequency energy and, if not installed and used in accordance with the instructions, may cause harmful interference to radio communications. However, there is no guarantee that interference will not occur in a particular installation. If this equipment does cause harmful interference to radio or television reception, which can be determined by turning the equipment off and on, the user is encouraged to try to correct the interference by one or more of the following measures: Reorient or relocate the receiving antenna. Increase the separation between the equipment and receiver. Connect the equipment into an outlet on a circuit different from that to which the receiver is connected. Consult the dealer or an experienced radio/tv technician for help. Important Safety Instructions 1) Read these instructions. 2) Keep these instructions. 3) Heed all warnings. 4) Follow all instructions. 5) Do not use this apparatus near water. 6) Clean only with dry cloth. 7) Do not block any ventilation openings. Install in accordance with the manufacturer s instructions. 8) Do not install near any heat sources such as radiators, heat registers, stoves, or other apparatus (including amplifiers) that produce heat. 9) Do not defeat the safety purpose of the polarized or grounding-type plug. A polarized plug has two blades with one wider than the other. A grounding type plug has two blades and a third grounding prong. The wide blade or the third prong are provided for your safety. If the provided plug does not fit into your outlet, consult an electrician for replacement of the obsolete outlet. 10)Protect the power cord from being walked on or pinched particularly at plugs, convenience receptacles, and the point where they exit from the apparatus. 11)Only use attachments/accessories specified by the manufacturer. 12)Use only with the cart, stand, tripod, bracket, or table specified by the manufacturer, or sold with the apparatus. When a cart is used, use caution when moving the cart/apparatus combination to avoid injury from tip-over. 13)Unplug this apparatus during lightning storms or when unused for long periods of time. 14)Refer all servicing to qualified service personnel. Servicing is required when the apparatus has been damaged in any way, such as power-supply cord or plug is damaged, liquid has been spilled or objects have fallen into the apparatus, the apparatus has been exposed to rain or moisture, does not operate normally, or has been dropped. 2 US

7 This equipment must not be co-located or operated in conjunction with any other antenna or transmitter. This equipment complies with FCC/IC radiation exposure limits set forth for an uncontrolled environment and meets the FCC radio frequency (RF) Exposure Guidelines in Supplement C to OET65 and RSS-102 of the IC radio frequency (RF) Exposure rules. This equipment should be installed and operated keeping the radiator at least 20 cm or more away from person's body (excluding extremities: hands, wrists, feet and ankles). For customers in Canada This device complies with Industry Canada licenceexempt RSS standard(s). Operation is subject to the following two conditions: (1) this device may not cause interference, and (2) this device must accept any interference, including interference that may cause undesired operation of the device. Under Industry Canada regulations, this radio transmitter may only operate using an antenna of a type and maximum (or lesser) gain approved for the transmitter by Industry Canada. To reduce potential radio interference to other users, the antenna type and its gain should be so chosen that the equivalent isotropically radiated power (e.i.r.p.) is not more than that necessary for successful communication. For the State of California, USA only Perchlorate Material - special handling may apply, See Perchlorate Material: Lithium battery contains perchlorate. 3 US
.")
8 Table of Contents Overview of this Personal Audio System...5 Guide to Parts and Controls...7 Main unit...7 Remote control...10 Getting Started Preparing the Unit and the Remote Control...11 Connecting to an AC power source...11 Preparing the remote control...11 Turning on the unit...11 Connecting Your Network...12 Connecting to a Wi-Fi network...12 Connecting to a wired network...12 Option 3: Wi-Fi Connection using Access Point Scan...13 Enjoying the Audio Content Listening to ipod...16 Listening with the AirPlay Function...18 Listening to Bluetooth Devices...19 Pairing with a Bluetooth device...19 Operating a Bluetooth device...19 Listening to Other Components...21 Updating the Software...21 Initializing the Unit...22 Additional Information Troubleshooting...23 Specifications...27 Compatible ipad/iphone/ipod Models and Computers...28 System Requirements for the Computer for Setting up the AirPlay Function...29 Precautions US

9 Overview of this Personal Audio System This unit enables you to enjoy sound from various sources. AirPlay Bluetooth TV, etc. Portable Audio Player, etc. ipod You can enjoy sound from an ipod, iphone or ipad by setting it on the Docking Tray of this unit, while charging it at the same time (page 16). 5 US
.")
10 AirPlay You can enjoy sound from an ipad/iphone/ipod touch or itunes with this unit anywhere in your home (page 18). You will need to set your ipad/iphone/ipod touch to a Wi-Fi network, and connect this unit to that network. Bluetooth You can listen to sound from a Bluetooth device, such as a mobile phone, by wirelessly connecting it to this unit (page 19). TV, etc. You can listen to sound from an optional component, such as a TV or CD player, by connecting it to the AUDIO IN (DIGITAL) terminal of this unit (page 21). Portable Audio Player, etc. You can listen to sound from an optional component, such as a portable audio player, by connecting it to the AUDIO IN (ANALOG) terminal of this unit (page 21). 6 US
 terminal of this unit (page 21).")
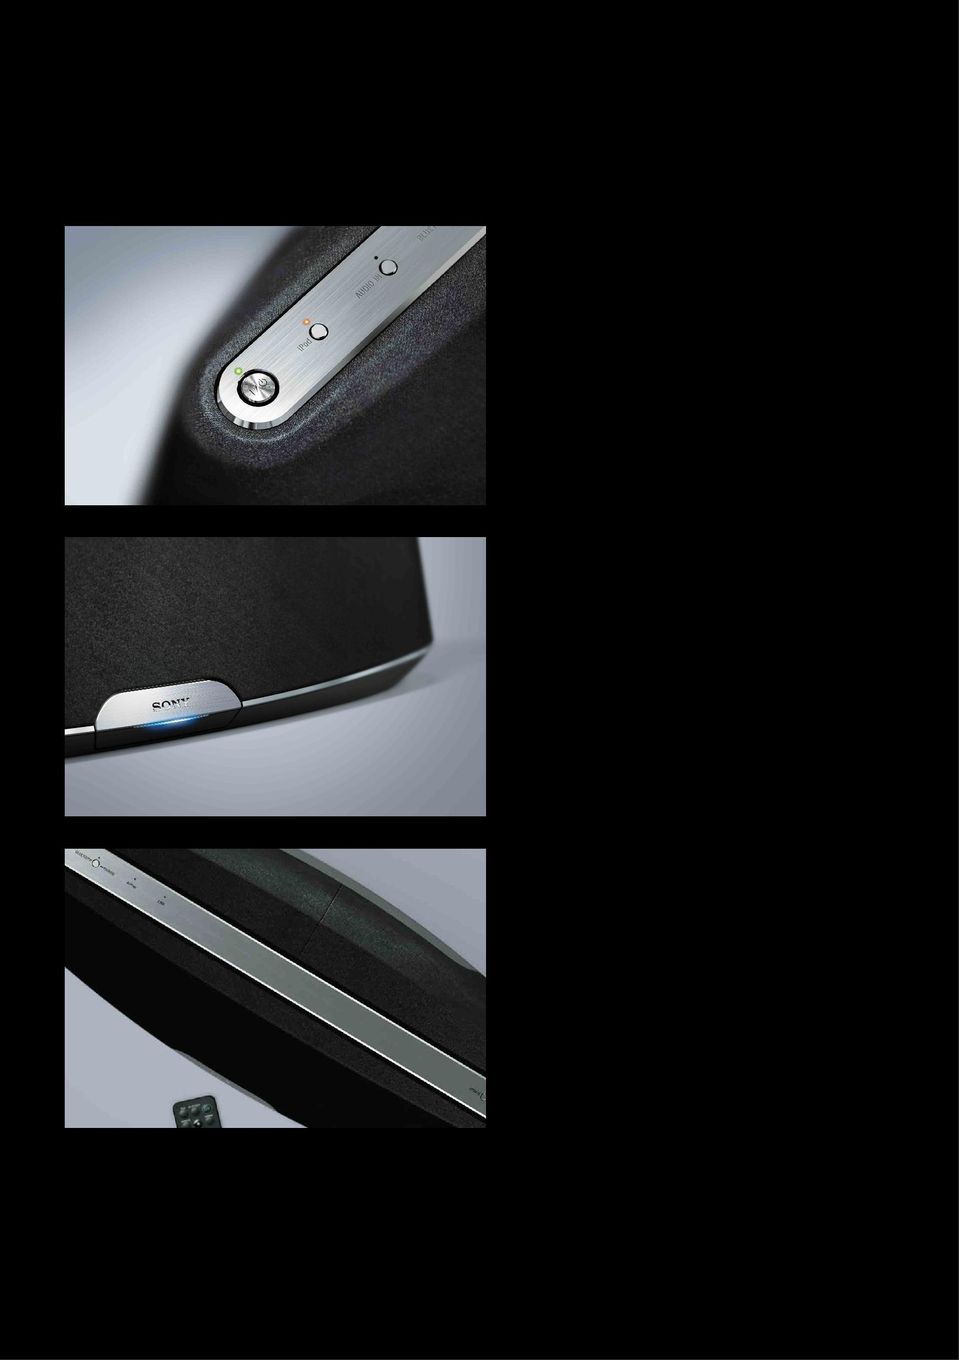
11 Guide to Parts and Controls Main unit Top/Front A Docking Tray Press the Docking Tray on the front of the unit to open or close it. Set your ipod on the Docking Tray when you want to operate it on the tray or charge it (page 16). B Input Status indicator Indicates the input status of the unit. White (normal): The unit is in the ipod / AUDIO IN mode. White (small): The unit is in the AirPlay / Bluetooth mode and the connection is not established. Green: The unit is in the AirPlay mode and the connection is established. Blue: The unit is in the Bluetooth mode and the connection is established. Flashes when the operation is started. Flashes three times when the volume is set to minimum or maximum. C Remote sensor (inside) D?/1 (On/Standby) button, indicator Turns the unit on (page 11), or places in standby/network standby mode. Indicates the power status of the unit. Green (lit): The unit is turned on. Green (flashing): The unit is being turned on. Red: The unit is in the standby mode. Amber: The unit is in the network standby mode. Tips When the unit is in the network standby mode and receives a command to playback on an AirPlay device, the unit turns on and starts playback automatically. 7 US

12 To switch the unit between the standby mode and network standby mode, press and hold the?/1 button until the colour of the?/1 indicator changes. E ipod, AUDIO IN, BLUETOOTH PAIRING buttons, indicators Selects a source device (page 16, 19, 21). Lights up amber (ipod or AUDIO IN) or blue (Bluetooth) according to a selected source. The BLUETOOTH indicator shows Bluetooth connection status. Blue (lit): Connection has been established. Blue (flashing slowly): Connection is being established. Blue (flashing quickly): Pairing mode is activated. F AirPlay indicator Lights up green when the unit is in the AirPlay mode. G LINK indicator Indicates the connection status of the wired/wi-fi network. Green (lit): Wi-Fi connection has been established. Green (flashing): Wi-Fi connection is being established. Amber (lit): Wired connection has been established. Amber (flashing): Wired connection is being established. Red (flashing): One of the following has occurred. This unit cannot find the wireless LAN router/access point. The security method/password selected for the wireless LAN router/access point is wrong. An error has occurred. Not lit: The Wi-Fi network setting process is not finished. H UPDATE button, indicator Press and hold to start updating the software of the unit (page 21). Indicates the update status of the unit. Green (lit): The unit can be updated. Green (flashing): The unit is updating. Not lit: The unit does not need updating. I u (Play/Pause) button Starts playback of the device. Press repeatedly to pause/resume playback. J VOLUME +/ button Adjusts the volume. 8 US
: Pairing mode is activated. F AirPlay indicator Lights up green when the unit is in the AirPlay mode.")
13 Rear A WPS button Use to connect the unit to your Wi-Fi network, refer to the supplied AirPlay via Wi-Fi Network Setup for details. B LAN port Connect a network (LAN) cable (not supplied, page 12). C RESET (NETWORK) button Press and hold to reset the network settings (the?/1 indicator starts flashing). Use a thin object, such as a small pin. Note Settings other than network settings, including Bluetooth pairing information, are not reset. D AUDIO IN terminals DIGITAL (OPT): Connect to the digital (optical) output jack of an external component (page 21). ANALOG: Connect to the analog (stereo) output jack of an external component (page 21). E AC IN terminal Connect the supplied AC power cord (page 11). 9 US
: Connect to the digital (optical) output jack of an external component (page 21).")
14 Remote control A ipod, AUDIO IN, BLUETOOTH buttons Selects a source device (page 16, 19, 21). B u (Play/Pause) button Starts playback of the device. Press repeatedly to pause/resume playback. > (Forward) button Go to the next track. Press and hold to locate a desired point.. (Backward) button Go back to the previous track. During playback, this operation returns to the beginning of the current track. To go back to the previous track, press twice. Press and hold to locate a desired point. C?/1 (On/Standby) button Turns the unit on (page 11), or places in standby/network standby mode. D DIMMER button Changes the brightness of the Input Status indicator (bright/dark/off). E MENU button Returns to the previous menu of the ipod on the Docking Tray. ENTER button Enters the selected menu item or begin playback. V (Up)/v (Down) button Selects a menu item or track for playback. F VOL (Volume) +/ button Adjusts the volume. 10 US
 button Turns the unit on (page 11), or places in standby/network standby mode. D DIMMER button Changes the brightness of the Input Status indicator (bright/dark/off).")
15 Getting Started Preparing the Unit and the Remote Control Connecting to an AC power source 1 Plug the connector of the AC power cord into the AC IN terminal on the unit. To replace the battery of the remote control If the remote control stops working, replace the battery (CR2025) with a new one. j the e side facing up Turning on the unit 2 Plug the AC power cord to a wall outlet (the mains). Press the?/1 button The?/1 indicator starts flashing. You can operate the unit when the?/1 indicator stops flashing and lights up green. The LINK indicator also starts flashing. You can set up or use the AirPlay function when it stops flashing. It may take a while for these indicators to stop flashing. Preparing the remote control Before using the remote control for the first time, remove the insulation film. Note After playback of the connected device has finished, if no operation is performed for about 20 minutes, the unit will automatically enter standby/network standby mode. 11 US

16 Connecting Your Network See the following descriptions to determine the correct way to set up. Connecting to a Wi-Fi network Option 1: Wi-Fi Connection using WPS Push Button Configuration Method Setup device: Wireless LAN router/access point Connecting to a wired network Option 4: Wired Connection Connect the unit and a wireless LAN router/ access point by network (LAN) cable (not supplied). Then turn this unit on. The LINK indicator lights up amber when the connection is established (about 90 seconds later). Refer to A in the supplied AirPlay via Wi-Fi Network Setup for details. Option 2: Wi-Fi Connection using D-Sappli* Setup device: ipad/iphone/ipod touch Refer to B in the supplied AirPlay via Wi-Fi Network Setup for details. * For details on D-Sappli, see page 17. Option 3: Wi-Fi Connection using Access Point Scan (page 13) Setup device: Mac or PC 12 US
. Refer to A in the supplied AirPlay via Wi-Fi Network Setup for details.")
17 Option 3: Wi-Fi Connection using Access Point Scan 1 Prepare for the following devices. This unit Mac or PC Wireless LAN router/access point Network (LAN) cable (not supplied) if needed 2 Have your wireless network name (SSID) and Security Key (if applicable) available for reference. SSID (Wireless Network Name) For Mac Start Safari and select [Bonjour] under [Bookmarks], then select [SONY: RDP- XA900iPN]. For PC Start the browser and input either of the following URLs into the browser s address bar. When using a network (LAN) cable When connecting wirelessly Security Key (WEP or WPA key) Refer to the operating instructions of the wireless LAN router/access point. 3 Connect the unit and the Mac or PC using a network (LAN) cable (not supplied). Then turn this unit on. Wait for about 4 minutes until the LINK indicator lights up amber. 5 Select the desired language when the [Language Setup] screen appears. Tip You can also perform this procedure wirelessly. See To connect wirelessly (page 14). 4 Access the [Sony Network Device Setting] screen. 6 Select [Network Settings] from the menu. Network Settings 13 US
![SSID (Wireless Network Name) For Mac Start Safari and select [Bonjour] under [Bookmarks], then select [SONY: RDP- XA900iPN].](/docs-images/43/1669511/images/page_17.jpg "For PC Start the browser and input either of the following URLs into the browser s address bar.")
18 7 Select the SSID of the wireless LAN router/access point, then input the Security Key (if applicable). For Windows 8 UI Turn on PC. Move the mouse pointer to the top-right (or bottom-right) corner on the Start screen to display the charms, and select [Settings]. With a touch panel, display the charms by swiping from the right end of the Start screen, and select [Settings]. SSID 8 Select [Apply]. 9 Disconnect the network (LAN) cable from the unit following the on-screen instructions. The unit restarts automatically, then the LINK indicator lights up green when the connection is established. To connect wirelessly Note Before starting this procedure, be aware that your Wi-Fi network will not be protected until the setting is complete. After the setting is complete, your Wi-Fi network will be protected again when you set a wireless LAN security. 1 Turn the unit on. 2 Press and hold the RESET (NETWORK) button on the rear of the unit with a thin object such as a small pin until the?/1 indicator starts flashing. 3 Turn the unit on again. Then wait for about 70 seconds 120 seconds until the LINK indicator turns off. 4 Connect the unit and a Mac or PC. For Mac OS X Turn on Mac. Click icon on the top of the screen. Turn on the Wi-Fi or AirPort. Then select [Open Network Preferences ]. Select [RDP-XA900iPN_Setup] from the network list. Select or tap the or icon. Select [RDP-XA900iPN_Setup] from the network list. For Windows 7/Windows 8 Turn on PC. Click icon on the bottom of the screen. Select [RDP-XA900iPN_Setup] from the network list. For Windows Vista Turn on PC. Click icon on the bottom of the screen. Click [Connect to a network]. Select [RDP-XA900iPN_Setup] from the network list. 5 Perform steps 4 to 8 above. The unit restarts automatically, then the LINK indicator lights up green when the connection is established. 6 Reconnect the Mac or PC to your network. Note This procedure needs to be completed within 10 minutes. If you cannot complete, start over from step US
![With a touch panel, display the charms by swiping from the right end of the Start screen, and select [Settings]. SSID 8 Select [Apply].](/docs-images/43/1669511/images/page_18.jpg "9 Disconnect the network (LAN) cable from the unit following the on-screen instructions. The unit restarts automatically, then the LINK indicator lights up green when the connection is established.")
19 About the LINK indicator Notes Once you press and hold the RESET (NETWORK) button, the network settings of the unit are reset. Settings other than network settings, including Bluetooth pairing information, are not reset. Lights up green. (Green) The Wi-Fi network connection is established. Flashes green. This unit is in the process of connecting to the Wi-Fi network. (Green) Please wait. Lights up amber. (Amber) Flashes amber. The wired network connection is established. This unit is in the process of connecting to the wired network. (Amber) Please wait. Flashes red k Lights up red An error has occurred. Try again from the beginning, or adjust your (Red) network settings. The indicator turns off. (Nothing) No connection is established. Tips You can also connect the unit to your wireless or wired network by other methods including Manual Setup, WPS PIN, etc. You can set up Fixed IP, as required. You can set up a Proxy Server, as required. When a problem occurs while you are making the network settings Press and hold the RESET (NETWORK) button on the rear of the unit with a thin object such as a small pin (page 9). 15 US
 Please wait. Flashes red k Lights up red An error has occurred.")
20 Enjoying the Audio Content Listening to ipod 1 Press the ipod button. 2 Press the Docking Tray on the front of the unit to open it. 3 Set your ipod on the Docking Tray. Do not carry the unit with an ipod set on the Docking Tray. Doing so may cause a malfunction. When placing or removing the ipod, hold the Docking Tray securely. Before disconnecting the ipod, pause playback. If the battery of your ipod is extremely low, charge it for a while before operation. Sony cannot accept responsibility in the event that data recorded to an ipod is lost or damaged when using an ipod connected to this unit. For details of environmental conditions for operating your ipod, check the website of Apple Inc. To use the unit as a battery charger You can use the unit as a battery charger. The charging status appears in the ipod display. For details, see the user s guide of your ipod. When the unit is in standby mode, the battery may not be charged, even if you connect the ipod to the Dock connector. In this case, turn on the unit. Tip If a pop-up message appears on the display of the ipod, refer to AirPlay via Wi-Fi Network Setup or see About D-Sappli (page 17). 4 Press the u button. The ipod begins to play back. You can operate the connected ipod via this unit or the ipod itself. Notes Remove the case or cover from your ipod before setting in the Docking Tray if a good connection cannot be ensured. When placing or removing the ipod, hold the ipod at the same angle as that of the connector of the Docking Tray. Do not twist or bend the ipod as it may damage the connector. 16 US

21 About D-Sappli A dedicated dock app for ipod touch, iphone, and ipad available at Apple App Store. Search for D-Sappli and download the free app to find out more about the functions. Features D-Sappli can be used to connect the unit to your network. Refer to the supplied AirPlay via Wi-Fi Network Setup for details. The Sound EQ function allows you to create your own equalizer settings. You can select equalizer presets, or customize settings to your taste. This function is available only when an ipod touch, iphone or ipad is set on the Docking Tray. To re-activate the App s link function, repeat the above steps. The indicator for ipod will flash slowly. When you remove the ipod from the Docking Tray, the Sound EQ function setting will return to the default. When the sound volume is high, the Sound EQ function may not be effective. D-Sappli includes three timer functions: Music Play Timer, Sleep Timer and Alarm. The Music Play Timer allows you to play/pause desired music at a desired time. The Sleep Timer allows you to specify a time at which the music playback will stop. The Alarm includes a repeat function and snooze function. You can select ipod or a preset sound as the sound source. These three functions work in combination with the power supply of the unit. D-Sappli also includes a clock display enlarge feature. Notes If the App to link with this unit is not downloaded to your ipod, a pop-up message prompting you to download D-Sappli may appear repeatedly. Deactivate the App s link function to stop the popup message. To deactivate the App s link function, connect the AC power cord, then press the?/1 button to turn on the unit. Remove your ipod from the Dock connector, and then press and hold the VOLUME and u buttons simultaneously for more than 2 seconds. (The indicator for ipod flashes rapidly when deactivated.) 17 US
22 Listening with the AirPlay Function 1 Check that the unit and your ipod touch, iphone, ipad or itunes are connected to your network. For details on how to connect the unit to the network, see page Select SONY: RDP-XA900iPN on the AirPlay menu of itunes or your ipod touch, iphone or ipad. ipod touch, iphone or ipad Tips Update the software of your ipod touch, iphone or ipad to the latest version beforehand. For details on how to operate ipod touch, iphone, ipad or itunes, refer to the operating instructions or the help documentation of your device or software. 2 Tap/click on the icon at the bottom right of the iphone, ipod touch or ipad screen or top center of the itunes window. itunes SONY: RDP- XA900iPN SONY: RDP- XA900iPN ipod touch, iphone or ipad 4 Start playing back audio content on the ipod touch, iphone, ipad or itunes. The unit starts playing back automatically. Tip If playback does not start, perform the process again from step 1. itunes To control AirPlay playback You can use the VOLUME +/, u buttons on the unit and the VOLUME +/, u,. and > buttons on the remote control. Operation from the unit and the remote control is active only when the unit is selected as the device for output. When you use itunes, set it to accept control from the unit and the remote control when you want to use the unit and the remote control to operate itunes. 18 US
23 Listening to Bluetooth Devices By using the Bluetooth connection, you can listen to the sound from a Bluetooth device such as a mobile phone or portable audio player with the unit wirelessly. Bluetooth devices need to be paired with each other beforehand. Once Bluetooth devices are paired, there is no need for pairing again, unless pairing information is deleted. Pairing with a Bluetooth device You can register up to nine Bluetooth devices to be paired on the unit. If you register a 10th device, the least recently used information is deleted. 1 Keep a Bluetooth device and the unit within one meter of each other for this operation. 2 Press and hold the PAIRING button on the unit. When pairing starts, a double-beep sound will be heard and the Bluetooth indicator will flash quickly. Pairing mode of the unit is activated. 3 Perform the pairing procedure on the Bluetooth device to detect the unit. A list of detected devices appears on the display of the Bluetooth device. This unit is displayed as SONY: RDP-XA900iPN (Bluetooth). If SONY: RDP-XA900iPN (Bluetooth) is not displayed, repeat from step 1. 4 Select SONY: RDP-XA900iPN (Bluetooth) shown in the display of the Bluetooth device. 5 If Passcode* input is required on the display of the Bluetooth device, input * Passcode may be called Passkey, PIN code, PIN number, or Password. 6 Start the Bluetooth connection from the Bluetooth device. The unit memorises the device as the last connected device. Some Bluetooth devices may connect with the unit automatically when pairing is complete. The Bluetooth indicator lights up when the connection is made. Tips For details on how to operate the device to be connected, refer to the operating instructions supplied with the device. To pair with other Bluetooth devices, repeat steps 1 to 5 for each device. Notes Pairing mode is cancelled after about 5 minutes. If pairing mode is cancelled halfway, start over from step 1. When you try to pair the unit with your Bluetooth device for the first time, the pairing mode is activated as soon as you press the BLUETOOTH button. In this case, the pairing mode is not cancelled after about 5 minutes. Pairing information is deleted after repair, etc. Passcode of the unit is fixed as The unit cannot be paired with a Bluetooth device whose Passcode is not Operating a Bluetooth device The unit supports SCMS-T content protection. You can listen to a Bluetooth device that supports SCMS-T content protection. Check the following before operating the unit. The Bluetooth function of a Bluetooth device is on. The pairing procedure is complete (page 19). 19 US
24 1 Press the BLUETOOTH button. The BLUETOOTH indicator flashes slowly while the Bluetooth connection is being established. 2 Start the Bluetooth connection from the Bluetooth device. The BLUETOOTH indicator lights up blue when the Bluetooth connection is established. 3 Start playback on the Bluetooth device. 4 Adjust the volume. Set the volume of the Bluetooth device to a moderate level, and press the VOLUME +/ buttons on the unit. Turn off the unit. Tips You can adjust the volume of the unit via a Bluetooth device supporting AVRCP (Audio Video Remote Control Profile) VOLUME UP/ DOWN. For details, refer to the operating instructions supplied with the device. The volume of the unit may not be controllable, depending on the device. Notes If the source device has a bass boost function or equaliser function, turn them off. If these functions are on, sound may be distorted. In the following cases, you will need to make the Bluetooth connection again. The power of the unit does not turn on. The power of the Bluetooth device does not turn on, or the Bluetooth function is off. The Bluetooth connection is not established. If more than one device paired with the unit is being played back, sound will be heard from just one of those devices. To finish listening Terminate the Bluetooth connection by any of the operations below. Operate the Bluetooth device to terminate the connection. For details, refer to the operating instructions supplied with the device. Turn off the Bluetooth device. 20 US
25 Listening to Other Components You can enjoy the sound from an optional component, such as a TV or a portable digital music player. Be sure to turn off the power of each component before making any connections. 1 Firmly connect the line output jack of a TV (or other component) to either of the AUDIO IN terminals (DIGITAL (OPT) or ANALOG) on the rear of the unit, using a suitable audio connecting cable (not supplied). 2 Press the?/1 button to turn on the unit. 3 Turn the connected component on. 4 Press the AUDIO IN button to select the source. 5 Operate the connected component. Updating the Software When a new update is available, the UPDATE indicator lights up green while the unit is connected to the Internet. 1 Check that the UPDATE indicator lights up green. 2 Press and hold the UPDATE button on the top of the unit. The unit beeps, then quits or stops all operations automatically and the update starts. The UPDATE indicator flashes during the update. When the update has completed, the UPDATE indicator turns off. Notes When an error occurred, the UPDATE indicator flashes quickly and all other indicators light up. Then the unit restarts automatically. You cannot operate the unit until updating has completed. It may take about 20 minutes to update the software. The time required depends on the size of the update content and type of Internet connection you are using. Do not disconnect the AC power cord during the update. Notes If each terminal is connected to a different component, and both are playing back, the unit will output sound from the component connected to the DIGITAL (OPT) terminal. When you use the ANALOG terminal and the volume is low, adjust the volume level on the connected equipment first. If the volume is still too low, adjust the volume level on the unit. The DIGITAL (OPT) terminal supports Linear PCM 2ch. signal only. Linear PCM multi-channel is not supported. You may need to change the sound setting of the connected component. If digital audio signals or other signals that this unit does not support are input, the AUDIO IN indicator flashes and sound is not output. 21 US
Paxton. ins-20605. Net2 desktop reader USB
 Paxton ins-20605 Net2 desktop reader USB 1 3 2 4 1 2 Desktop Reader The desktop reader is designed to sit next to the PC. It is used for adding tokens to a Net2 system and also for identifying lost cards.
GIGABIT PCI DESKTOP ADAPTER DGE-530T. Quick Installation Guide+ Guide d installation+
 GIGABIT PCI DESKTOP ADAPTER Quick Installation Guide+ Guide d installation+ Check Your Package Contents Quick Installation Guide Gigabit Ethernet PCI Adapter CD with Manual and Drivers DO NOT insert the
PRESENTATION REMOTE TÉLÉCOMMANDE DE PRÉSENTATION. User Guide Manuel de l utilisateur
 PRESENTATION REMOTE TÉLÉCOMMANDE DE PRÉSENTATION User Guide Manuel de l utilisateur Targus Presentation Remote Introduction Thank you for your purchase of the Targus Presentation Remote. This cordless
Package Contents. System Requirements. Before You Begin
 Package Contents DWA-125 Wireless 150 USB Adapter CD-ROM (contains software, drivers, and manual) Cradle If any of the above items are missing, please contact your reseller. System Requirements A computer
Guide d'installation rapide TFM-560X YO.13
 Guide d'installation rapide TFM-560X YO.13 Table of Contents Français 1 1. Avant de commencer 1 2. Procéder à l'installation 2 Troubleshooting 6 Version 06.08.2011 16. Select Install the software automatically
Logitech Tablet Keyboard for Windows 8, Windows RT and Android 3.0+ Setup Guide Guide d installation
 Logitech Tablet Keyboard for Windows 8, Windows RT and Android 3.0+ Setup Guide Guide d installation English.......................................... 3 Français.........................................
Instructions Mozilla Thunderbird Page 1
 Instructions Mozilla Thunderbird Page 1 Instructions Mozilla Thunderbird Ce manuel est écrit pour les utilisateurs qui font déjà configurer un compte de courrier électronique dans Mozilla Thunderbird et
SERVEUR DÉDIÉ DOCUMENTATION
 SERVEUR DÉDIÉ DOCUMENTATION Release 5.0.6.0 19 Juillet 2013 Copyright 2013 GIANTS Software GmbH, All Rights Reserved. 1/9 CHANGE LOG Correction de bug divers (5.0.6.0) Ajout d une option de relance automatique
Garage Door Monitor Model 829LM
 Garage Door Monitor Model 829LM To prevent possible SERIOUS INJURY or DEATH from a closing garage door: NEVER permit children to operate or play with door control push buttons or remote control transmitters.
Logitech Speaker System Z553 Setup Guide Guide d installation
 Logitech Speaker System Z553 Setup Guide Guide d installation Logitech Speaker System Z553 English................. 3 Français................ 10 www.logitech.com/support...19 2 Package contents Logitech
Contents Windows 8.1... 2
 Workaround: Installation of IRIS Devices on Windows 8 Contents Windows 8.1... 2 English Français Windows 8... 13 English Français Windows 8.1 1. English Before installing an I.R.I.S. Device, we need to
Quick Setup Guide Guide de configuration rapide. Tablet Device SGPT12 Series Tablette électronique Série SGPT12
 Quick Setup Guide Guide de configuration rapide Tablet Device SGPT12 Series Tablette électronique Série SGPT12 Welcome / Bienvenue Congratulations on your purchase of this Xperia Tablet S. This Quick Setup
Notice Technique / Technical Manual
 Contrôle d accès Access control Encodeur USB Mifare ENCOD-USB-AI Notice Technique / Technical Manual SOMMAIRE p.2/10 Sommaire Remerciements... 3 Informations et recommandations... 4 Caractéristiques techniques...
How to Login to Career Page
 How to Login to Career Page BASF Canada July 2013 To view this instruction manual in French, please scroll down to page 16 1 Job Postings How to Login/Create your Profile/Sign Up for Job Posting Notifications
Thank you for choosing the Mobile Broadband USB Stick. With your USB Stick, you can access a wireless network at high speed.
 Thank you for choosing the Mobile Broadband USB Stick. With your USB Stick, you can access a wireless network at high speed. Note: This manual describes the appearance of the USB Stick, as well as the
WiFi Security Camera Quick Start Guide. Guide de départ rapide Caméra de surveillance Wi-Fi (P5)
") #45 #46 WiFi Security Camera Quick Start Guide Guide de départ rapide Caméra de surveillance Wi-Fi (P5) #47 Start Here 1 Is this you? TECH SUPPORT CTRL ALT DEL 2 If yes, turn to page three 1 3 If not,
#45 #46 WiFi Security Camera Quick Start Guide Guide de départ rapide Caméra de surveillance Wi-Fi (P5) #47 Start Here 1 Is this you? TECH SUPPORT CTRL ALT DEL 2 If yes, turn to page three 1 3 If not,
Thank you for choosing the Mobile Broadband USB Stick. With your USB Stick, you can access a wireless network at high speed.
 Thank you for choosing the Mobile Broadband USB Stick. With your USB Stick, you can access a wireless network at high speed. Note: This manual describes the appearance of the USB Stick, as well as the
TABLE DES MATIERES A OBJET PROCEDURE DE CONNEXION
 1 12 rue Denis Papin 37300 JOUE LES TOURS Tel: 02.47.68.34.00 Fax: 02.47.68.35.48 www.herve consultants.net contacts@herve consultants.net TABLE DES MATIERES A Objet...1 B Les équipements et pré-requis...2
Folio Case User s Guide
 Fujitsu America, Inc. Folio Case User s Guide I N S T R U C T I O N S This Folio Case is a stylish, lightweight case for protecting your Tablet PC. Elastic Strap Pen Holder Card Holders/ Easel Stops Figure
WEB page builder and server for SCADA applications usable from a WEB navigator
 Générateur de pages WEB et serveur pour supervision accessible à partir d un navigateur WEB WEB page builder and server for SCADA applications usable from a WEB navigator opyright 2007 IRAI Manual Manuel
Quick Start Guide This guide is intended to get you started with Rational ClearCase or Rational ClearCase MultiSite.
 Rational ClearCase or ClearCase MultiSite Version 7.0.1 Quick Start Guide This guide is intended to get you started with Rational ClearCase or Rational ClearCase MultiSite. Product Overview IBM Rational
APPENDIX 2. Provisions to be included in the contract between the Provider and the. Holder
 Page 1 APPENDIX 2 Provisions to be included in the contract between the Provider and the Obligations and rights of the Applicant / Holder Holder 1. The Applicant or Licensee acknowledges that it has read
Instructions pour mettre à jour un HFFv2 v1.x.yy v2.0.00
 Instructions pour mettre à jour un HFFv2 v1.x.yy v2.0.00 HFFv2 1. OBJET L accroissement de la taille de code sur la version 2.0.00 a nécessité une évolution du mapping de la flash. La conséquence de ce
Contrôle d'accès Access control. Notice technique / Technical Manual
 p.1/18 Contrôle d'accès Access control INFX V2-AI Notice technique / Technical Manual p.2/18 Sommaire / Contents Remerciements... 3 Informations et recommandations... 4 Caractéristiques techniques... 5
LOGICIEL D'ADMINISTRATION POUR E4000 & G4000 MANAGEMENT SOFTWARE FOR E4000 & G4000
 LOGICIEL D'ADMINISTRATION POUR E4000 & G4000 MANAGEMENT SOFTWARE FOR E4000 & G4000 TABLE DES MATIÈRES TITRE PAGE Présentation - - - - - - - - - - - - - - - - - - - - - - - - - - - - - - - - - - - -4 Le
Quick Installation Guide TBW-106UB H/W: V1
 Quick Installation Guide TBW-106UB H/W: V1 Table of Contents... 1. Avant de commencer... 2. Procéder à l'installation... 3. Configuration de l'adaptateur Bluetooth... Troubleshooting... 1 1 2 5 7 Version
USB 598. Quick Start Guide (Windows) Guide de démarrage rapide (Windows) USB Modem. Modem USB. www.sierrawireless.com
 Guide de démarrage rapide (Windows) USB Modem. Modem USB. www.sierrawireless.com") USB 598 With Avec USB Modem Quick Start Guide (Windows) Modem USB Guide de démarrage rapide (Windows) www.sierrawireless.com This guide provides installation instructions for users of: Windows Vista Windows
USB 598 With Avec USB Modem Quick Start Guide (Windows) Modem USB Guide de démarrage rapide (Windows) www.sierrawireless.com This guide provides installation instructions for users of: Windows Vista Windows
Quick Installation Guide TEW-P21G
 Quick Installation Guide TEW-P21G Table of of Contents Contents... 1. Avant de commencer... 2. Comment effectuer les connexions... 3. Utilisation du serveur d'impression... 1 1 2 3 Troubleshooting... 7
Harmony Smart Keyboard Add-on. Setup Guide Guide d installation
 Harmony Smart Keyboard Add-on Setup Guide Guide d installation Contents / Sommaire English................. 3 Français................. 9 support.myharmony.com/smart-keyboard-add-on 2 E Ch Pg Package contents
Quick Installation Guide TW100-BRV304
 Quick Installation Guide TW100-BRV304 Table of of Contents Contents Français... 1. Avant de commencer... 2. Installation du matériel... 3. Configuration du routeur... 1 1 2 3 Troubleshooting... 5 Version
DOCUMENTATION - FRANCAIS... 2
 DOCUMENTATION MODULE SHOPDECORATION MODULE PRESTASHOP CREE PAR PRESTACREA INDEX : DOCUMENTATION - FRANCAIS... 2 INSTALLATION... 2 Installation automatique... 2 Installation manuelle... 2 Résolution des
Cheque Holding Policy Disclosure (Banks) Regulations. Règlement sur la communication de la politique de retenue de chèques (banques) CONSOLIDATION
 Regulations. Règlement sur la communication de la politique de retenue de chèques (banques) CONSOLIDATION") CANADA CONSOLIDATION CODIFICATION Cheque Holding Policy Disclosure (Banks) Regulations Règlement sur la communication de la politique de retenue de chèques (banques) SOR/2002-39 DORS/2002-39 Current to
CANADA CONSOLIDATION CODIFICATION Cheque Holding Policy Disclosure (Banks) Regulations Règlement sur la communication de la politique de retenue de chèques (banques) SOR/2002-39 DORS/2002-39 Current to
DOCUMENTATION - FRANCAIS... 2
 DOCUMENTATION MODULE CATEGORIESTOPMENU MODULE CREE PAR PRESTACREA INDEX : DOCUMENTATION - FRANCAIS... 2 INSTALLATION... 2 CONFIGURATION... 2 LICENCE ET COPYRIGHT... 3 SUPPORT TECHNIQUE ET MISES A JOUR...
Utiliser une WebCam. Micro-ordinateurs, informations, idées, trucs et astuces
 Micro-ordinateurs, informations, idées, trucs et astuces Utiliser une WebCam Auteur : François CHAUSSON Date : 8 février 2008 Référence : utiliser une WebCam.doc Préambule Voici quelques informations utiles
VTP. LAN Switching and Wireless Chapitre 4
 VTP LAN Switching and Wireless Chapitre 4 ITE I Chapter 6 2006 Cisco Systems, Inc. All rights reserved. Cisco Public 1 Pourquoi VTP? Le défi de la gestion VLAN La complexité de gestion des VLANs et des
Quick Installation Guide TEW-AO12O
 Quick Installation Guide TEW-AO12O Table of of Contents Contents Français... 1 1. Avant de commencer... 1 2. Installation du matériel... 2 3. Montage... 4 Troubleshooting... 6 Version 10.04.2007 1. Avant
SA-32 / SA-62 INSTRUCTION MANUAL - MANUEL D INSTRUCTIONS
 SA-32 / SA-62 INSTRUCTION MANUAL - MANUEL D INSTRUCTIONS 4 5 6 7 4 5 6 7 1. Telephone Paging Volume Control 1. Contrôle de volume Paging Téléphone 2. Microphone Volume Control 2. Contrôle volume du microphone
RULE 5 - SERVICE OF DOCUMENTS RÈGLE 5 SIGNIFICATION DE DOCUMENTS. Rule 5 / Règle 5
 RULE 5 - SERVICE OF DOCUMENTS General Rules for Manner of Service Notices of Application and Other Documents 5.01 (1) A notice of application or other document may be served personally, or by an alternative
Le Cloud Computing est-il l ennemi de la Sécurité?
 Le Cloud Computing est-il l ennemi de la Sécurité? Eric DOMAGE Program manager IDC WE Security products & Solutions Copyright IDC. Reproduction is forbidden unless authorized. All rights reserved. Quelques
Support Orders and Support Provisions (Banks and Authorized Foreign Banks) Regulations
 Regulations") CANADA CONSOLIDATION CODIFICATION Support Orders and Support Provisions (Banks and Authorized Foreign Banks) Regulations Règlement sur les ordonnances alimentaires et les dispositions alimentaires (banques
CANADA CONSOLIDATION CODIFICATION Support Orders and Support Provisions (Banks and Authorized Foreign Banks) Regulations Règlement sur les ordonnances alimentaires et les dispositions alimentaires (banques
Contrôle d accès Access control MOD-TCPIP-AI. Notice technique / Technical Manual
 Contrôle d accès Access control MOD-TCPIP-AI Notice technique / Technical Manual Notice technique Mod-TCPIP-AI 9 septembre 2008 v.1.0 p.2/16 Sommaire / Contents Sommaire / Contents...2 Remerciements...3
Protect your new investment The details of your purchase will be on file for reference in the event of an insurance claim such as loss or theft.
 X-SMC3-K/-S Slim AV Micro System Système AV Compact Sistema Micro Slim AV Register your product at: http://www.pioneerelectronics.com (US) http://www.pioneerelectronics.ca (Canada) Protect your new investment
03/2013. Mod: WOKI-60IP/TR. Production code: DTWIC 6000
 03/2013 Mod: WOKI-60IP/TR Production code: DTWIC 6000 ENCASTRABLE INDUCTION DROP IN INDUCTION 11/2011 TECHNICAL FEATURES DOCUMENTATION S.A.V. Notice d utilisation : FX00326-A Guide d intervention : ---
Adeunis-RF Softwares. Stand-Alone configuration Manager V2. User guide version V1 FRANCAIS ENGLISH
 Adeunis-RF Softwares Stand-Alone configuration Manager V2 User guide version V1 FRANCAIS ENGLISH Adeunis RF 283 rue Louis Néel Parc Technologique Pré Roux 38920 Crolles - France Tel : +33 0)4 76 92 07
Instruction Manual. HS-636-4GBBK MP3 Player
 Instruction Manual HS-636-4GBBK MP3 Player Thank you for your purchase of this Hip Street MP3 player and we hope you enjoy using it. Please visit our website at www.hipstreetonline.com. The display screen
Frequently Asked Questions
 Frequently Asked Questions GENERAL Q: Can I connect an external hard drive, USB stick or MP3 player to copy files to the device? A: Yes, you can. The device supports USB HOST function, which can read USB
3615 SELFIE. http://graffitiresearchlab.fr HOW-TO / GUIDE D'UTILISATION
 3615 SELFIE http://graffitiresearchlab.fr HOW-TO / GUIDE D'UTILISATION Hardware : Minitel Computer DIN FM545 45 connector (http://www.gotronic.fr/art-fiche-din-fm545-4747.htm) Cable Arduino compatible
Critères à l attention des fabricants et des fournisseurs de biens ou de services : dispositifs mécaniques pour bingo
 Alcohol and Gaming Commission des alcools Commission of Ontario et des jeux de l'ontario Gaming Registration & Lotteries Inscription pour les jeux et loteries 90 Sheppard Avenue East 90, avenue Sheppard
Logitech Wireless Performance Combo MX800 Setup Guide Guide d installation
 Logitech Wireless Performance Combo MX800 Setup Guide Guide d installation Logitech Wireless Performance Combo MX800 Setup Guide Guide d installation Important information Safety, compliance, and warranty
Oracle FS Data Protection Manager. Release Notes. Part Number E50336-01 Oracle FS Data Protection Manager release 3.5.
 Oracle FS Data Protection Manager Release Notes Part Number E50336-01 Oracle FS Data Protection Manager release 3.5.0 2014 December Copyright 2005, 2014, Oracle and/or its affiliates. All rights reserved.
Nouveautés printemps 2013
 » English Se désinscrire de la liste Nouveautés printemps 2013 19 mars 2013 Dans ce Flash Info, vous trouverez une description des nouveautés et mises à jour des produits La Capitale pour le printemps
Operating Instructions Mode d emploi N-50. Network Audio Player Gestion des médias réseau N-30
 Operating Instructions Mode d emploi Network Audio Player Gestion des médias réseau N-50 N-30 IMPORTANT The lightning flash with arrowhead symbol, within an equilateral triangle, is intended to alert the
CLIM/GTP/27/8 ANNEX III/ANNEXE III. Category 1 New indications/ 1 re catégorie Nouvelles indications
 ANNEX III/ANNEXE III PROPOSALS FOR CHANGES TO THE NINTH EDITION OF THE NICE CLASSIFICATION CONCERNING AMUSEMENT APPARATUS OR APPARATUS FOR GAMES/ PROPOSITIONS DE CHANGEMENTS À APPORTER À LA NEUVIÈME ÉDITION
ASSEMBLY INSTRUCTIONS DIRECTIVES POUR L'ASSEMBLAGE ombre pendant lamp lampe suspendue à tons dégradés, chocolat
 ASSEMBLY INSTRUCTIONS DIRECTIVES POUR L'ASSEMBLAGE ombre pendant lamp lampe suspendue à tons dégradés, chocolat SKU 2728089 INSTRUCTIONAL MANUAL MANUEL D'INSTRUCTIONS 270/2707 COMPONENT LIST LISTE DES
ASSEMBLY INSTRUCTIONS DIRECTIVES POUR L'ASSEMBLAGE luster chandelier lamp chandelier à trois branches en verre lustré
 ASSEMBLY INSTRUCTIONS DIRECTIVES POUR L'ASSEMBLAGE luster chandelier lamp chandelier à trois branches en verre lustré SKU 2711592 INSTRUCTIONAL MANUAL MANUEL D'INSTRUCTIONS 270/2707 COMPONENT LIST LISTE
Quick Installation Guide
 Quick Installation Guide PowerLine AV+ Wireless N Mini Extender Version 1.10(NA) February 18, 2013 Wi-Fi Configuration Note Package Contents PowerLine AV+ Wireless N Mini Extender ENGLISH CAT5 Ethernet
Warning: Failure to follow these warnings could result in property damage, or personal injury.
 Western Steel & Tube 1 Storage Locker Extended Storage Locker Storage Cabinet Assembly And Use Instructions Warning: Failure to follow these warnings could result in property damage, or personal injury.
Règlement sur le télémarketing et les centres d'appel. Call Centres Telemarketing Sales Regulation
 THE CONSUMER PROTECTION ACT (C.C.S.M. c. C200) Call Centres Telemarketing Sales Regulation LOI SUR LA PROTECTION DU CONSOMMATEUR (c. C200 de la C.P.L.M.) Règlement sur le télémarketing et les centres d'appel
SunATM 4.0 Release Notes
 SunATM 4.0 Release Notes Sun Microsystems, Inc. 901 San Antonio Road Palo Alto, CA 94303-4900 USA 650 960-1300 Fax 650 969-9131 Part No.: 805-6553-10 March 1999, Revision A Copyright 1999 Sun Microsystems,
Quick Installation Guide TV-IP400 TV-IP400W
 Quick Installation Guide TV-IP400 TV-IP400W Table of of Contents Contents Français... 1. Avant de commencer... 2. Installation du matériel... 3. Configuration de la Webcam... Troubleshooting... 1 1 2 3
Lavatory Faucet. Instruction Manual. Questions? 1-866-661-9606 customerservice@artikaworld.com
 Lavatory Faucet Instruction Manual rev. 19-01-2015 Installation Manual You will need Adjustable Wrench Adjustable Pliers Plumber s Tape Hardware list (included) Allen Key Socket wrench tool Important Follow
en SCÈNE RATIONAL Rational Démonstration SDP : automatisation de la chaîne de développement Samira BATAOUCHE sbataouche@fr.ibm.com
 Rational Démonstration SDP : automatisation de la chaîne de développement Samira BATAOUCHE sbataouche@fr.ibm.com Fabrice GRELIER fabrice.grelier@fr.ibm.com RATIONAL en SCÈNE 2007 IBM Corporation Objectif
AND / ET USER GUIDE UK HARDWIRED CONTROL PANEL UK GUIDE UTILISATEUR CENTRALE D ALARME FILAIRE F 496572 1
 AND / ET UK USER GUIDE HARDWIRED CONTROL PANEL UK F GUIDE UTILISATEUR CENTRALE D ALARME FILAIRE 496572 1 English UK Operator Controls and Displays On both control panel and remote keypad the LEDs display
APPENDIX 6 BONUS RING FORMAT
 #4 EN FRANÇAIS CI-DESSOUS Preamble and Justification This motion is being presented to the membership as an alternative format for clubs to use to encourage increased entries, both in areas where the exhibitor
Monitor LRD. Table des matières
 Folio :1/6 Table des matières 1.Installation du logiciel... 3 2.Utilisation du logiciel... 3 2.1.Description de la fenêtre de commande... 3 2.1.1.Réglage des paramètres de communication... 4 2.1.2.Boutons
Guide d installation Deco Drain inc. DD200
 Guide d installation Deco Drain inc. DD200 Pour plus informations et pour télécharger les guides d installation en couleur, visitez notre site web. www.decodrain.com Soutien technique : Composez le : 514-946-8901
Principe de TrueCrypt. Créer un volume pour TrueCrypt
 Sommaire : Principe de TrueCrypt...1 Créer un volume pour TrueCrypt...1 Premier montage...6 Réglages...8 Save Currently Mounted Volumes as Favorite...8 Settings > Preferences...9 TrueCrypt Traveller pour
Gestion des prestations Volontaire
 Gestion des prestations Volontaire Qu estce que l Income Management (Gestion des prestations)? La gestion des prestations est un moyen de vous aider à gérer votre argent pour couvrir vos nécessités et
Access Point AP-010BT/AP-100BT Guide de démarrage rapide
 Access Point AP-010BT/AP-100BT Guide de démarrage rapide Acc-Pt-FR-QS Rév E 1/15 Connexion du point d accès 1. Faites glisser le joint torique dans le sillon dans le connecteur. Remarque : Si vous choisissez
LG Electronics, Inc. Display Limited Warranty - USA
 LG Electronics, Inc. Display Limited Warranty - USA Your LG Display will be repaired or replaced in accordance with the terms of this warranty, at LGE s option, if it proves to be defective in material
Touchstone WR2100 Wireless Repeater
 Touchstone WR2100 Wireless Repeater Quick Installation Guide i Package Contents The following items should be included: If any of these items are damaged or missing, please contact your service provider
First Nations Assessment Inspection Regulations. Règlement sur l inspection aux fins d évaluation foncière des premières nations CONSOLIDATION
 CANADA CONSOLIDATION CODIFICATION First Nations Assessment Inspection Regulations Règlement sur l inspection aux fins d évaluation foncière des premières nations SOR/2007-242 DORS/2007-242 Current to September
Once the installation is complete, you can delete the temporary Zip files..
 Sommaire Installation... 2 After the download... 2 From a CD... 2 Access codes... 2 DirectX Compatibility... 2 Using the program... 2 Structure... 4 Lier une structure à une autre... 4 Personnaliser une
HT-R693. Basic Manual AV RECEIVER. Advanced Manual found here. http://www.onkyo.com/manual/htr693/adv/en.html
 HT-R693 AV RECEIVER En Fr Es Basic Manual Advanced Manual found here http://www.onkyo.com/manual/htr693/adv/en.html En Before Start About the Basic Manual The Basic Manual leads you through the fundamental
THE LAW SOCIETY OF UPPER CANADA BY-LAW 19 [HANDLING OF MONEY AND OTHER PROPERTY] MOTION TO BE MOVED AT THE MEETING OF CONVOCATION ON JANUARY 24, 2002
![THE LAW SOCIETY OF UPPER CANADA BY-LAW 19 [HANDLING OF MONEY AND OTHER PROPERTY] MOTION TO BE MOVED AT THE MEETING OF CONVOCATION ON JANUARY 24, 2002](/thumbs/19/276456.jpg "THE LAW SOCIETY OF UPPER CANADA BY-LAW 19 [HANDLING OF MONEY AND OTHER PROPERTY] MOTION TO BE MOVED AT THE MEETING OF CONVOCATION ON JANUARY 24, 2002") 2-aes THE LAW SOCIETY OF UPPER CANADA BY-LAW 19 [HANDLING OF MONEY AND OTHER PROPERTY] MOTION TO BE MOVED AT THE MEETING OF CONVOCATION ON JANUARY 24, 2002 MOVED BY SECONDED BY THAT By-Law 19 [Handling
2-aes THE LAW SOCIETY OF UPPER CANADA BY-LAW 19 [HANDLING OF MONEY AND OTHER PROPERTY] MOTION TO BE MOVED AT THE MEETING OF CONVOCATION ON JANUARY 24, 2002 MOVED BY SECONDED BY THAT By-Law 19 [Handling
SunVTS 7.0 Software Quick Reference
 SunVTS 7.0 Software Quick Reference Sun Microsystems, Inc. www.sun.com Part No. 820-1419-11 April 2008, Revision A Submit comments about this document at: http://www.sun.com/hwdocs/feedback Copyright 2008
DOCUMENTATION MODULE BLOCKCATEGORIESCUSTOM Module crée par Prestacrea - Version : 2.0
 DOCUMENTATION MODULE BLOCKCATEGORIESCUSTOM Module crée par Prestacrea - Version : 2.0 INDEX : DOCUMENTATION - FRANCAIS... 2 1. INSTALLATION... 2 2. CONFIGURATION... 2 3. LICENCE ET COPYRIGHT... 3 4. MISES
Compléter le formulaire «Demande de participation» et l envoyer aux bureaux de SGC* à l adresse suivante :
 FOIRE AUX QUESTIONS COMMENT ADHÉRER? Compléter le formulaire «Demande de participation» et l envoyer aux bureaux de SGC* à l adresse suivante : 275, boul des Braves Bureau 310 Terrebonne (Qc) J6W 3H6 La
Application Form/ Formulaire de demande
 Application Form/ Formulaire de demande Ecosystem Approaches to Health: Summer Workshop and Field school Approches écosystémiques de la santé: Atelier intensif et stage d été Please submit your application
English Français Deutsch Nederlands
 Network CD Receiver / Ampli-Tuner CD Réseau OWNER S MANUAL MODE D EMPLOI BEDIENUNGSANLEITUNG GEBRUIKSAANWIJZING English Français Deutsch Nederlands Read the supplied booklet Safety Brochure before using
Software and Hardware Datasheet / Fiche technique du logiciel et du matériel
 Software and Hardware Datasheet / Fiche technique du logiciel et du matériel 1 System requirements Windows Windows 98, ME, 2000, XP, Vista 32/64, Seven 1 Ghz CPU 512 MB RAM 150 MB free disk space 1 CD
Fabricant. 2 terminals
 Specifications Fabricant Nominal torque (Nm) 65 Minimal torque (Nm) 0,63 Coil resistance - 20 C (ohms) 20 Rated current DC (A) 1 Rotor inertia (kg.m 2 ) 2.10-3 Weight (kg) 7,20 Heat dissipation continuous
Mesure chimique. Chemical measurement. Sonde de température Pt 1000 Inox Pt 1000 stainless steel. Ref : 703 262. Français p 1.
 Mesure chimique Chemical measurement Français p 1 English p 3 Sonde de température Pt 1000 Inox Pt 1000 stainless steel Version : 6010 Mesure chimique Sonde de température Pt 1000 Inox 1 Description La
Practice Direction. Class Proceedings
 Effective Date: 2010/07/01 Number: PD - 5 Title: Practice Direction Class Proceedings Summary: This Practice Direction describes the procedure for requesting the assignment of a judge in a proceeding under
Wireless IP Camera 75790, 75790WH, 75791 Quick Start Guide Guide de départ rapide
 Wireless IP Camera 75790, 75790WH, 75791 Quick Start Guide Guide de départ rapide 1 Is this you? Start Here TECH SUPPORT CTRL ALT DEL 2 If yes, skip to advanced setup. 3 If not, write down the following:
INSTRUMENTS DE MESURE SOFTWARE. Management software for remote and/or local monitoring networks
 INSTRUMENTS DE MESURE SOFTWARE SOFTWARE Logiciel de supervision des réseaux locaux et/ou distants Management software for remote and/or local monitoring networks MIDAs EVO 4 niveaux de fonctionnalités
Setup Guide Guide d installation
 Setup Guide Guide d installation Languages English................. 3 Français.................15 2 English Package contents 1 2 3 4 5 1. Home Control remote 2. Home Hub Controls devices via IR, Bluetooth,
ULHV DESKTOP AUDIO SYSTEM SYSTEME AUDIO DESKTOP TSX-B232. 16 May OWNER S MANUAL MODE D EMPLOI MANUAL DE INSTRUCCIONES
 ULHV DESKTOP AUDIO SYSTEM SYSTEME AUDIO DESKTOP TSX-B232 6 May OWNER S MANUAL MODE D EMPLOI MANUAL DE INSTRUCCIONES IMPORTANT SAFETY INSTRUCTIONS CAUTION RISK OF ELECTRIC SHOCK DO NOT OPEN CAUTION: TO
Using a Walker. 2. Move your injured or weak leg toward the walker first. If you have had surgery on both legs, use either leg to begin walking.
 Using a Walker Walking with a Walker 1. Lift the walker and place it at a comfortable distance in front of you with all four of its legs on the floor. This distance is often equal to an arm s length. 2.
Sécurité relative aux sièges auto et aux rehausseurs
 Sécurité relative aux sièges auto et aux rehausseurs Safety with Car Seats and Booster Seats Car crashes are the main cause of accidental death and serious injury of children. Correctly using a car or
Academic Project. B2- Web Development. Resit Project. Version 1.0 Last update: 24/05/2013 Use: Students Author: Samuel CUELLA
 SUPINFO Academic Dept. Resit Project Academic Project B2- Web Development 2012-2013 Version 1.0 Last update: 24/05/2013 Use: Students Author: Samuel CUELLA Conditions d utilisations : SUPINFO International
AMENDMENT TO BILL 32 AMENDEMENT AU PROJET DE LOI 32
 THAT the proposed clause 6(1), as set out in Clause 6(1) of the Bill, be replaced with the following: Trustee to respond promptly 6(1) A trustee shall respond to a request as promptly as required in the
If the corporation is or intends to become a registered charity as defined in the Income Tax Act, a copy of these documents must be sent to:
 2014-10-07 Corporations Canada 9th Floor, Jean Edmonds Towers South 365 Laurier Avenue West Ottawa, Ontario K1A 0C8 Corporations Canada 9e étage, Tour Jean-Edmonds sud 365 avenue Laurier ouest Ottawa (Ontario)
FCM 2015 ANNUAL CONFERENCE AND TRADE SHOW Terms and Conditions for Delegates and Companions Shaw Convention Centre, Edmonton, AB June 5 8, 2015
 FCM 2015 ANNUAL CONFERENCE AND TRADE SHOW Terms and Conditions for Delegates and Companions Shaw Convention Centre, Edmonton, AB June 5 8, 2015 Early-bird registration Early-bird registration ends April
Solaris Server Intranet Extension 1.0 Licensing Guide
 Solaris Server Intranet Extension 1.0 Licensing Guide SunSoft, Inc. A Sun Microsystems, Inc. Business 2550 Garcia Avenue Mountain View, CA 94043 USA 415 960-1300 fax 415 969-9131 Part No.:805-1623-10 Revision
Simply Share, Save & Stream
 3-year warranty garantie de 3 ans mediashare TM Simply Share, Save & Stream Quick Start Guide Guide de démarrage rapide home network storage unité de stockage pour réseau à domicile share your photos!
Tom Pertsekos. Sécurité applicative Web : gare aux fraudes et aux pirates!
 Tom Pertsekos Sécurité applicative Web : gare aux fraudes et aux pirates! Sécurité Le mythe : «Notre site est sûr» Nous avons des Nous auditons nos Firewalls en place applications périodiquement par des
Sun ZFS Appliance Monitor. Configuration Guide, Version 1.0
 Sun ZFS Appliance Monitor Configuration Guide, Version 1.0 Part No.: E35144-01 Mfg No.: 7654321 July 2012 Copyright 2012, Oracle and/or its affiliates. All rights reserved. This software and related documentation
Credit Note and Debit Note Information (GST/ HST) Regulations
 Regulations") CANADA CONSOLIDATION CODIFICATION Credit Note and Debit Note Information (GST/ HST) Regulations Règlement sur les renseignements à inclure dans les notes de crédit et les notes de débit (TPS/ TVH) SOR/91-44
CANADA CONSOLIDATION CODIFICATION Credit Note and Debit Note Information (GST/ HST) Regulations Règlement sur les renseignements à inclure dans les notes de crédit et les notes de débit (TPS/ TVH) SOR/91-44
Sound Bar HT-CT370/CT770. Operating Instructions. Mode d emploi. Manual de instrucciones
 Sound Bar Operating Instructions Mode d emploi US FR Manual de instrucciones ES HT-CT370/CT770 Owner s Record The model and serial numbers are located on the bottom of the Bar Speaker. Record the serial